Chaos
Architecture

Industry solutions

Explore our ecosystem

Products

Media & Entertainment

Industry solutions

Explore our ecosystem

Products

Product & E-Commerce

Industry solutions

Explore our ecosystem

Products

Education & CommunityHelp

Chaos Help Center


What are you looking for?

featured-lisa-jorgensen.png

When being multiskilled and hardworking pays off


From multimedia design and cabinet making to modern archviz, artist Lisa Jørgensen has taken the 3D world by storm with her diverse skills and passion.


You guessed it, we’ve got another inspiring interview, with an alum from 3D College Denmark. What’s more is that she was a student of Nicklas Byriel who has taught the talented Michael Mayer you may have read about. So, without a further ado, let us introduce you to arch viz extraordinaire Lisa Jørgensen.

Lisa was a part of the Speed Class cohort led by Nicklas from August 2018 to January 2019. As part of her internship requirement to graduate, she landed a contract with Fritz Hansen as a multimedia apprentice, and got her degree in January 2022. Lisa was able to juggle working full time with seven school periods, where she would spend time on assignments, personal projects, and sharpening her archviz skills. After graduating, she was offered a full contract as a 3D Artist at Fritz Hansen, where she is still working.

We sat down with Lisa to have a talk on what led her to a career in archviz, her production process, and how she achieves eye-catching composition. She also shared valuable motivation tips and of course some of her marvelous work done in V-Ray for 3ds Max


едит-Lisa_Jørgensen-profile.jpg

Lisa, Alum, 3D College Denmark

Can you share a bit of your artistic journey? How did you get into 3D?

I was originally educated as a multimedia designer and worked in that field for a few years. I had many diverse tasks and I got to try out many things, however, animation was the thing I liked the most. I knew I wanted to specialize myself in something instead of being this graphic octopus. But I actually took a completely different turn and started training as a cabinet maker as that was something I always wanted to try out. I loved working with wood and designing furniture, but the funny part is that during the course, I was introduced to 3D, as nowadays you need to be able to draw technical documents within CAD software. I suddenly saw the great potential in combining my digital background with the interior and architecture field. So I decided to swap over to 3D College and dive into the world of archviz, and I feel this is the right field and industry. I now work as a 3D artist for a company producing designer furniture which is perfect for me. 

© Lisa Jørgensen

Your “Circle Dining Chair” animation is stunning. How did you achieve such realistic textures?

Thank you! Well, I spent a great time on texturizing but I would say the most important thing is having a nice lighting setup in the scene to highlight the materials the best way. I also used some really good high-resolution scanned bitmaps. I almost always use surface imperfections without trying to overdo it and then for fabrics I typically use V-Ray Fur and the sheen effect.

How important is following a strict production process for you? What is your favorite stage?

My process can vary but when it comes to larger productions, I’ve found out that the workflow shown in the image is the one that works very well for me. It also helped me understand my own process. I think my favorite stages are texturing and animation and also post-production as you see it all come together.  

lisa-jorgensen-workflow.jpg
© Lisa Jørgensen

What skills do you think are most important in order to be a great interior animator?

I would definitely say that lighting is the most important thing to get a great result. Without good lighting, everything falls apart. Also, I’ve found that composition and timing/tempo in animation are crucial. When I started out in animation I really got a new respect for this area and it is harder than you might think.

The pre-production is important as if you have spent a great deal of time on this part it will be a huge time saver at the end and the overall process will be much better organized.

The last thing I will mention is texturizing. You can actually get away with a lot of things if lighting and materials are nicely done, this can even hide most model errors.


© Lisa Jørgensen

How do you keep motivated when a project becomes tough? 

I usually try to remember to take breaks and exercise as it is important to let go of the screen from time to time. If I get really stuck I try to pause that part and then start with something else in the project. I also tend to swap focus. For example, if I get bored or stuck in the modeling process I begin to create materials or something else. 

What are your favorite V-Ray for 3ds Max features?

There are many, but I can’t work without LightMix and Cryptomatte together with Layers in V-Ray Frame Buffer. e is critical for smoother and faster production. And I couldn’t agree more. 


It’s so easy to adjust and mask out the render in the VFB, which speeds up the whole workflow and the post process a lot. It’s much easier to remove burned-out objects or correct colors etc. I often almost don’t need to go to Photoshop because of this feature.

Lisa Jørgensen, Alum, 3D School Denmark

© Lisa Jørgensen

What role did V-Ray play in your “Fujifilm Finepix X100S” project? 

V-Ray was used for the rendering part, but in this project, my main focus was getting better at modeling and trying out Substance Painter together with V-Ray. I actually liked this workflow and would love to do this more again when it comes to product visualizations. 

How did you choose your angles and cropping? Are there any rules you follow for composition?

I often try to get some sort of balance between the objects in the view and also some depth by placing objects at different distances to the camera. I also tend to get some asymmetry as I like when everything is not super strict. 

A nice method I discovered is if the composition is tricky, it can help to use a gray override material to remove all colors as they can confuse things. This makes it easier to only focus on getting the composition right.

© Lisa Jørgensen

It’s great to see how you bring your culture into your art. What visual aspects are key to bringing the Nordic atmosphere alive?

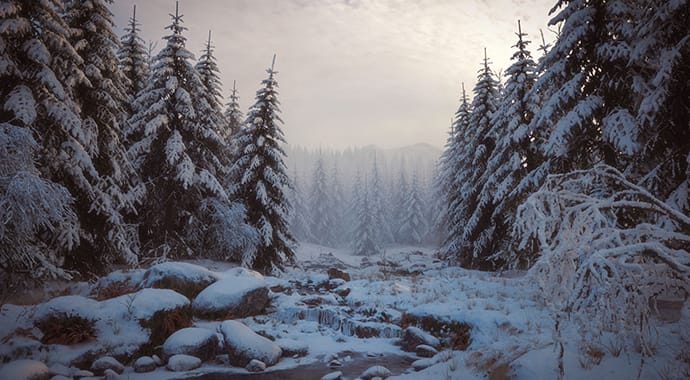
Again, I think the lighting is important. It can be either cold or a bit warm and soft but it’s important that it has a big role. Also, try not to crowd the scene but include a few objects or materials that really pop and catch the eye. The small details are important. 

Lisa_Jørgensen-image22.jpg
© Lisa Jørgensen

What piqued your interest in Photogrammetry? Can you share your process for photographing the leaves and flowers in your “Flower 2D Photogrammetry” project? 

This was a super fun and challenging project. I’ve followed a Patreon account (vizguru) which started diving into this area and shared a lot of great knowledge. I really like the combination of some physical scanning and a 3D setup. I think I missed some hands-on work. 

At the same time, people at my company wanted to have very specific flower bouquets in the renders and I just couldn't find good enough assets out there, so I decided to make it myself and learn some photogrammetry at the same time. The process took some time to get around but after some trial and error I could really see the potential. This is something I want to do even more in the future. 

© Lisa Jørgensen

Your project “Interior Animation/Frama Cph” must have taken you a lot of effort to produce. Can you walk us through how you recorded and placed the candle?

This was my first larger interior animation project, and I learned a lot about the whole workflow from animating in 3ds Max to animation renderings and the post-process afterward.

The candlelight is actually very simple. I went to a basement and placed a candle on a chair while recording the flame dancing from side to side in a very dark room. Then I tweaked the recording a little bit in After Effects so the background became pitch black and therefore could act as a mask as well. This is then exported as an image sequence and used with V-Ray Light material on a simple plane. This is smart as you can use the self-illuminating feature so the plane will work as a light source and the flame's movement will affect the light source on the other objects.

What projects do you have planned next?

I think my next project will be something that will focus on nature as this is something I get more and more requests on. I have worked so much on interiors, that I think it’s time to do some exterior rendering. I’m looking forward to trying out the new scattering feature in V-Ray 6.


Where do you see yourself professionally in five years?

 I’m hoping I will work much more with larger CGI animation projects, compared to what I do now. I could imagine I will work towards more product visualization and animation and also dive into VFX to increase complexity and quality in future projects. 

Bring your designs to life.

Try V-Ray for 3ds Max free for 30 days.
© Škoda Design

Subscribe to our blog.

Get the latest news, artist spotlight stories, tips and tricks delivered to your inbox.

By submitting your information you are agreeing to receive marketing messages from Chaos. You can opt-out at any time. Privacy Policy.

Chaos
© 2024 Chaos Software EOOD. All Rights reserved. Chaos®, V-Ray® and Phoenix FD® are registered trademarks of Chaos Software EOOD in Bulgaria and/or other countries.