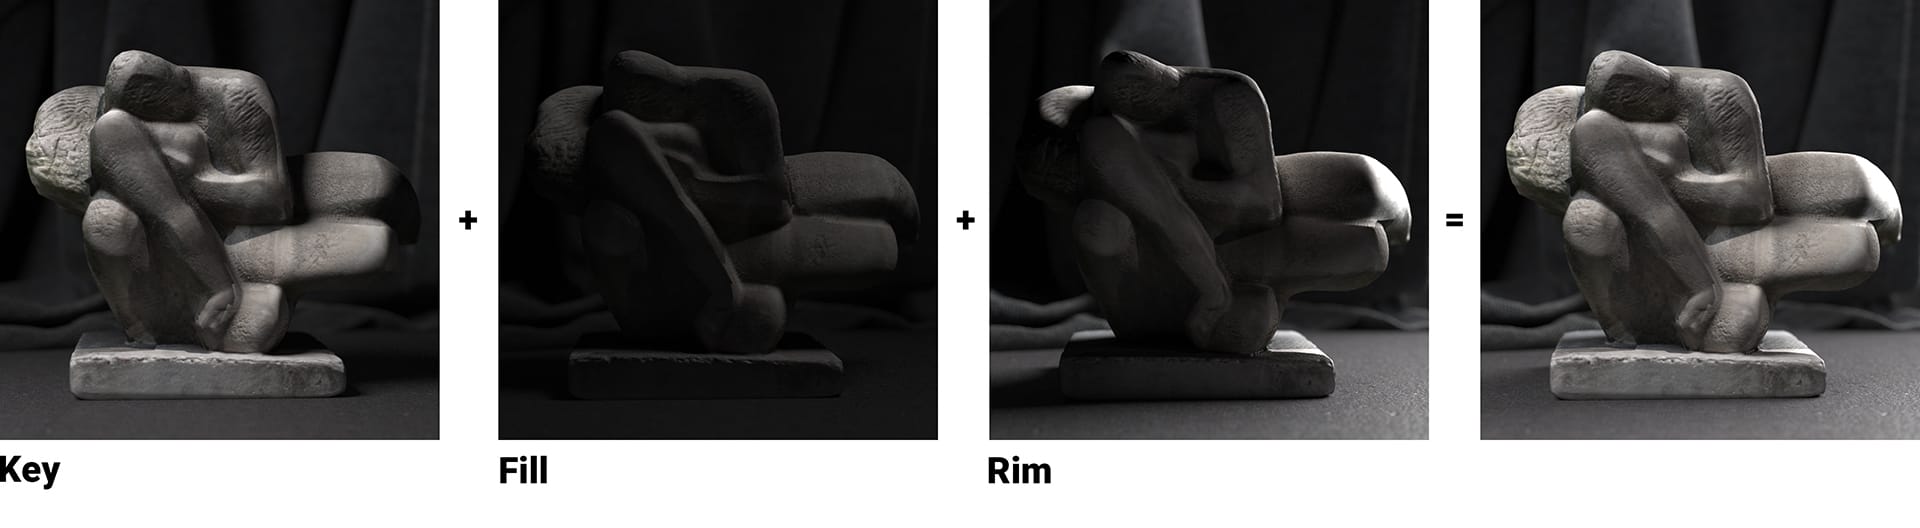
How to get the most from Light Mix
Here are some helpful tips to help you set up your scene and work with Light Mix in V-Ray 5.
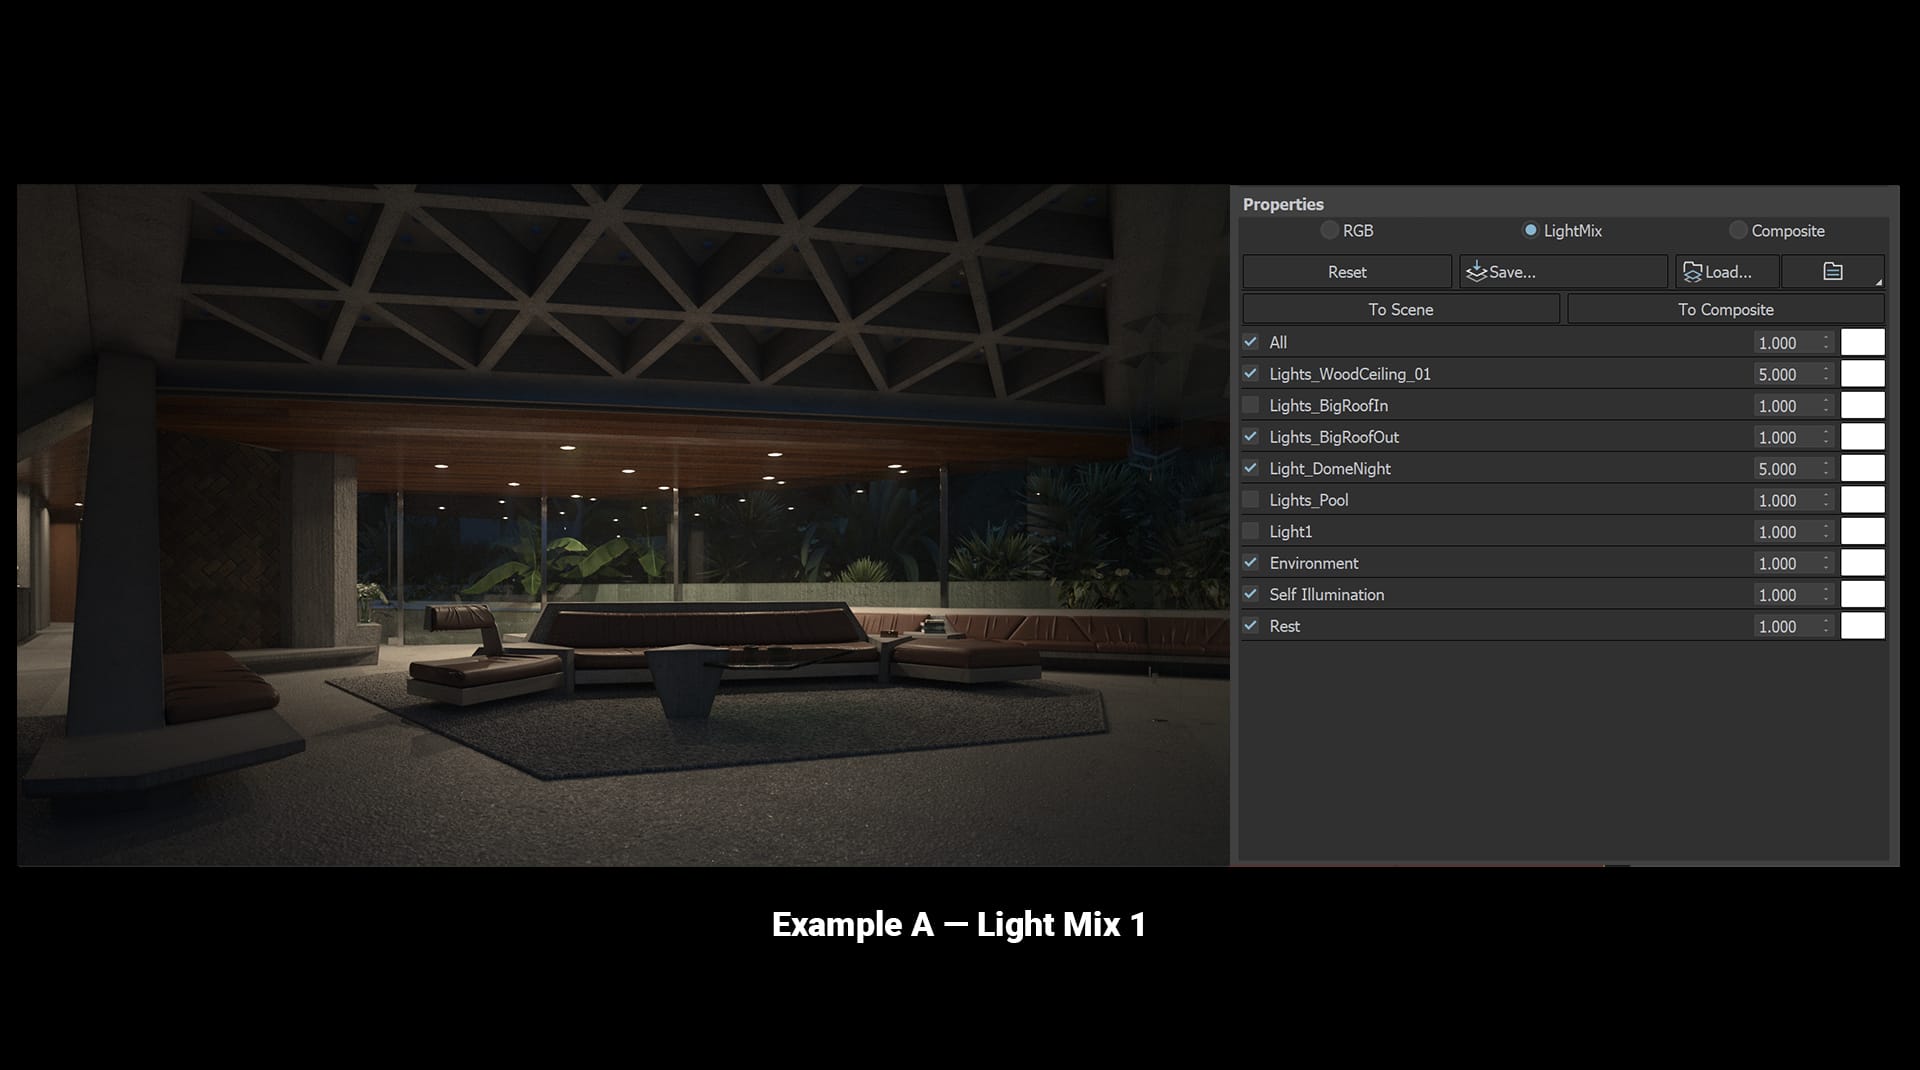
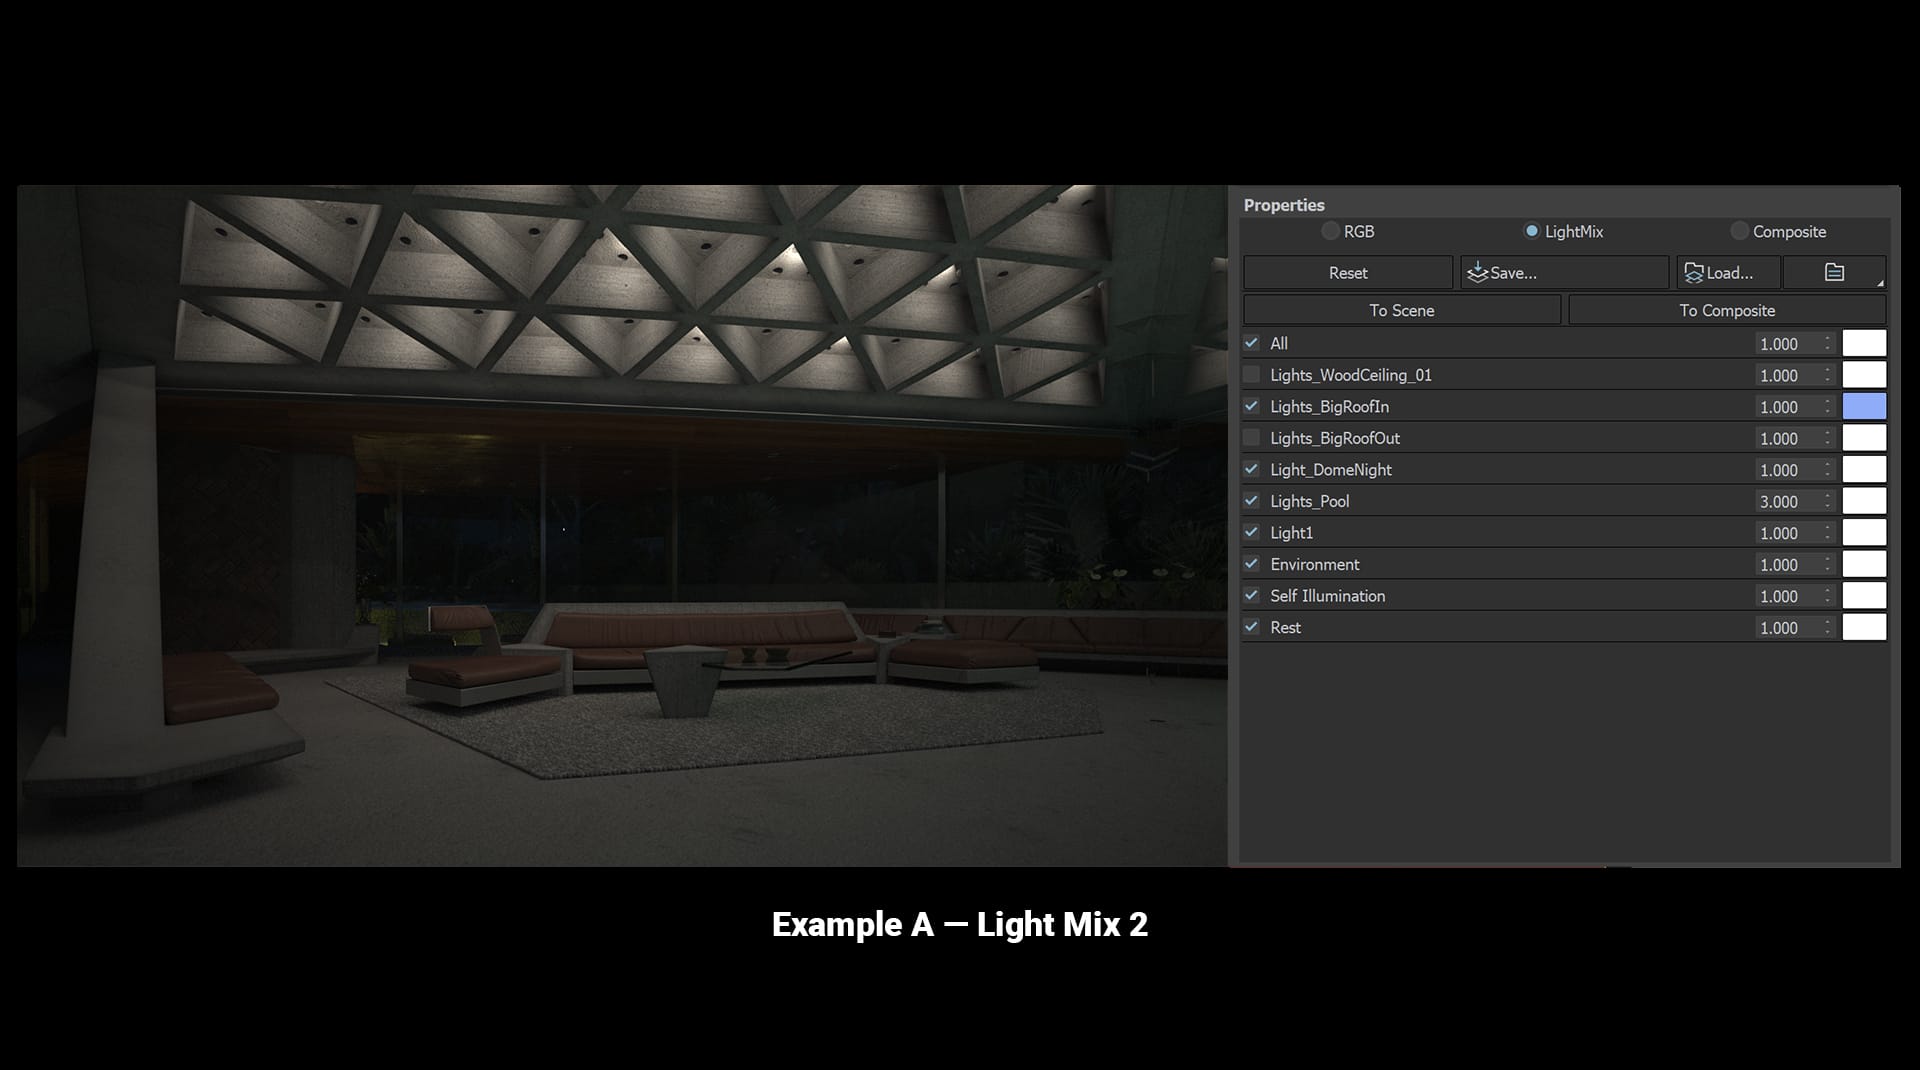
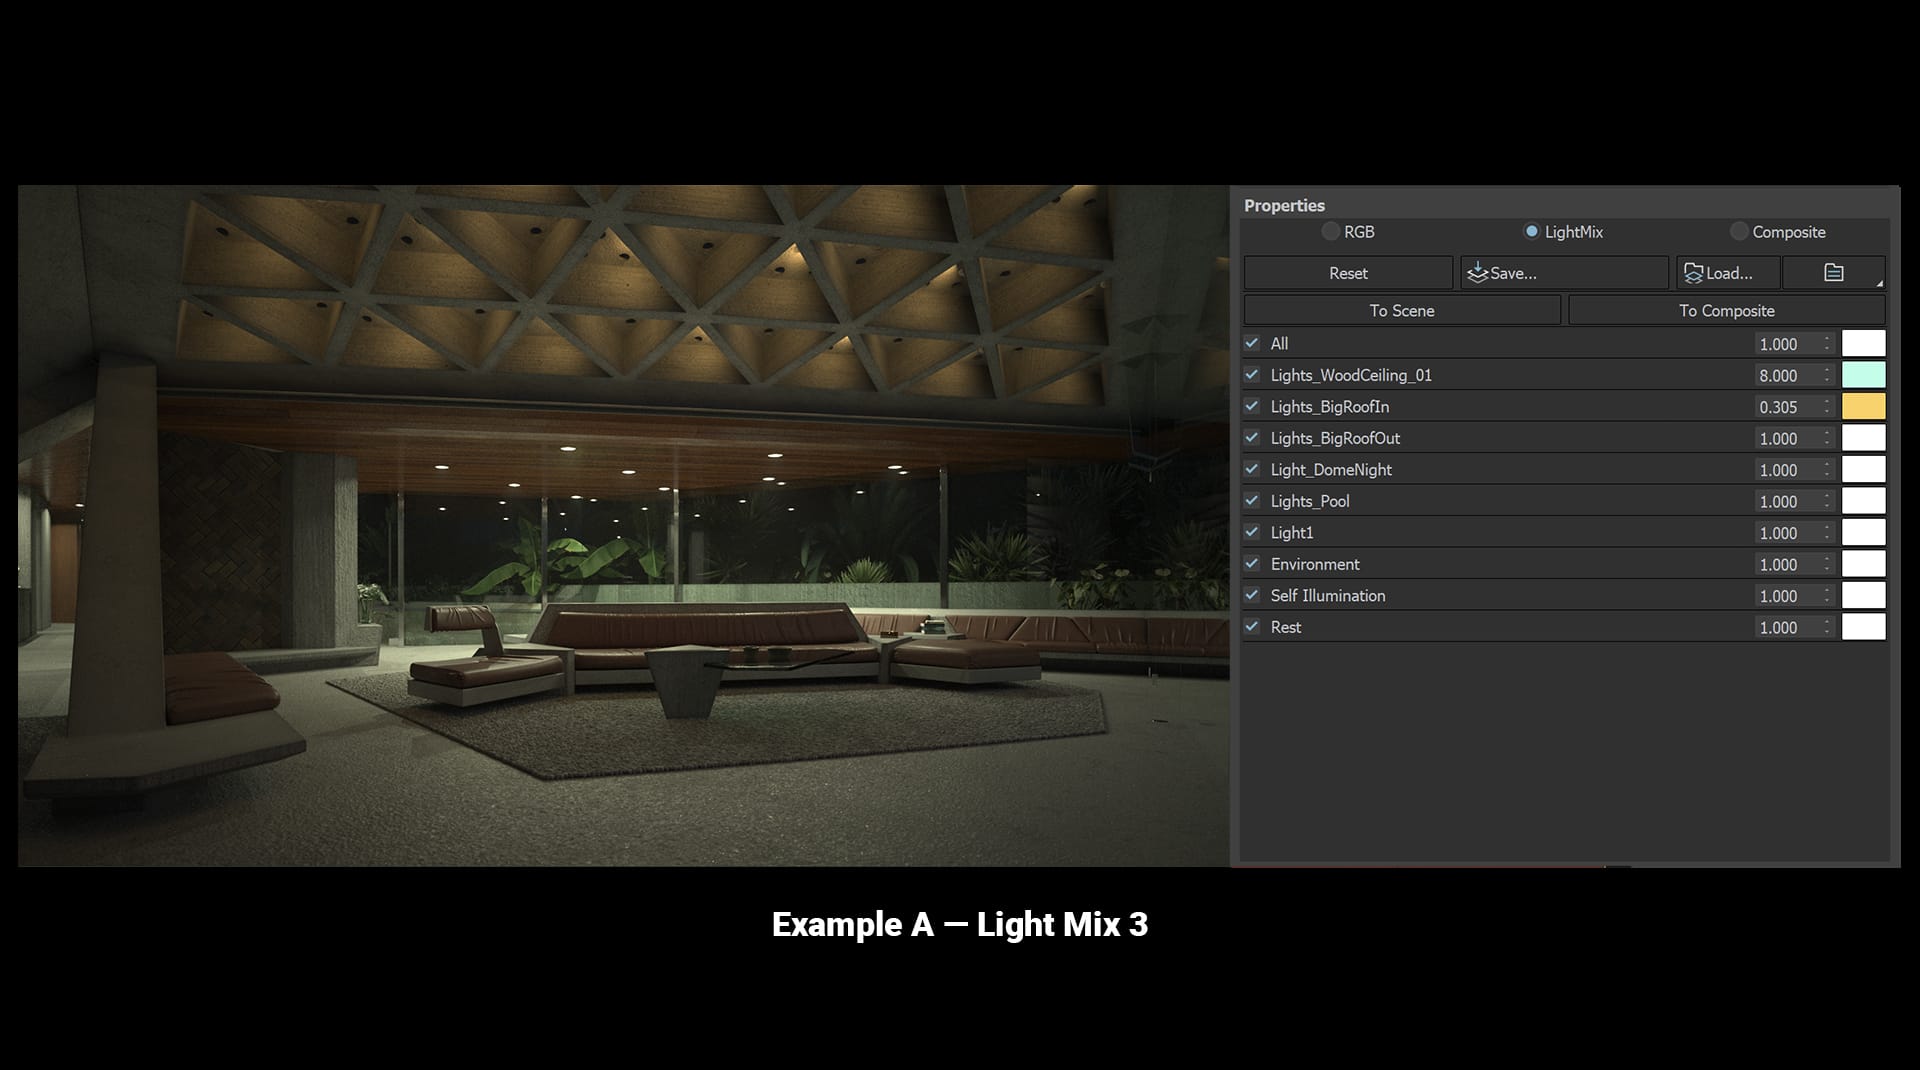
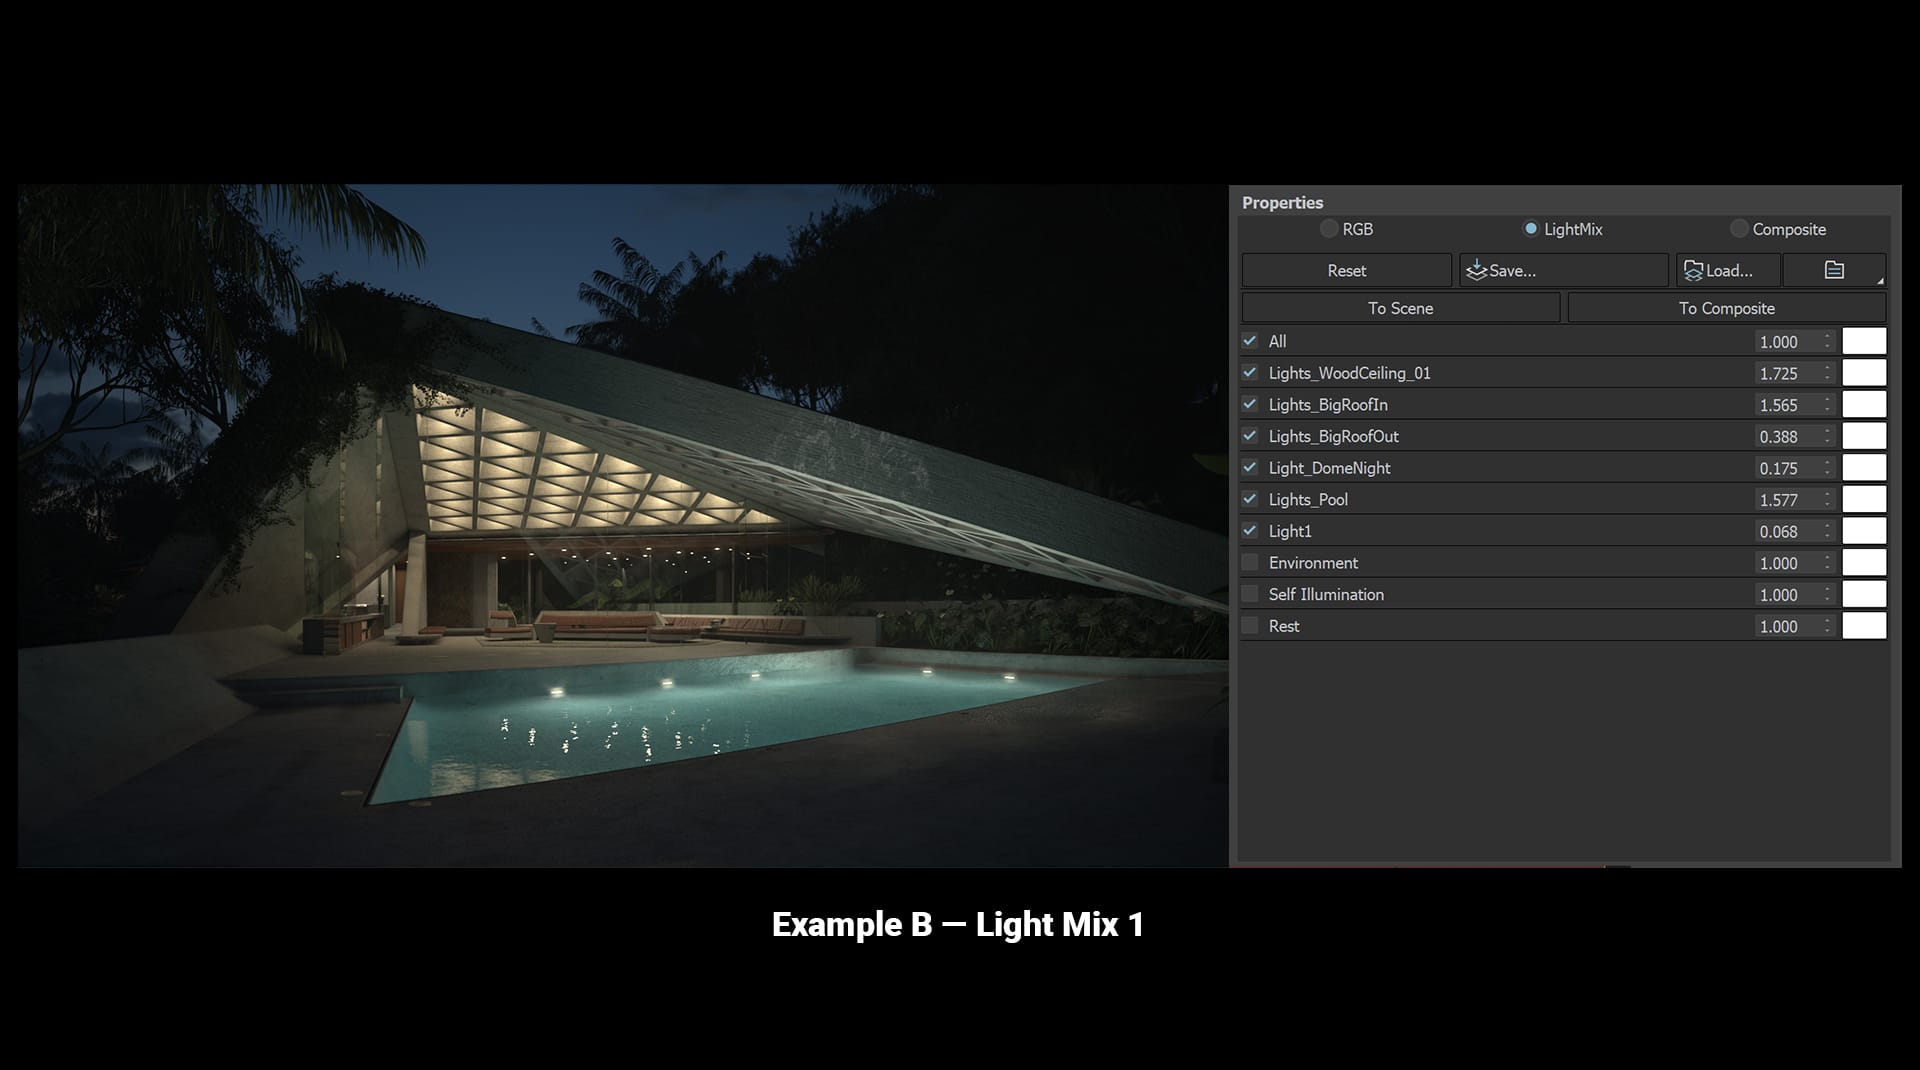
Organize your lights
If you have a lot of lights in your scene, you’ll want to keep them organized by instances, groups or layers. One of the best ways is to organize them as you would in real life — by switches or circuit breakers.
Make lights bright
Make sure lights are bright enough to easily see their contribution to the scene. Even if you want them to be dim, you can dim them later. In Light Mix, it’s cleaner to dim a light than it is to brighten it. That’s because brightening a light source after you render — especially if you turn it up a lot — can show more grain. So start out with a render that’s nice and bright and then dim it down to 1%, if that’s the effect you want.
Color your lights white
Keeping your light colors neutral white or gray makes them easier to adjust in the Light Mix. It may not be feasible to do this every time, but it’s helpful when you can.
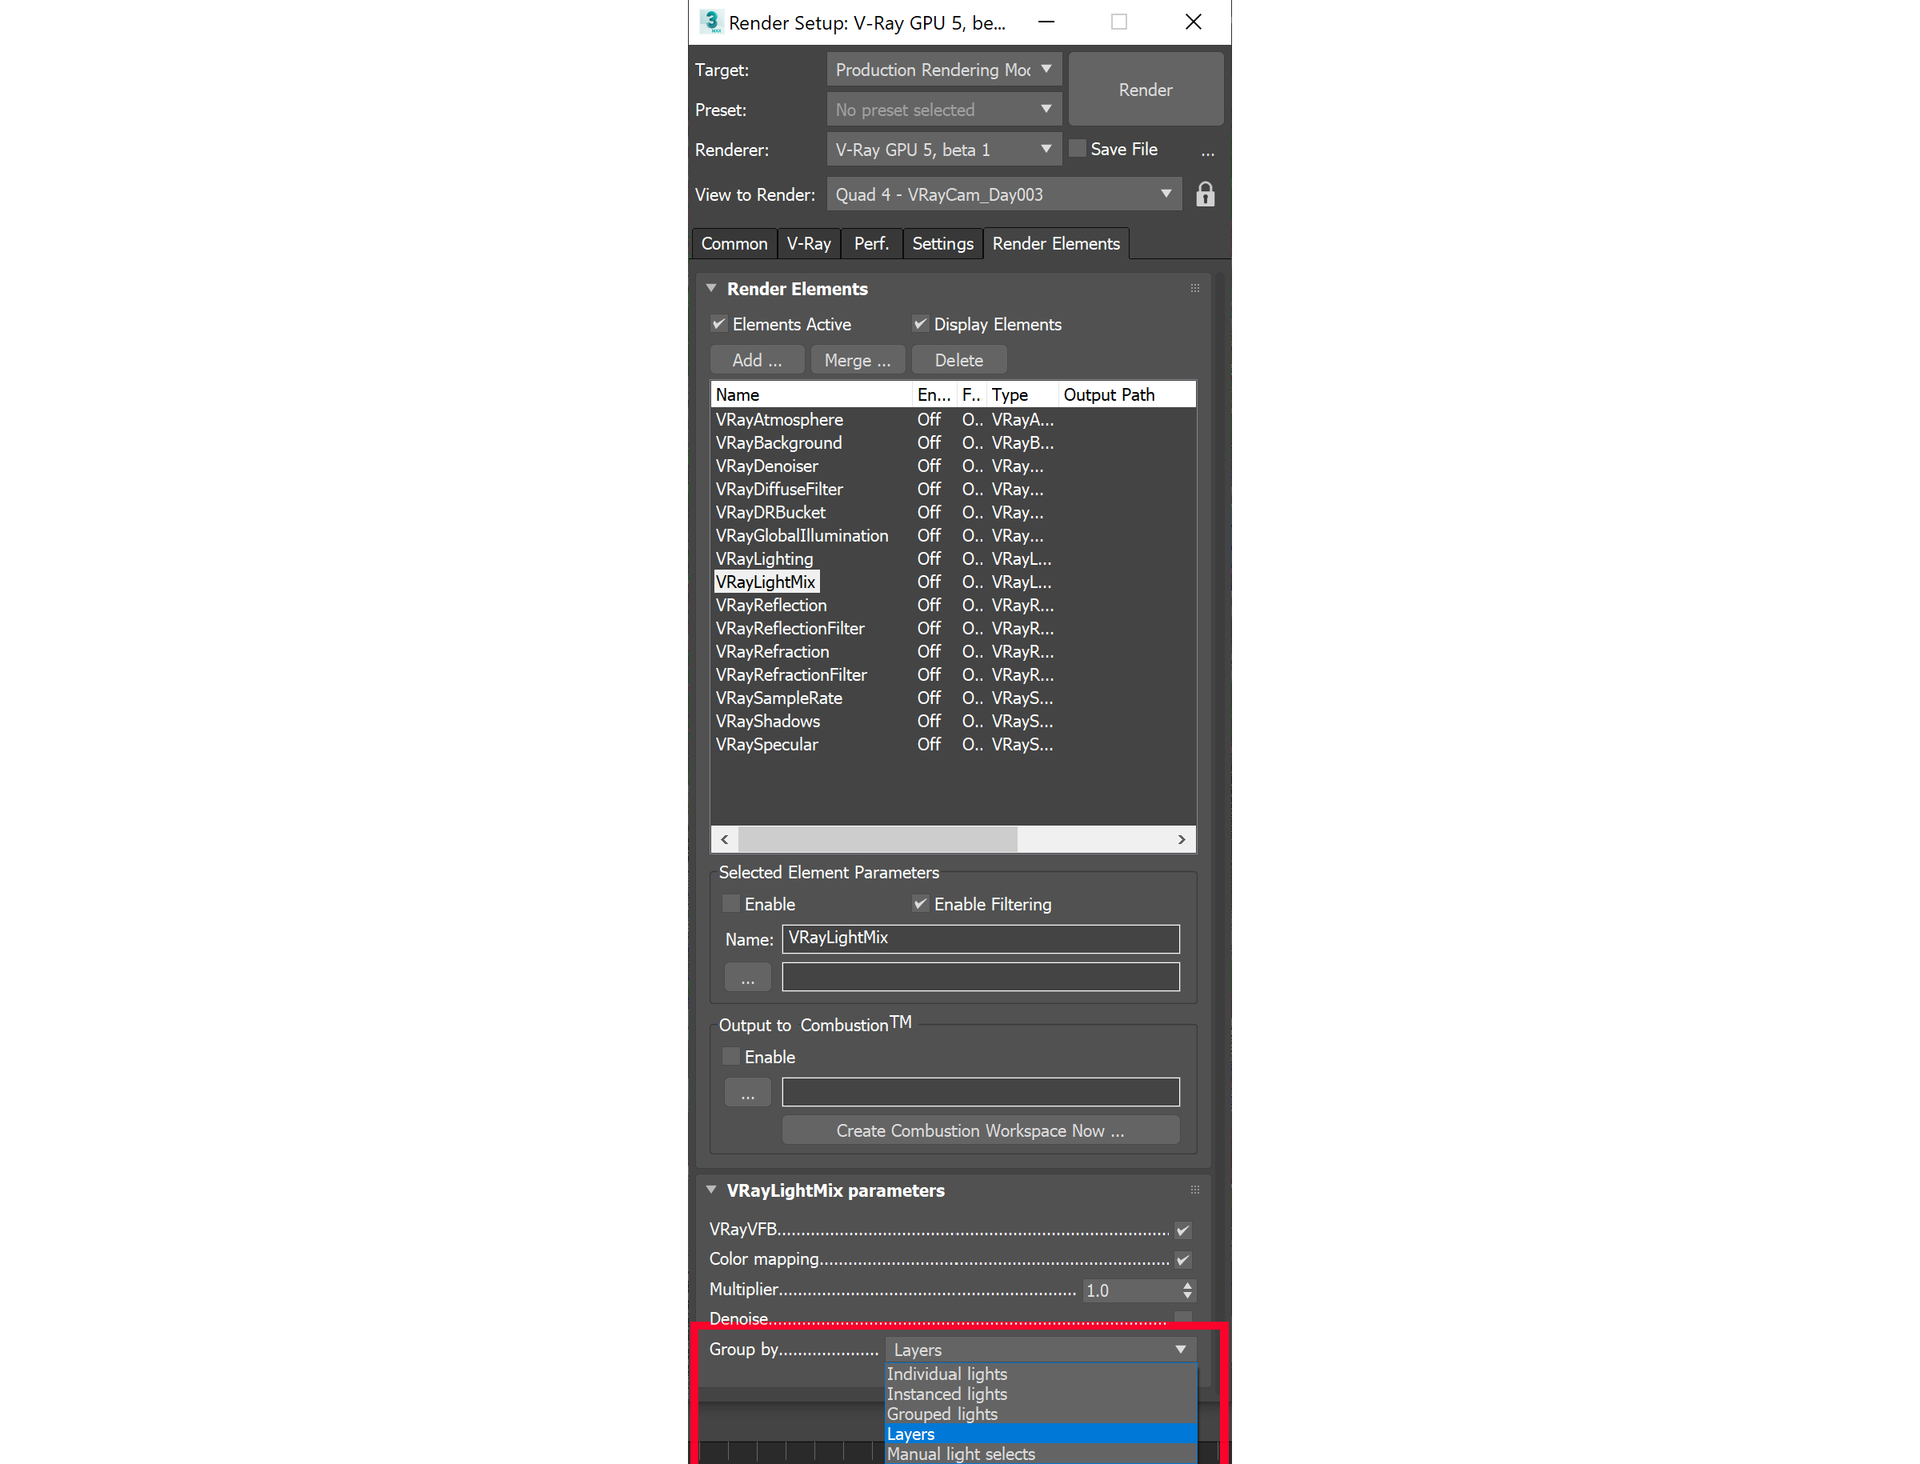
Using Light Mix with Chaos Cloud
If you want to render several scenes at once and mix the lighting afterwards, it’s no problem. One of the easiest ways to do this is to set up your renders as outlined above and render to the Chaos Cloud. Once the EXR is finished, you can load it into the VFB, call up the Light Mix render element, and make your adjustments.
If you have the scene open locally, you push your changes “To Scene” to update it. And you can even send it back to Chaos Cloud to render again.
Light Mix one, fix many
Your Light Mix recipe can be saved as a file and reloaded, in case you’d like to reuse the same values across multiple shots.
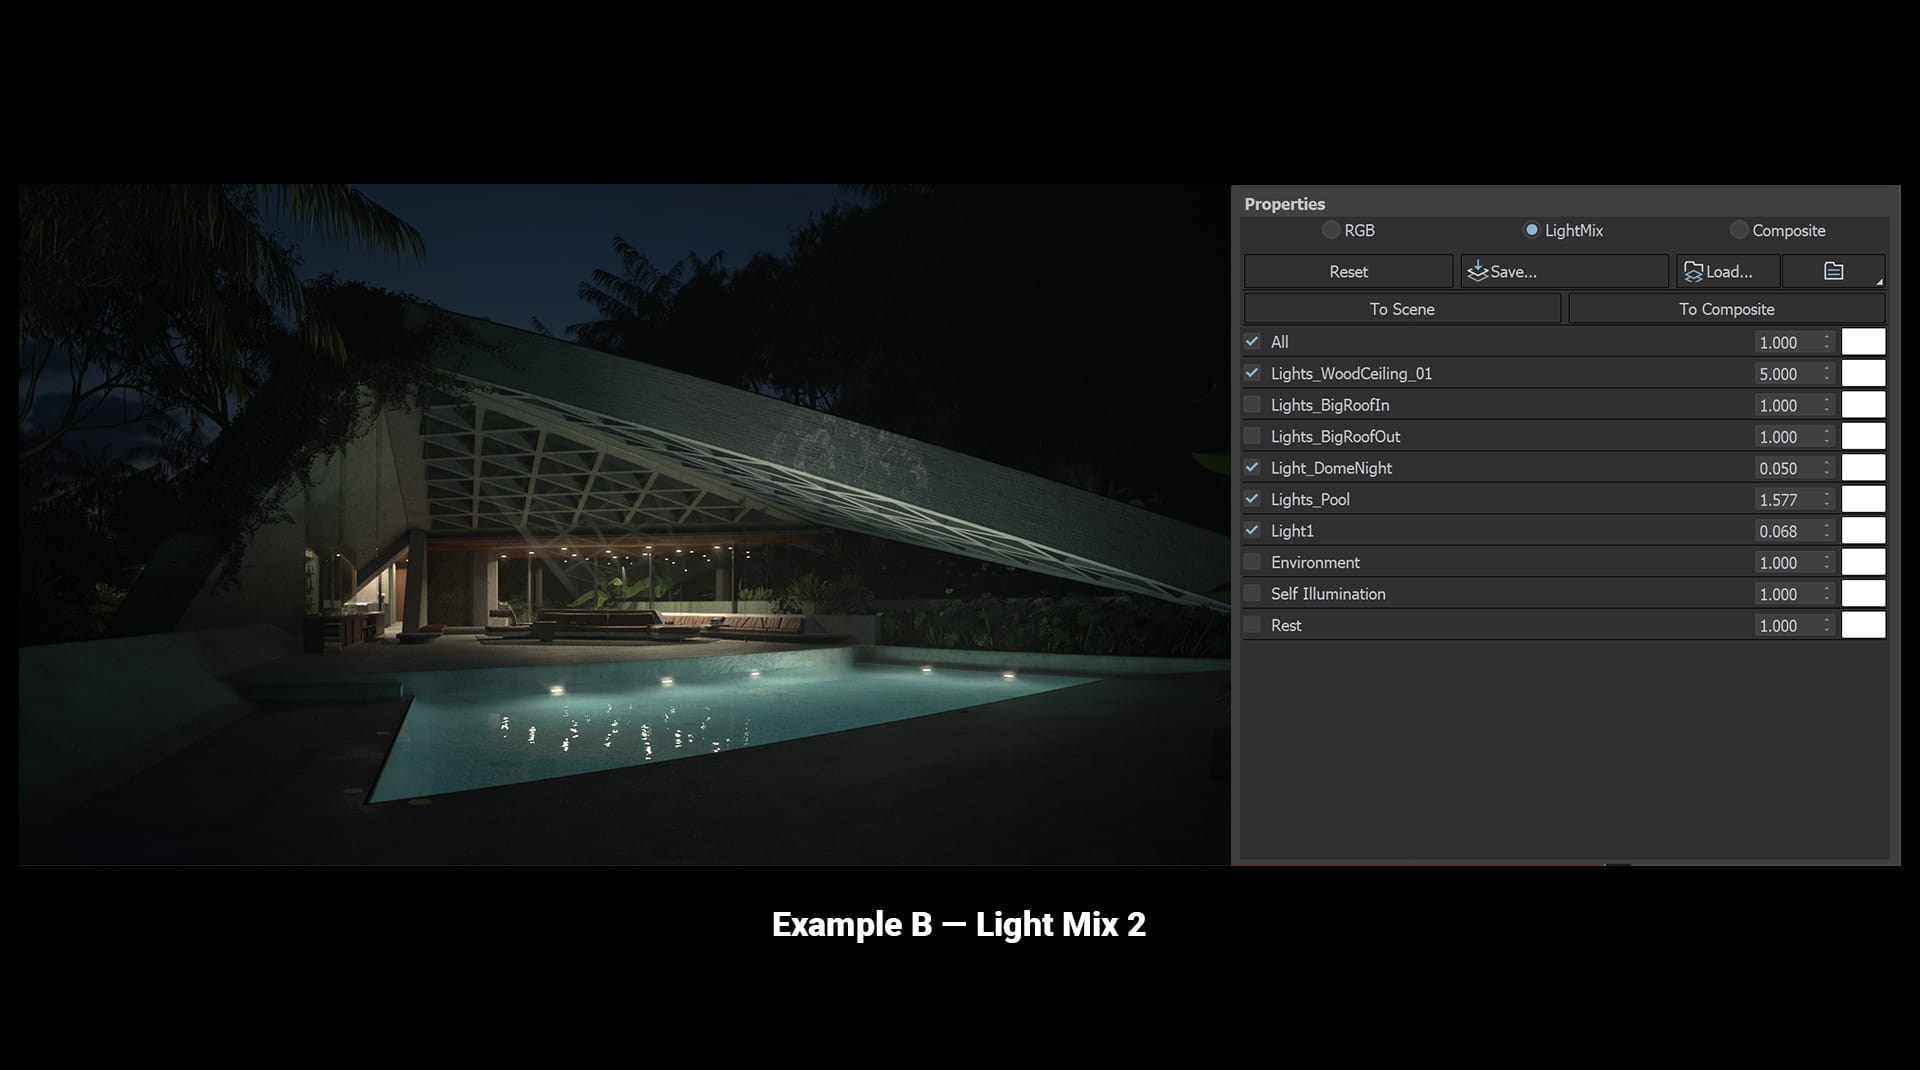
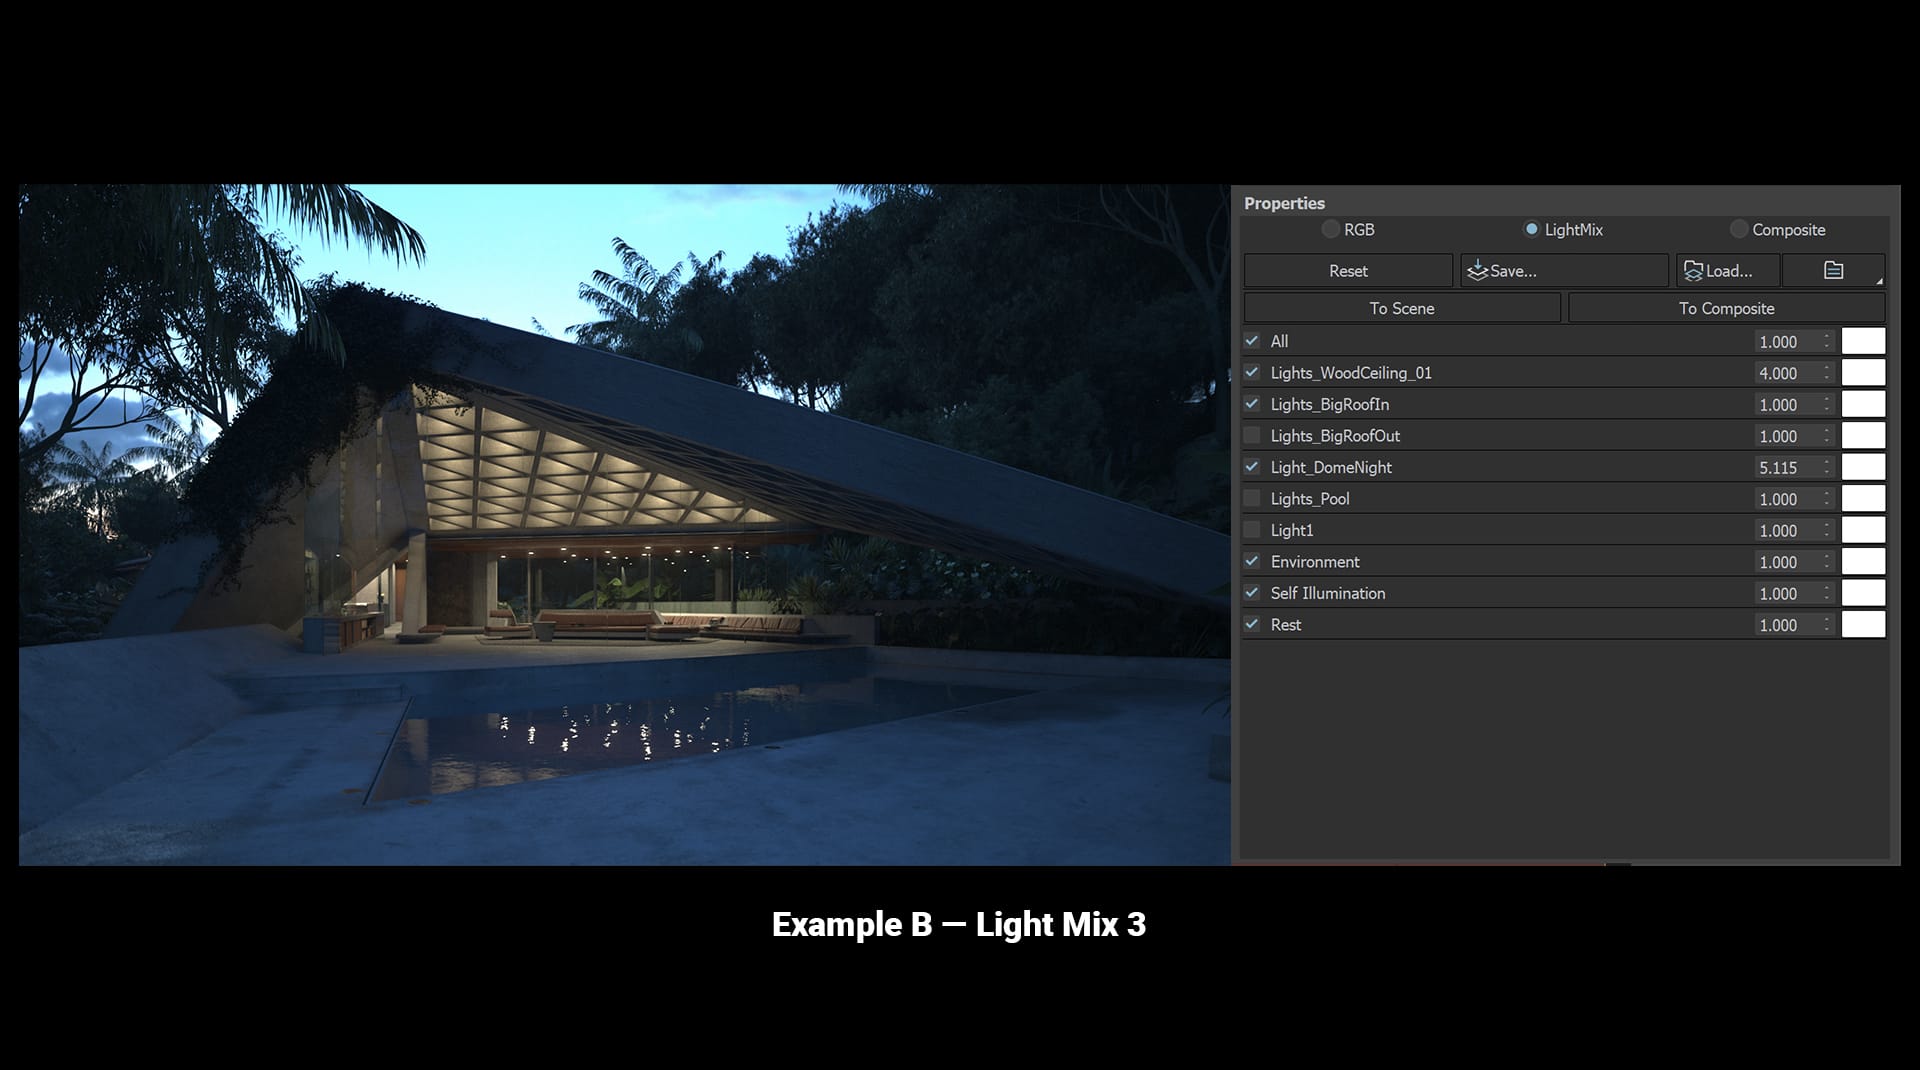


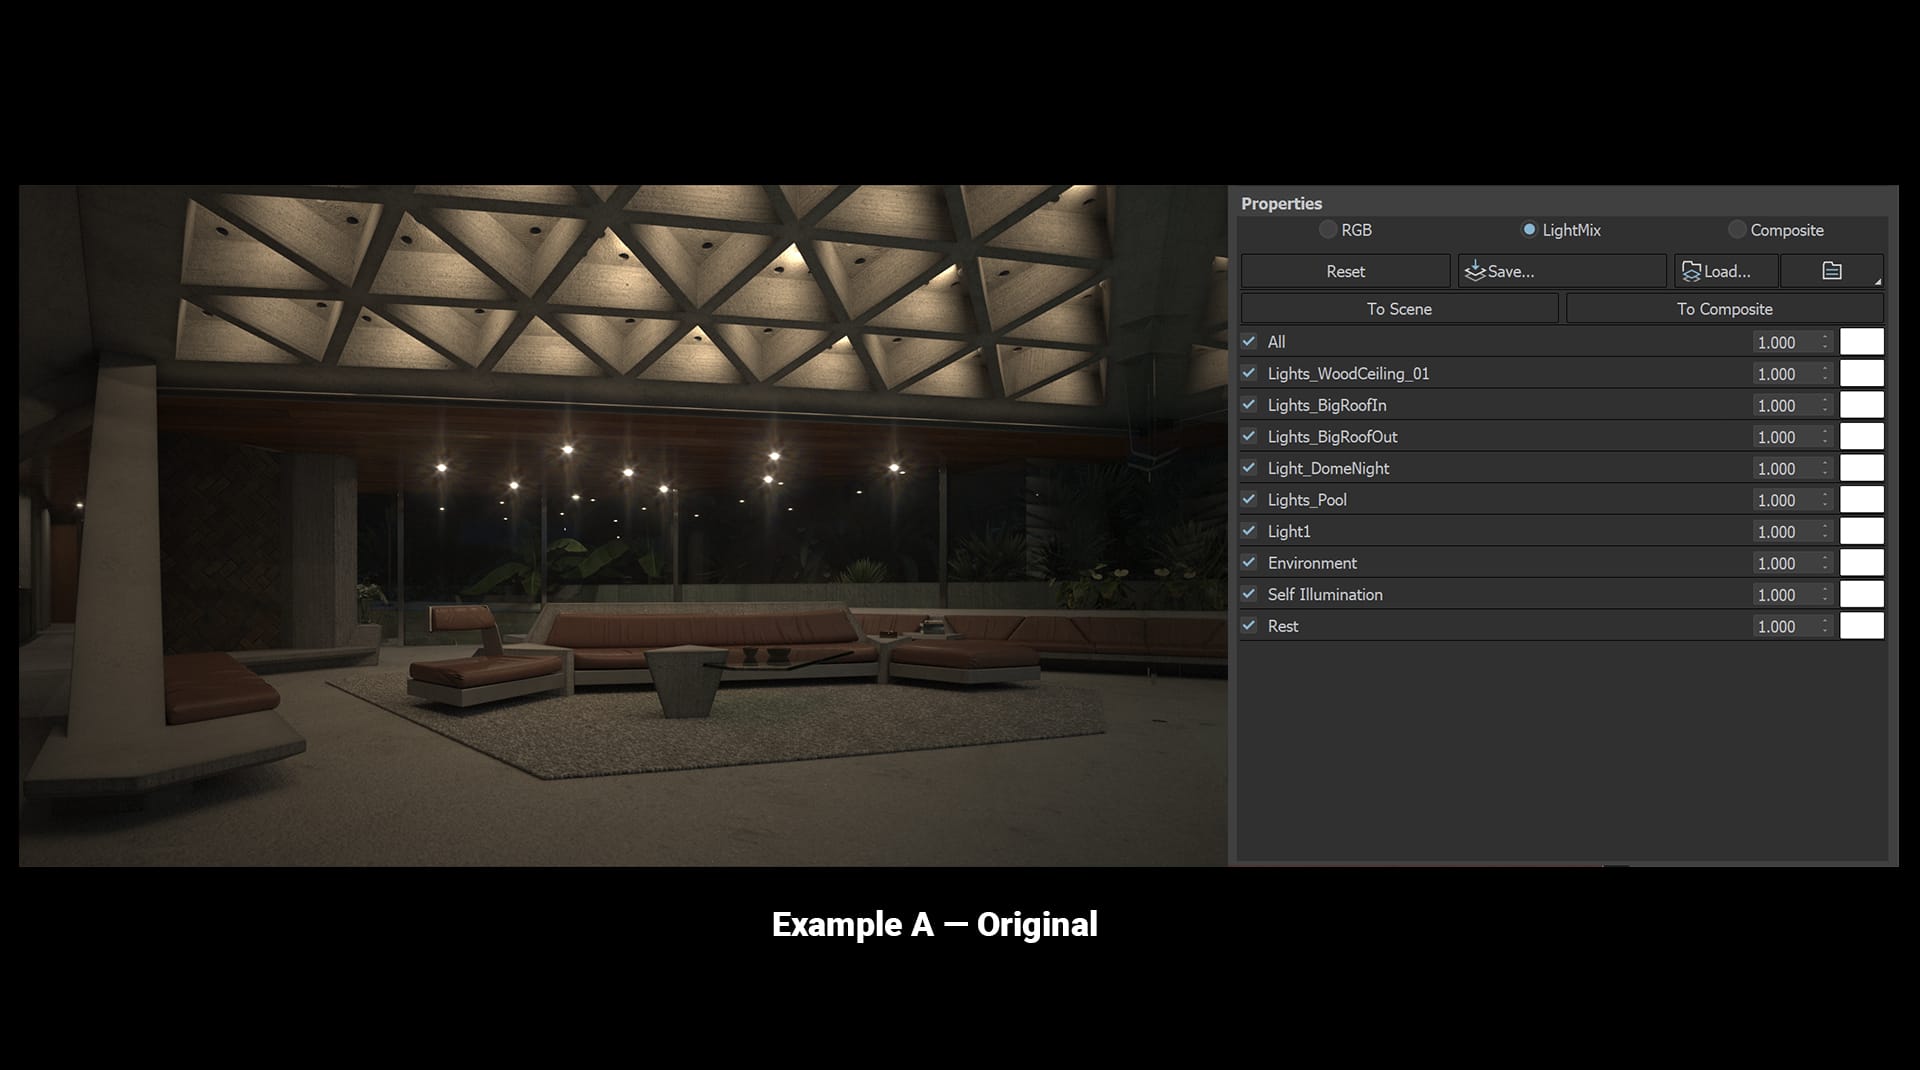
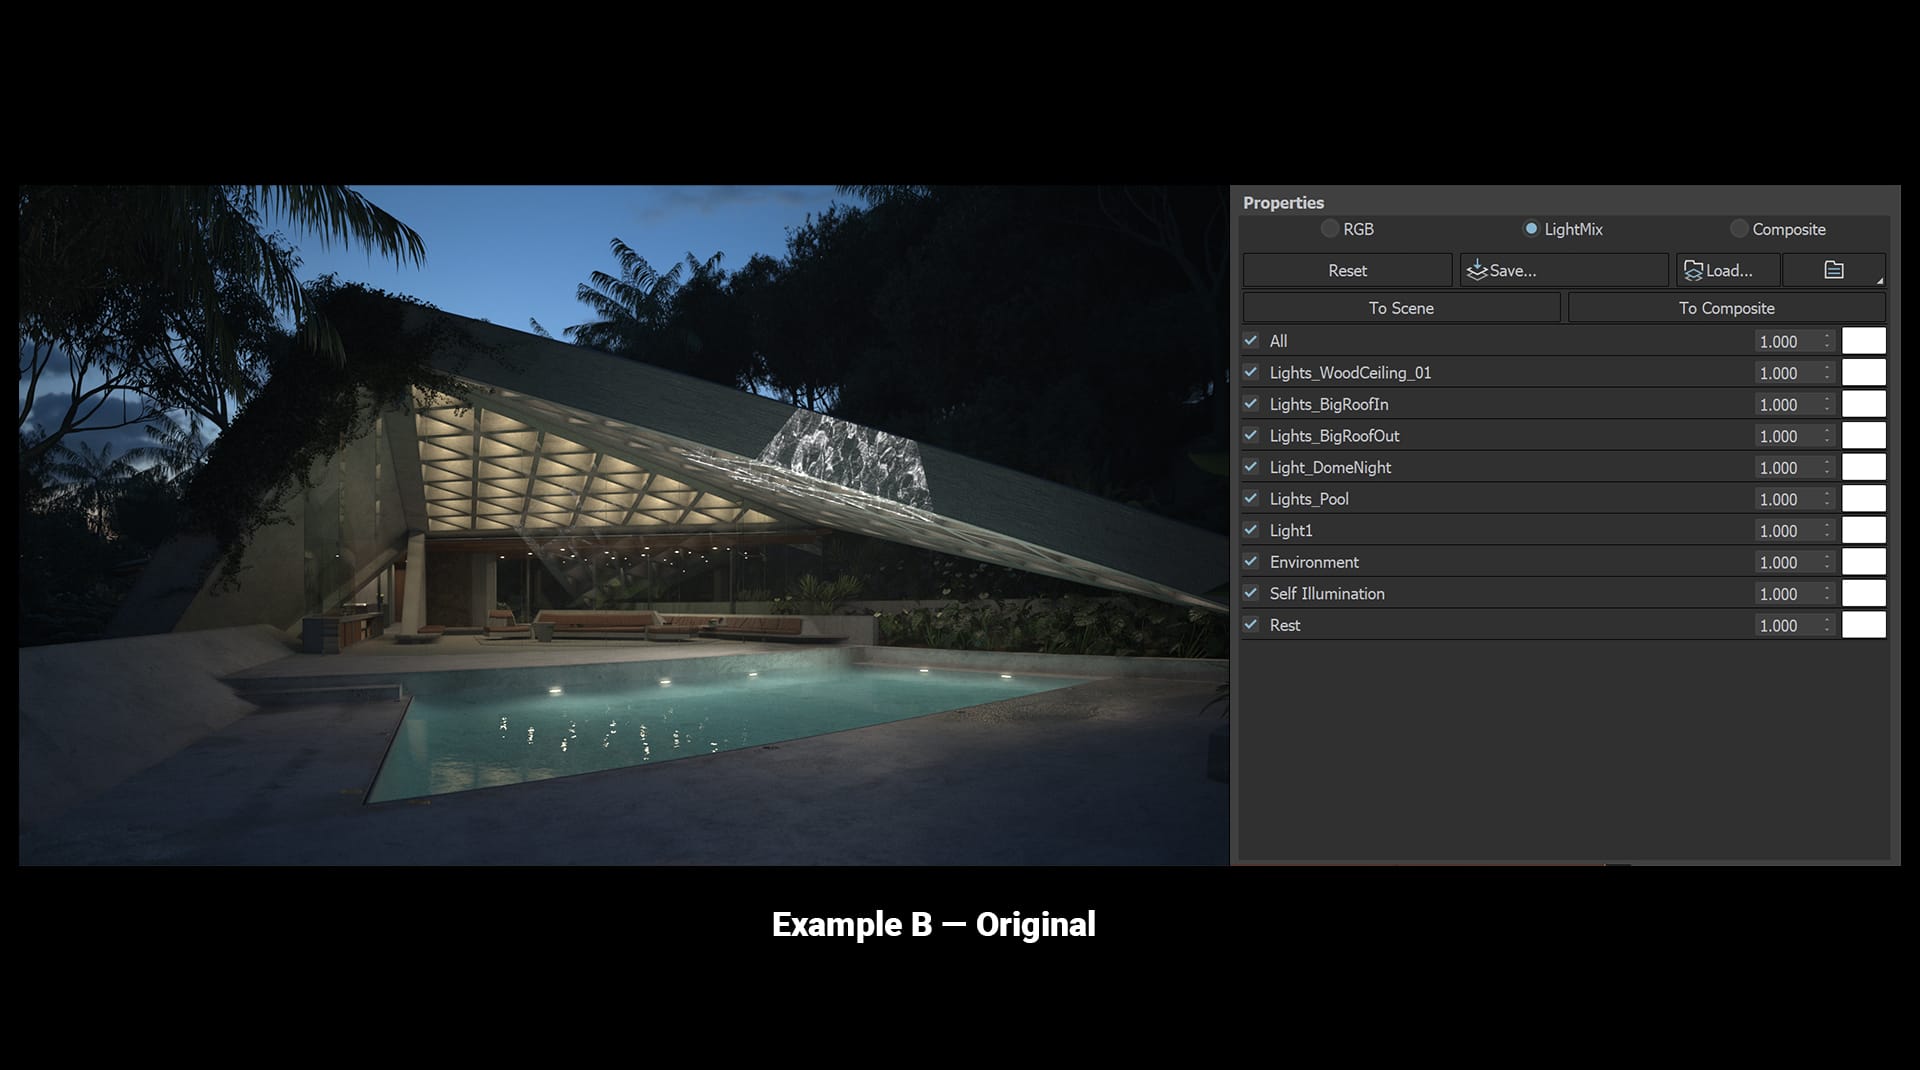
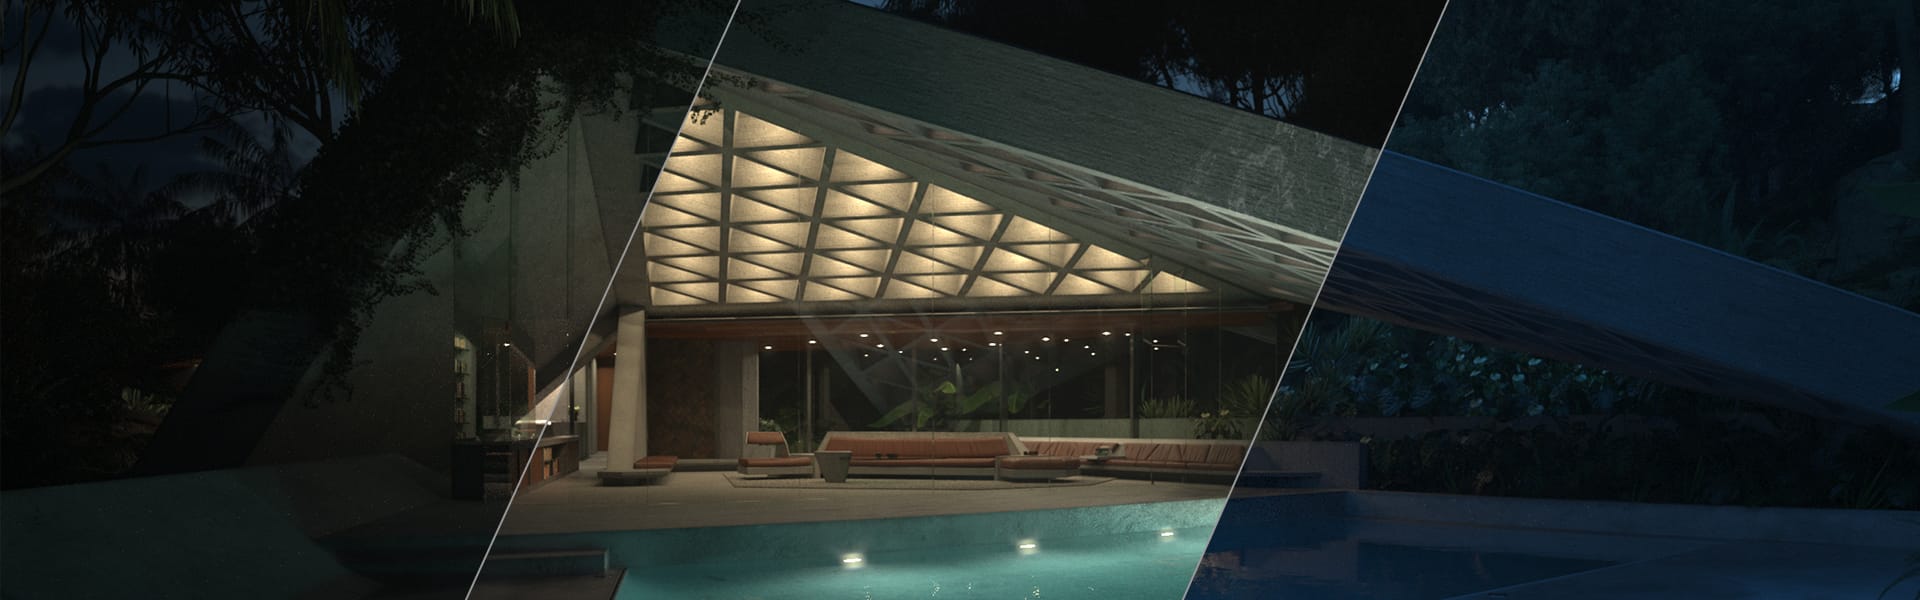 © Bertrand Benoit
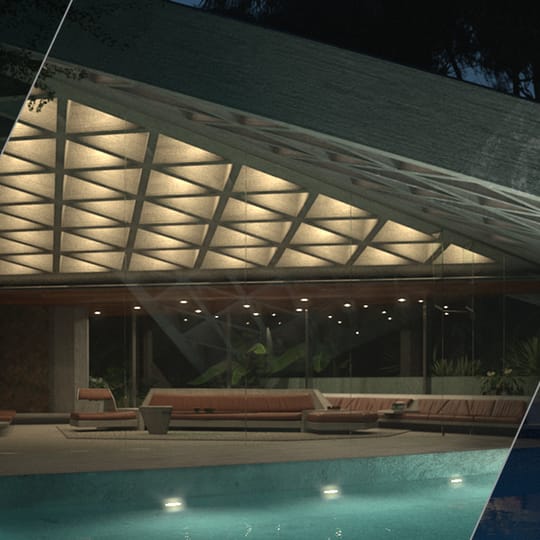 © Bertrand Benoit
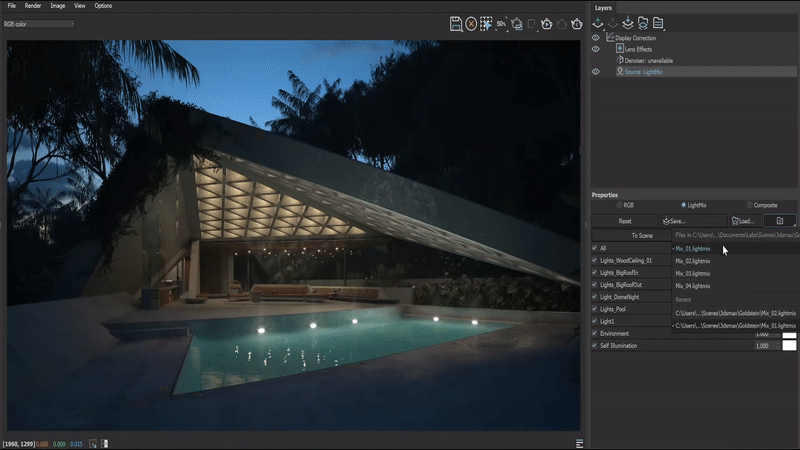


 © Škoda Design