Chaos
Architecture

Industry solutions

Explore our ecosystem

Products

Media & Entertainment

Industry solutions

Explore our ecosystem

Products

Product & E-Commerce

Industry solutions

Explore our ecosystem

Products

Education & Community
The State of AI in Architecture.

New insights from 1,200+ architects.

Help

Chaos Help Center


What are you looking for?

featured-part2-lighting-the-scene-1920x600.jpg

Creating interiors in V-Ray for Cinema 4D Part 2: Lighting the scene


Continue your rendering journey in V-Ray for Cinema 4D with helpful tips from 3D artist Nejc Kilar on how to light your scene.


So you’ve built your scene and created the foundation. Great job! Excited for what’s coming next? Let’s continue on our interior design rendering journey in V-Ray for Cinema 4D and get one step closer to a stunning interior that is sure to impress.

In the second part of the series, I will give you a few tips on how best to use V-Ray Sun & Sky as well as LightMix to create a captivating lighting environment in your scene. If you like, you can skip straight to part three, where I cover materials.

lighting-the-scene-sun-sky-2-1410x800.jpglighting-the-scene-sun-sky-2-1410x800.jpg

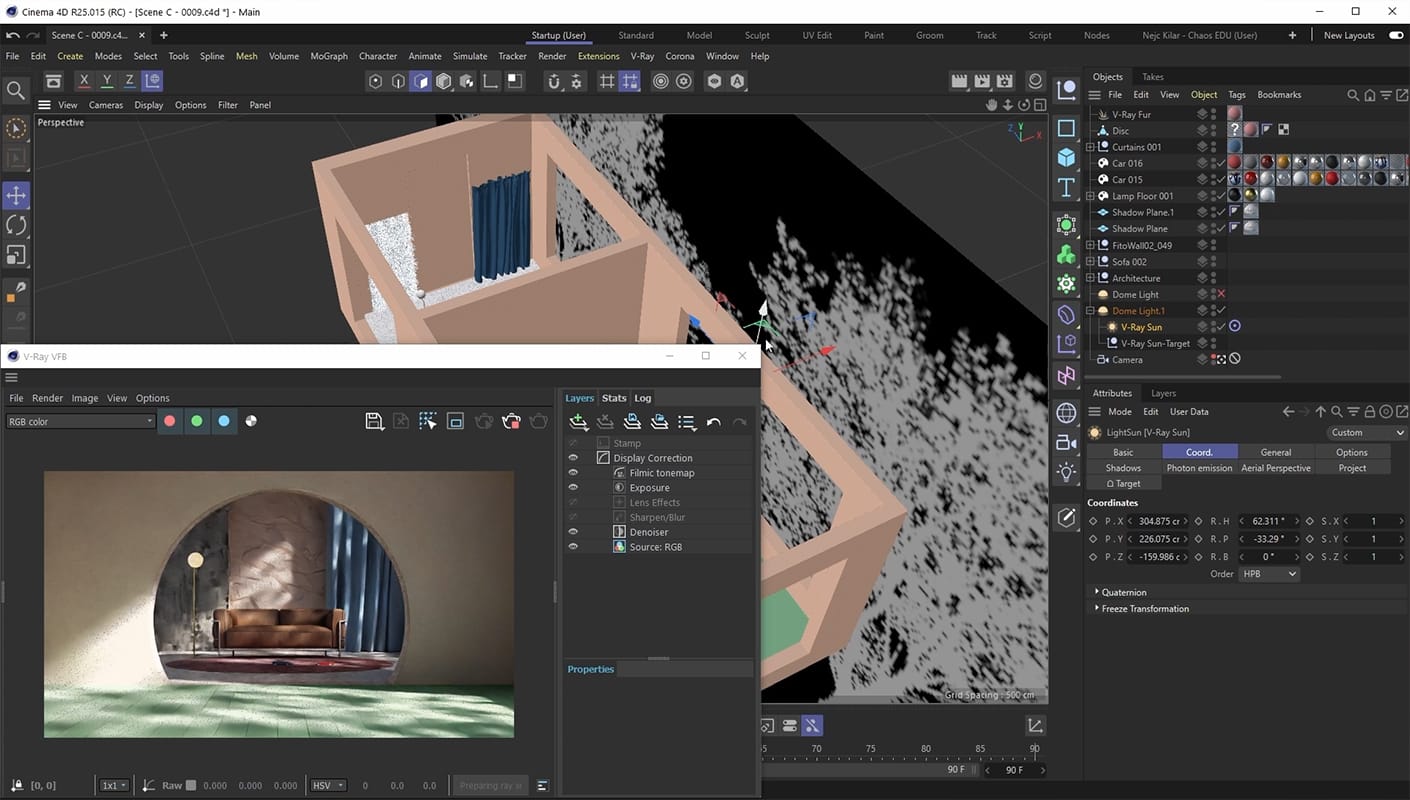
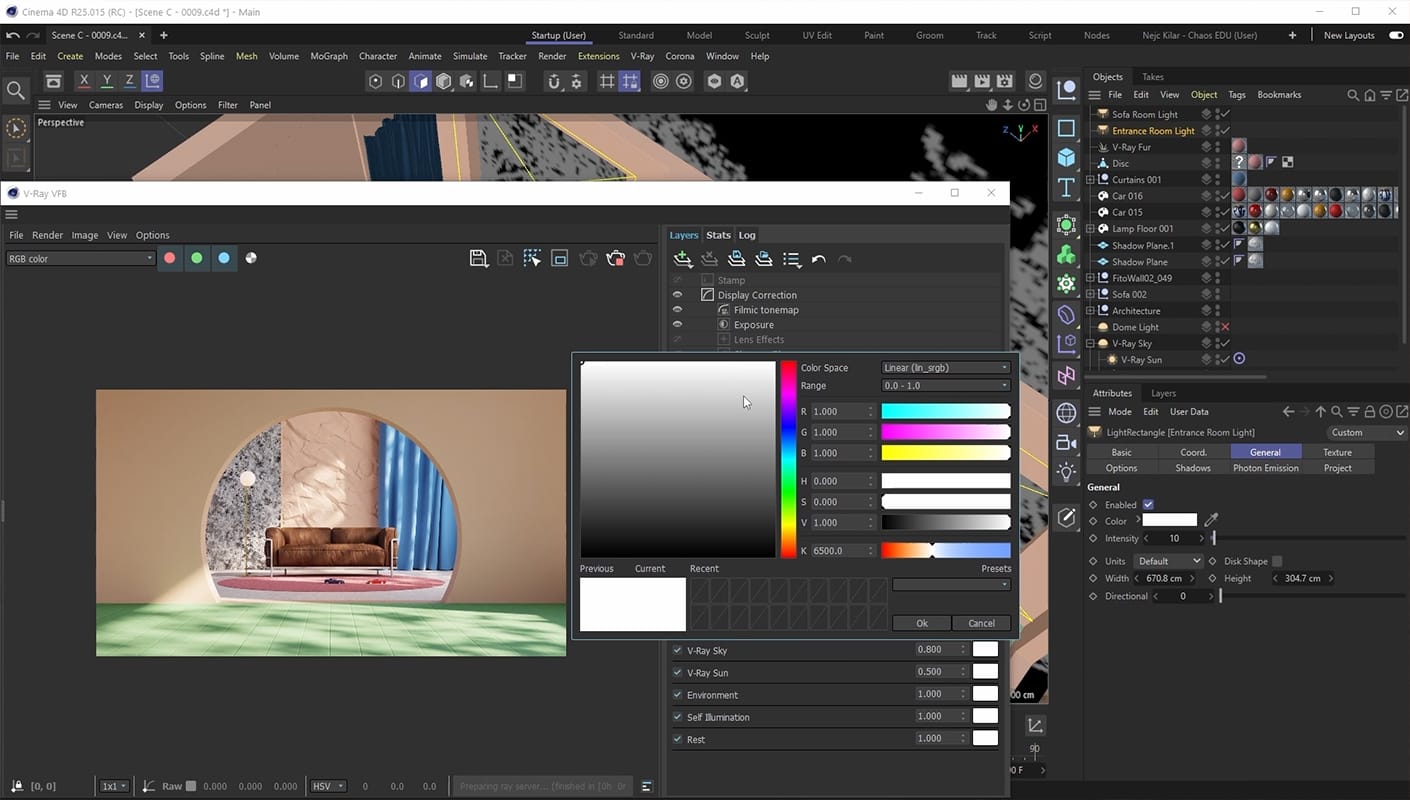
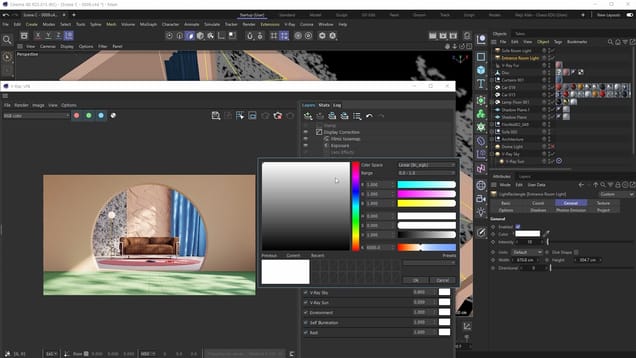
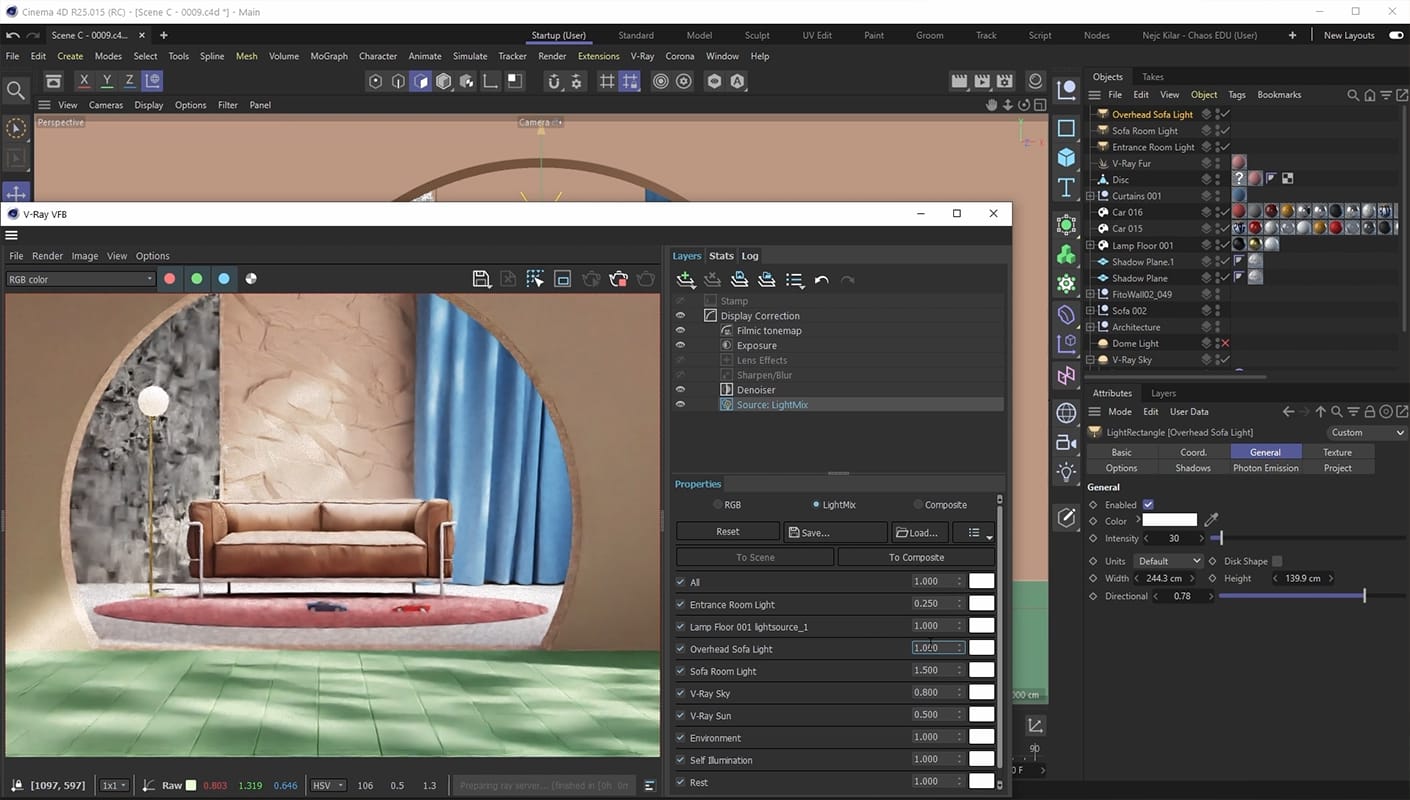
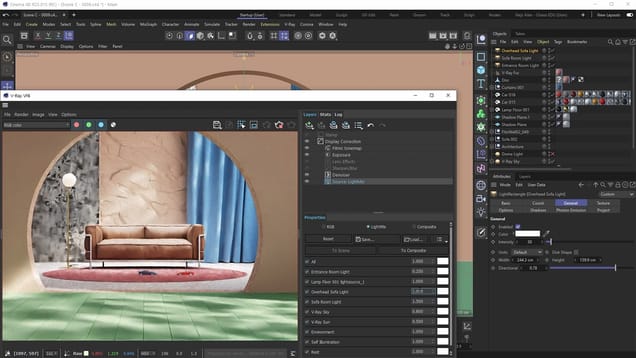
Tip #1: Experiment both with HDRIs and V-Ray Sun & Sky

While both of the techniques mentioned in the video are incredibly useful, there’s a couple of things to note for each of them. Lighting your scenes with HDRIs for example, will give you the ability to load up incredibly detailed High Dynamic Range Images of actual real world skies which in turn can give some extra detailing to your environment lighting.

On the other hand, lighting up your scenes with HDRIs will probably result in slower render times. You also won’t have total control over the lighting because you’re dealing with actual images. Basically, it’s a lot harder to move a sun being blocked by a cloud in an image than it is to just move the sun anywhere you please like you can with the V-Ray Sun & Sky system. 

The V-Ray Sun & Sky system is based on a simulation of a real world sky but it might lack details such as when clouds ever so slightly start blocking the sun a bit. It is generally faster to render and it gives you the control to recreate all kinds of different, realistic lighting scenarios. Ultimately which one you pick comes down to your preferences and how you prefer to work. Both can give you realistic looking results and they both excel in their own areas. Keep their differences in mind, experiment with both, and choose the one which works best for your scene.
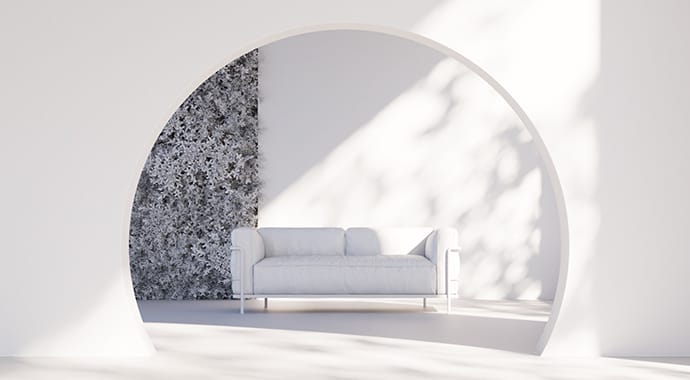
lighting-the-scene-lightmix-2-1410x800.jpglighting-the-scene-lightmix-2-1410x800.jpg

Tip #2: Stick to default light colors in LightMix

If you think you’ll be drastically changing the color of your lights using LightMix then it is recommended to stick with default light colors in the actual scene. The reasoning behind it is that changing light’s colors through LightMix is basically like filtering or multiplying colors - meaning if you have a light in your scene that is blue and you want to change it to red with LightMix it’ll be harder to do that because you’ll essentially be filtering colors and filtering blue and red does not equate to red while filtering white with red does.

lighting-the-scene-in-advance-2-1410x800.jpglighting-the-scene-in-advance-2-1410x800.jpg

Tip #3: Prepare your scene’s lighting in advance

LightMix is extremely powerful but it can be even more so if you plan ahead with it in mind. For example, if you overflood your scene with lights that have a similar intensity and evenly illuminate the scene,  you can then use LightMix to conjure up a lot of drastically different scenarios without generating a lot of noise in your image.

Remember, V-Ray sees the same image you see in the VFB when you aren’t using any effects including LightMix. So the way V-Ray will sample the scene and try to get rid of the noise will depend on what it sees when it’s rendering the image.

In that sense, if you prepare your scene’s lighting in advance, you can just render once and go from a broad daylight lighting setup to a really cozy nighttime one without having to worry about noise all that much. Of course, sometimes you will still want to re-render the image just because with drastic changes you might uncover a pocket of noise somewhere. 

Also worth noting is that if you flood your scene with lights that are of equal intensity there might be less shadowy areas and so the entire image will need to render for a bit longer to clear that noise out.

Bring your interior designs to life.

Try V-Ray for Cinema 4D free for 30 days.
© Škoda Design

Subscribe to our blog.

Get the latest news, artist spotlight stories, tips and tricks delivered to your inbox.

By submitting your information you are agreeing to receive marketing messages from Chaos. You can opt-out at any time. Privacy Policy.

Chaos
© 2024 Chaos Software EOOD. All Rights reserved. Chaos®, V-Ray® and Phoenix FD® are registered trademarks of Chaos Software EOOD in Bulgaria and/or other countries.