Chaos Phoenix can add unprecedented levels of realism to any 3D project. In this guide, fluid simulation expert Hammer Chen explains how to make the most of it.
We’re all fluid simulation artists now. Previously the reserve of large VFX studios, leaps in hardware and software have made fluid simulation accessible to arch viz artists, interior and product designers, and multifaceted freelancers. And, now that Chaos bundles its Phoenix simulation tool with its V-Ray and Corona rendering engines, there’s never been a better time to master fluid dynamics in 3ds Max and Maya, and add realistic licks of flame or splashes of water to whatever you’re working on.
Phoenix makes fluid sims easy, but in this two-part guide, I’ll share some tips that will help you take it to the next level. Read on to find out how to research your fluid sims, and discover the little Phoenix features that can produce amazing results, or jump straight to part two for more advanced tips and tricks.
Don’t just collect references — collect them with various lighting scenarios
The first step for any simulation project is to collect reference materials, such as video footage or images. It’s also a good idea to categorize your images based on various lighting scenarios; fire, for instance, can have a very different appearance depending on the time of day. A full spectrum of lighting conditions will give you a better understanding of the topic you are going to create.
Still images can help you establish a good sense of shading, composition, texture, and lighting. But you also need a sense of timing for specific topics. For example, when creating a waterfall shot, it’s a good idea to check stock photo websites for videos that accompany images in the search results. By watching footage of a waterfall, you can understand the flow and speed of the water, and the motion of mist caused by the splash.
Think of camera, lighting, and simulation as a whole
The human brain interprets a picture as a whole; we don’t see things as separate components. When creating a realistic shot, you have to think about lighting, camera composition, and the simulation itself as one thing, so the rendering can trigger specific emotions.
This is why we also need to take into account the lighting and composition when we collect reference materials.
Once your composition is set, it will also affect the simulator settings. With Phoenix, you can reduce simulation time by setting the simulator region so that it only simulates inside the camera view.
Exposure is also important. Even if you have set the right volumetric shader and used proper HDRI lighting, if the camera exposure is not correct, fire, for instance, just won’t look right.
On the other hand, when you have created a fire effect for daytime, if you want to convert it to a night scene, you will have to re-adjust the camera exposure as well as the Fire Multiplier and Light Power parameters in the volumetric render settings.
Be an organized 3ds Max/Maya user
Fluid simulation involves a large amount of data and when combined with geometry and other particle effects in the scene, it can sometimes generate several gigabytes of data per frame. Fortunately, there are several tools and settings in 3ds Max and Maya that can prevent this tragedy from occuring:
- Always auto save Get into the habit of turning on auto save on. Depending on the Backup Interval, having the chance to go back to a previous state can be a lifesaver.
- Use increment save Don’t overwrite your scene by saving. Instead, use increment save. During the research-and-development phase, your project will be revised several times, many different settings will be tested, and you might have to go back to a previous version. You also can’t stop your client from the dreaded “now I think your previous version is better” conversation.
- Check your drive space before running a simulation. It might sound silly, but the cache generated by a simulation may increase dramatically through the animation. This is especially true for overnight simulations. I always make sure I have plenty of drive space to run with.
Pay attention to scale
Always create a 3D model in real size. A 30-centimeter ship will have a very different fluid simulation result than a 30-meter ship sailing on the sea.
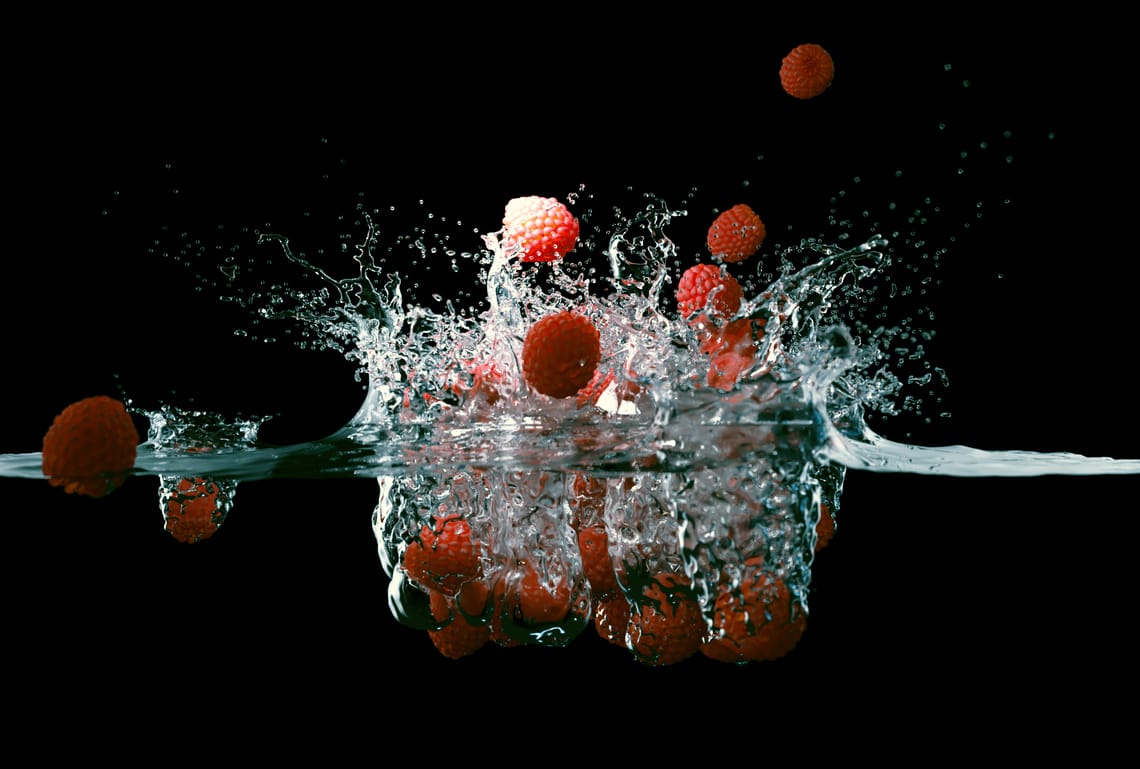
Geometry with real-life scale will allow you to get the effect you want faster. For example, if you have done a splashy scene of oranges falling into the water, it is easy to replace them with apples falling into the water if both are set to the correct size.
Over time, you will accumulate a stash of simulation scenes, which can be great if you're running a VFX studio. It will be easier to merge different simulation scenes if they all follow the rules of the scale; for example if you want to merge a flamethrower scene with an explosion scene. And who wouldn’t want to do this?
That said, in real-world production sometimes your source scenes won't have the correct scale. Fortunately, Phoenix gives you the option to adjust the Scene Scale in the simulator to compensate.
Use existing official Phoenix scenes as a starting point
Phoenix is a very powerful plug-in that can simulate a wide range of fluid effects, from a small candle to a large stormy sea. Each effect requires many parameters to be orchestrated in order to get the right look, and even Phoenix veterans may forget how to create a specific effect. Therefore, don’t be ashamed to use existing scenes as your starting point. You can find many high-quality and optimized scenes in the tutorial and examples section on the Phoenix documentation page.
Besides existing scenes, Phoenix’s Quick presets are your friend. On several occasions, I've used the quick preset to get a quick idea of how an effect should be set up, such as the Jet Engine preset, and then fine-tuned it to the look I wanted.
Mask your fluid sources
This is a very common yet powerful trick, and you can see it in use in Phoenix tutorial’s Fire/Smoke simulations (Animated Clouds and Burning Chair) and liquid scenes (Milk and Chocolate and Lava Flow). By default, the fluid emitted from a Source looks dull. Since nature is full of chaos, masking your fluid source can produce more interesting fluids — and more realistic results. Whether it's a Liquid Source or a Fire/Smoke Source, I always use a mask.
Introduce variations
For a CG forest, just a little color variation in the tree leaves can make the foliage look much more realistic. The same is true for fluid simulations; you have to break up the uniformity. There are many ways to approach it in the simulation:
- Animate the source geometry If the source is a simple plane (with a shell modifier on top), I usually add a Noise modifier to it. And I tick its Animate Noise option. This way, we can add fluctuations and variations to the geometry level, they pulsate and have more noise and also make for a more interesting simulation.
- Add a wind force Often you see beginners simulate smoke that goes straight up. Although the smoke shader looks real, the simulation feels wrong. An easy fix is to add a Phoenix Plain force (as a wind) in the scene, to add a little chaos. The smoke will immediately look much more convincing.
- Different colors in the smoke In the Explosion Plume with tyFlow tutorial, we set three different smoke colors (light gray, dark gray, and light brown) in the four different Sources. Through time, you can see an interesting mixture of those fluids that form sophisticated explosion plumes.
- Three levels of noise In Phoenix, there are three ways to introduce noise to your simulation. The first is to increase Noise in the Source; the second is to add Phoenix Turbulence to the scene, which affects all sources, and the final one is to increase the Randomized Amount in the Simulator’s Dynamics rollout. I usually add just a small amount of “Noise”. You can find a perfect example in the Animated Cloud tutorial, in which we use all three levels of “Noise”. Though each parameter has a subtle effect, when put together, all these settings ensure a natural-looking cloud simulation.