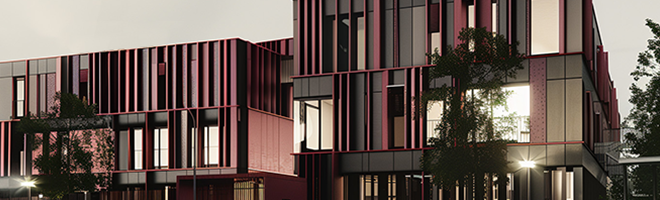

Chaos is excited about V-Ray 5 for Rhino’s recently released second update! We’ve put together some tips for making the most of V-Ray Vision, Chaos Cosmos, and more.
We recently hosted a webinar to demonstrate the latest capabilities of V-Ray 5 for Rhino, with pointers on using V-Ray Vision, Chaos Cosmos, V-Ray Light Gen, V-Ray 5 for Grasshopper, and Cloud batch rendering.

Watch the video tutorial or keep reading to learn helpful tricks including how to:
- Achieve a perfectly exposed image in V-Ray Vision with color correction controls
- Achieve maximum interactivity with Chaos Cosmos asset LODs (level of detail)
- Use "Fly mode" to move freely around your entire scene
- Convert Chaos Cosmos assets into a "V-Ray proxies" to modify their materials
- Enable "Temporal anti-aliasing" for smooth visual feedback
- Share a project with "Pack project" and downloading missing assets
- Create multiple lighting scenarios with V-Ray 5's Light Gen
- Render multiple views simultaneously on Chaos Cloud in a single batch
- Take advantage of Live Link in Grasshopper to visualize your scene in real-time
- Easily edit materials and geometry in Grasshopper
- Setup simple animations in V-Ray Timeline and export them
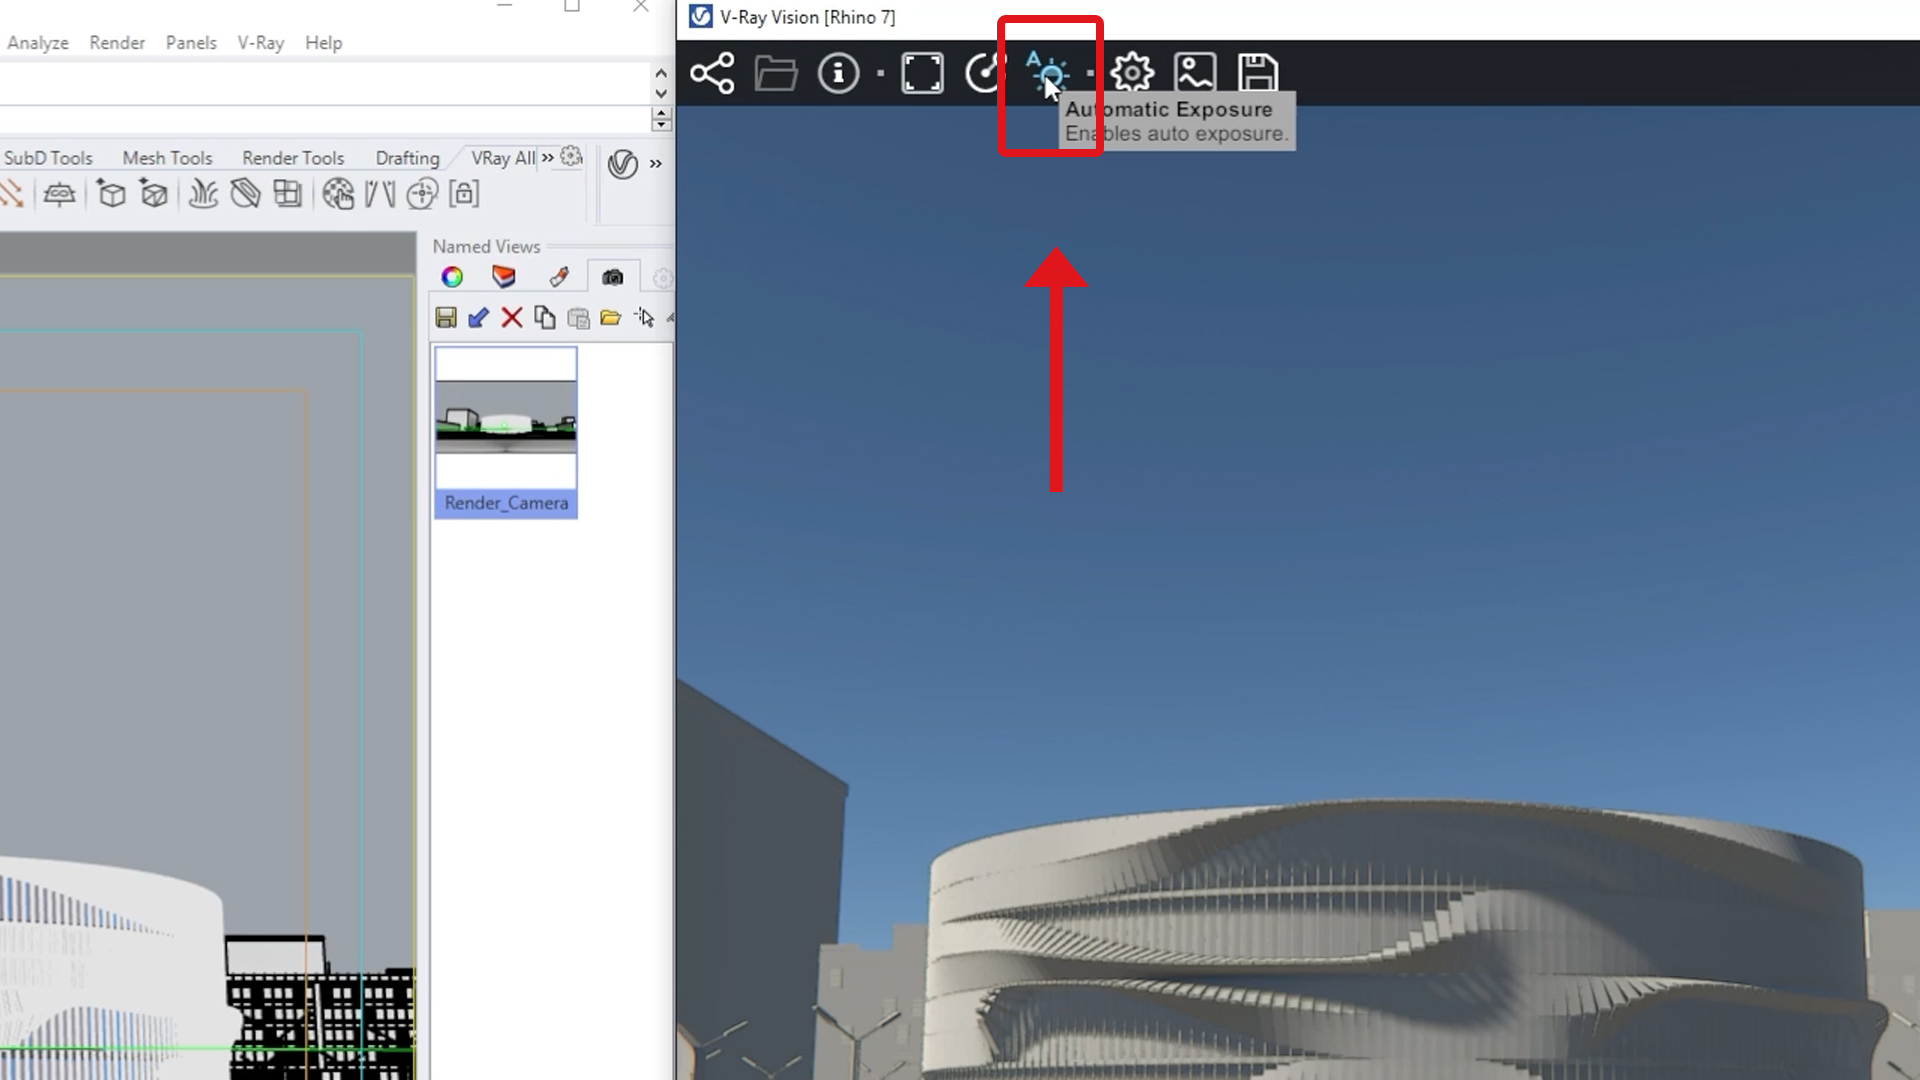
Achieve a perfectly exposed image in V-Ray Vision
Struggling to get the exposure of your scene in V-Ray Vision just right? That's when the auto-exposure functionality comes in. All you need to do is click on the sun icon in Vision to enable auto exposure and achieve a perfectly exposed image.
The importance of LODs of Chaos Cosmos assets
There's no longer a need to fret about a heavy project or tiresome lagging. The LODs (level of detail) of Chaos Cosmos assets change automatically which allows your machine to handle large scenes and not compromise rendering speed. You can switch on a high-quality version of the Cosmos assets by clicking the corresponding “High-quality cosmos assets” checkbox in the settings panel.
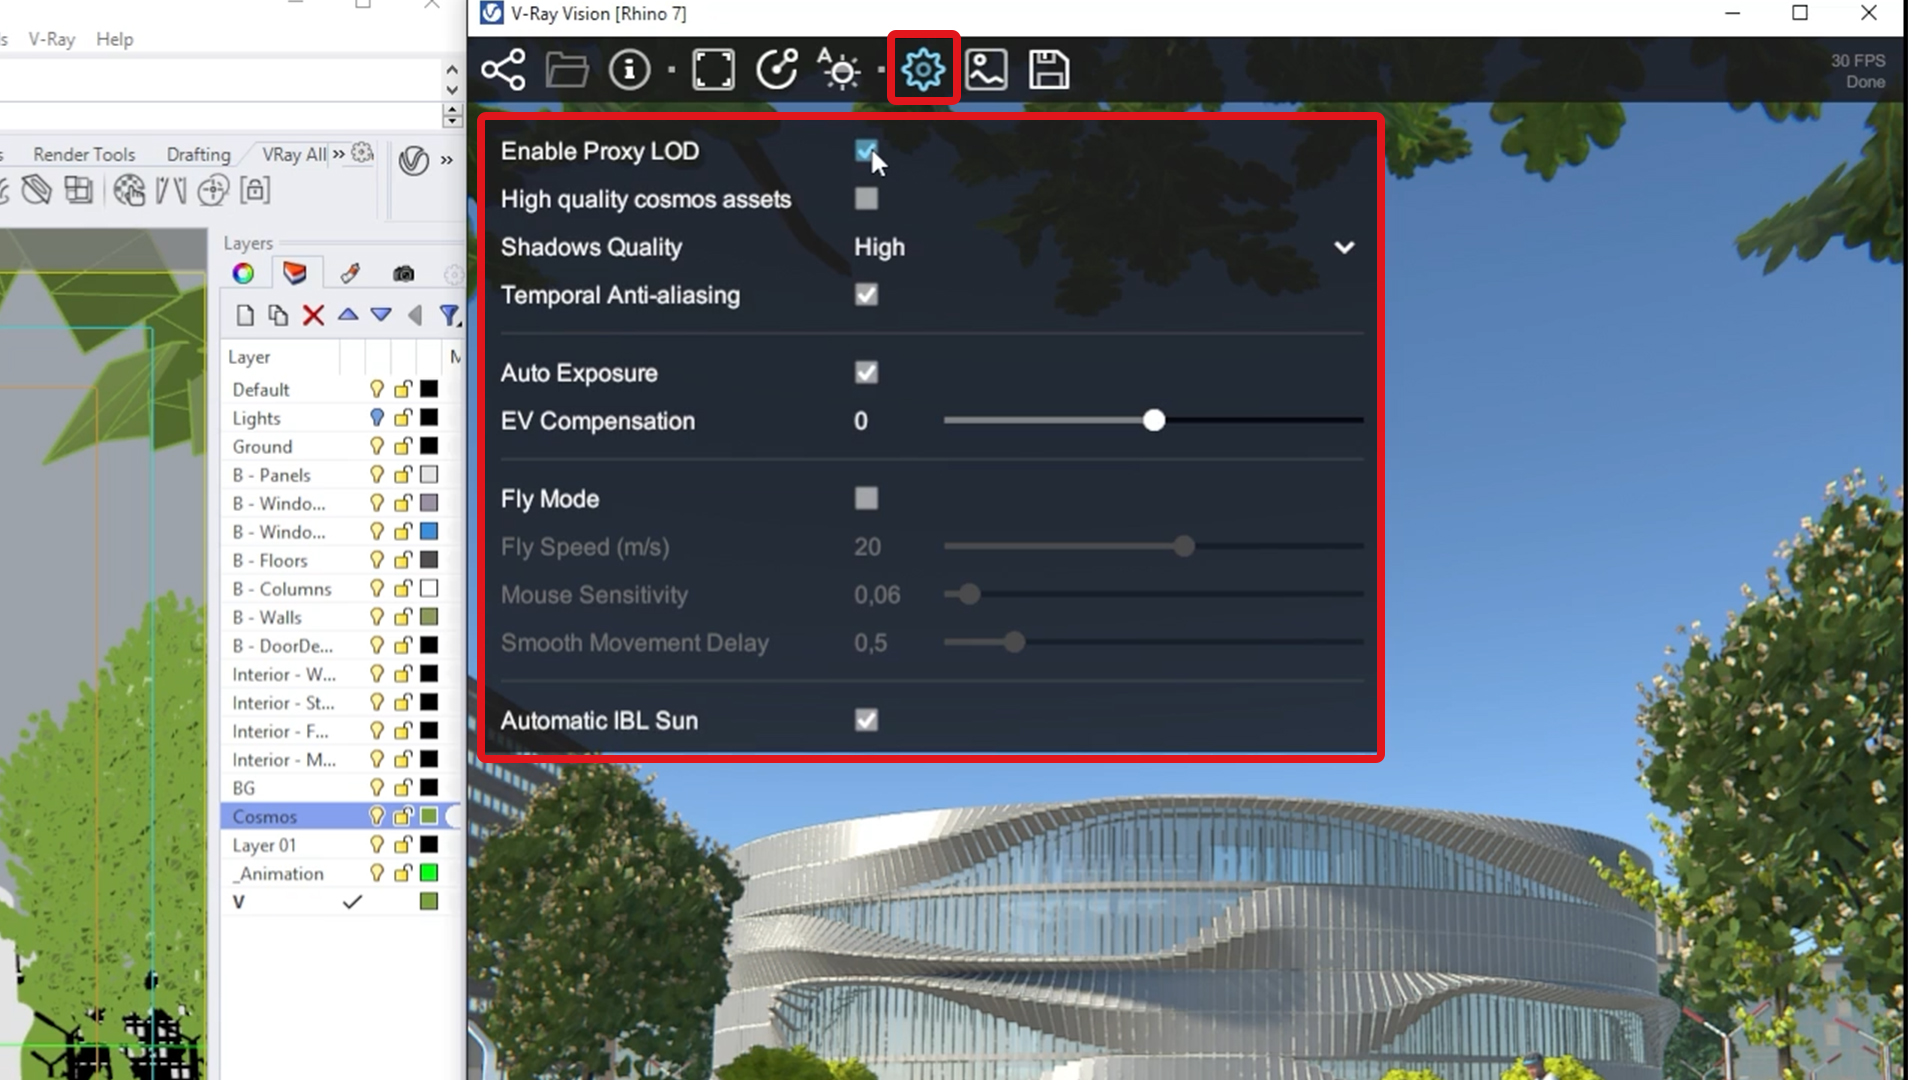
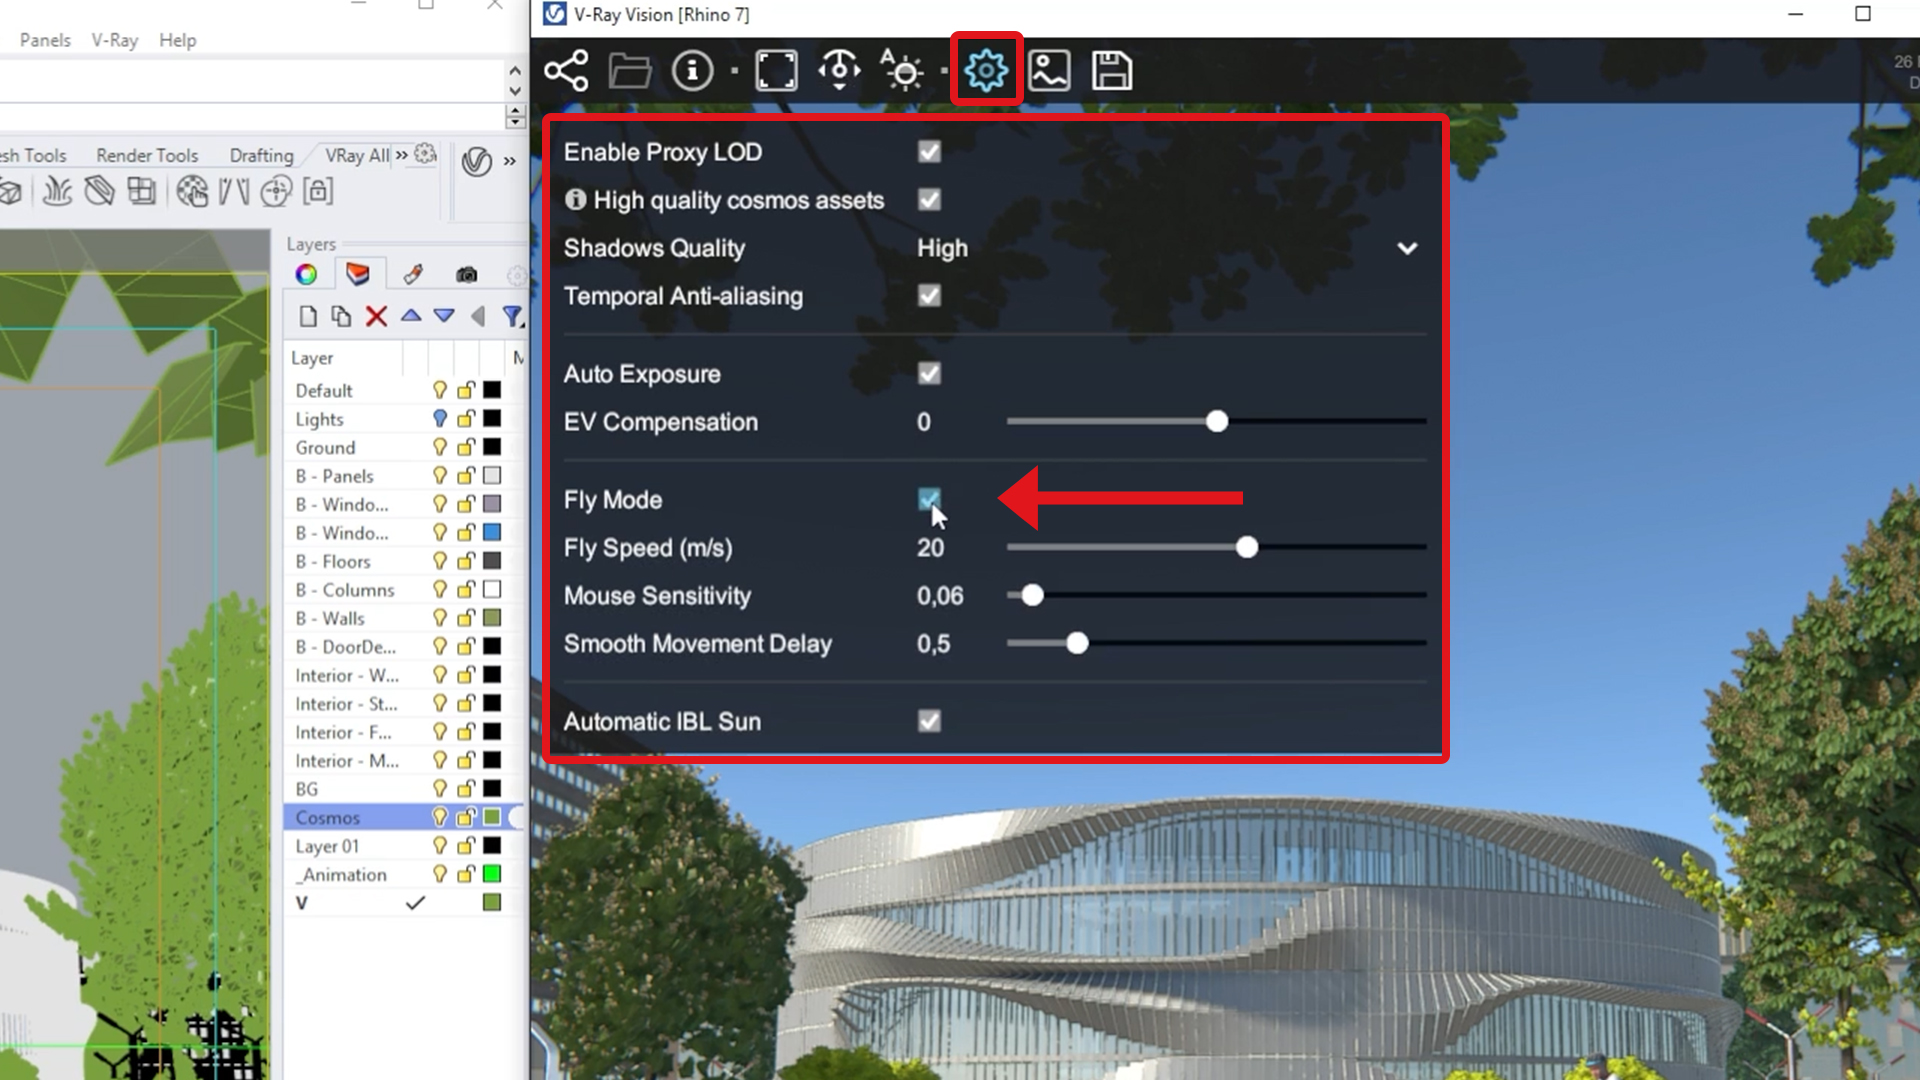
See your scene from every angle
Apart from the regular navigation controls, V-Ray Vision now comes with "Fly mode" to let you navigate within your scene in first-person view. Simply enable the option and adjust the speed to your preference. Use your mouse and arrow keys to fly all around your scene.
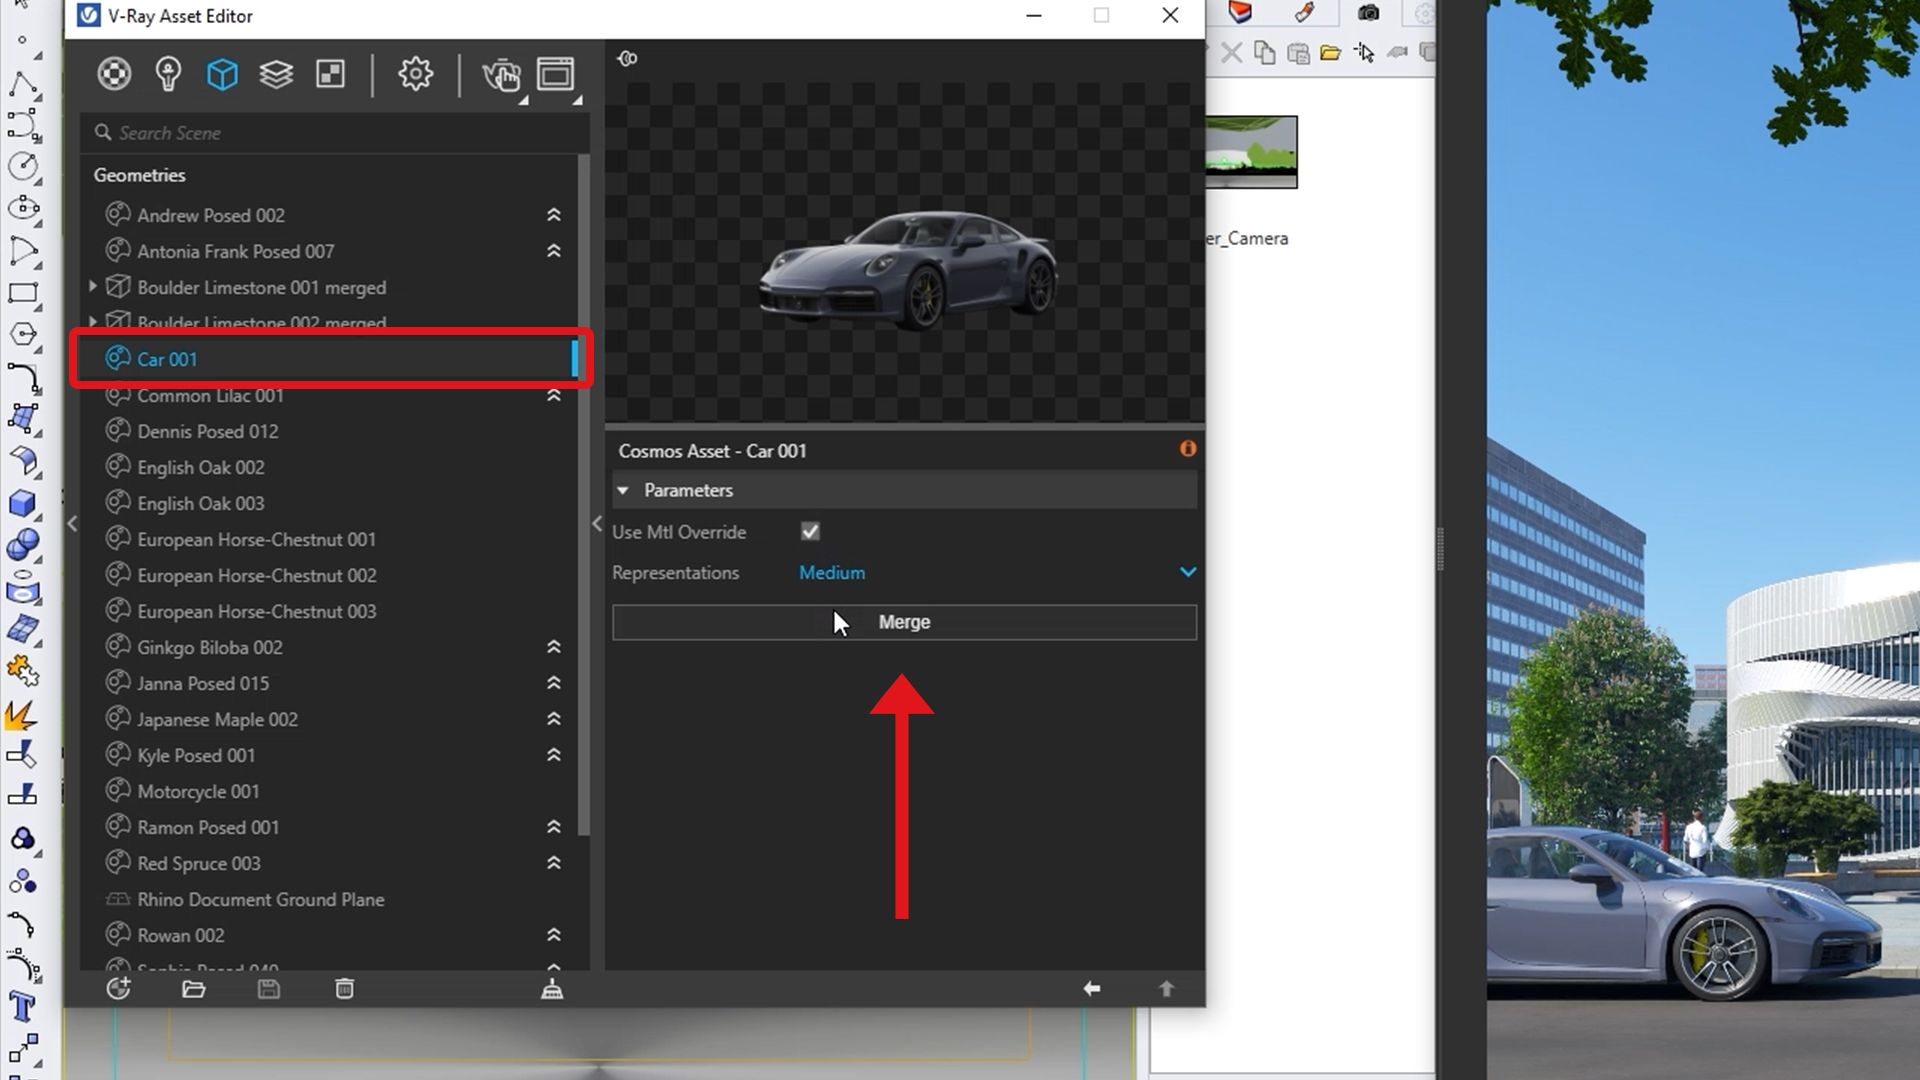
Modify the material of Chaos Cosmos assets
Chaos Cosmos assets come with amazing materials out-of-the-box, but what if you want to change them? Just convert them into V-Ray proxies. Select the asset and right-click to choose “Merge”, or hit the “Merge'' button from the right-side option panel while selecting the asset.
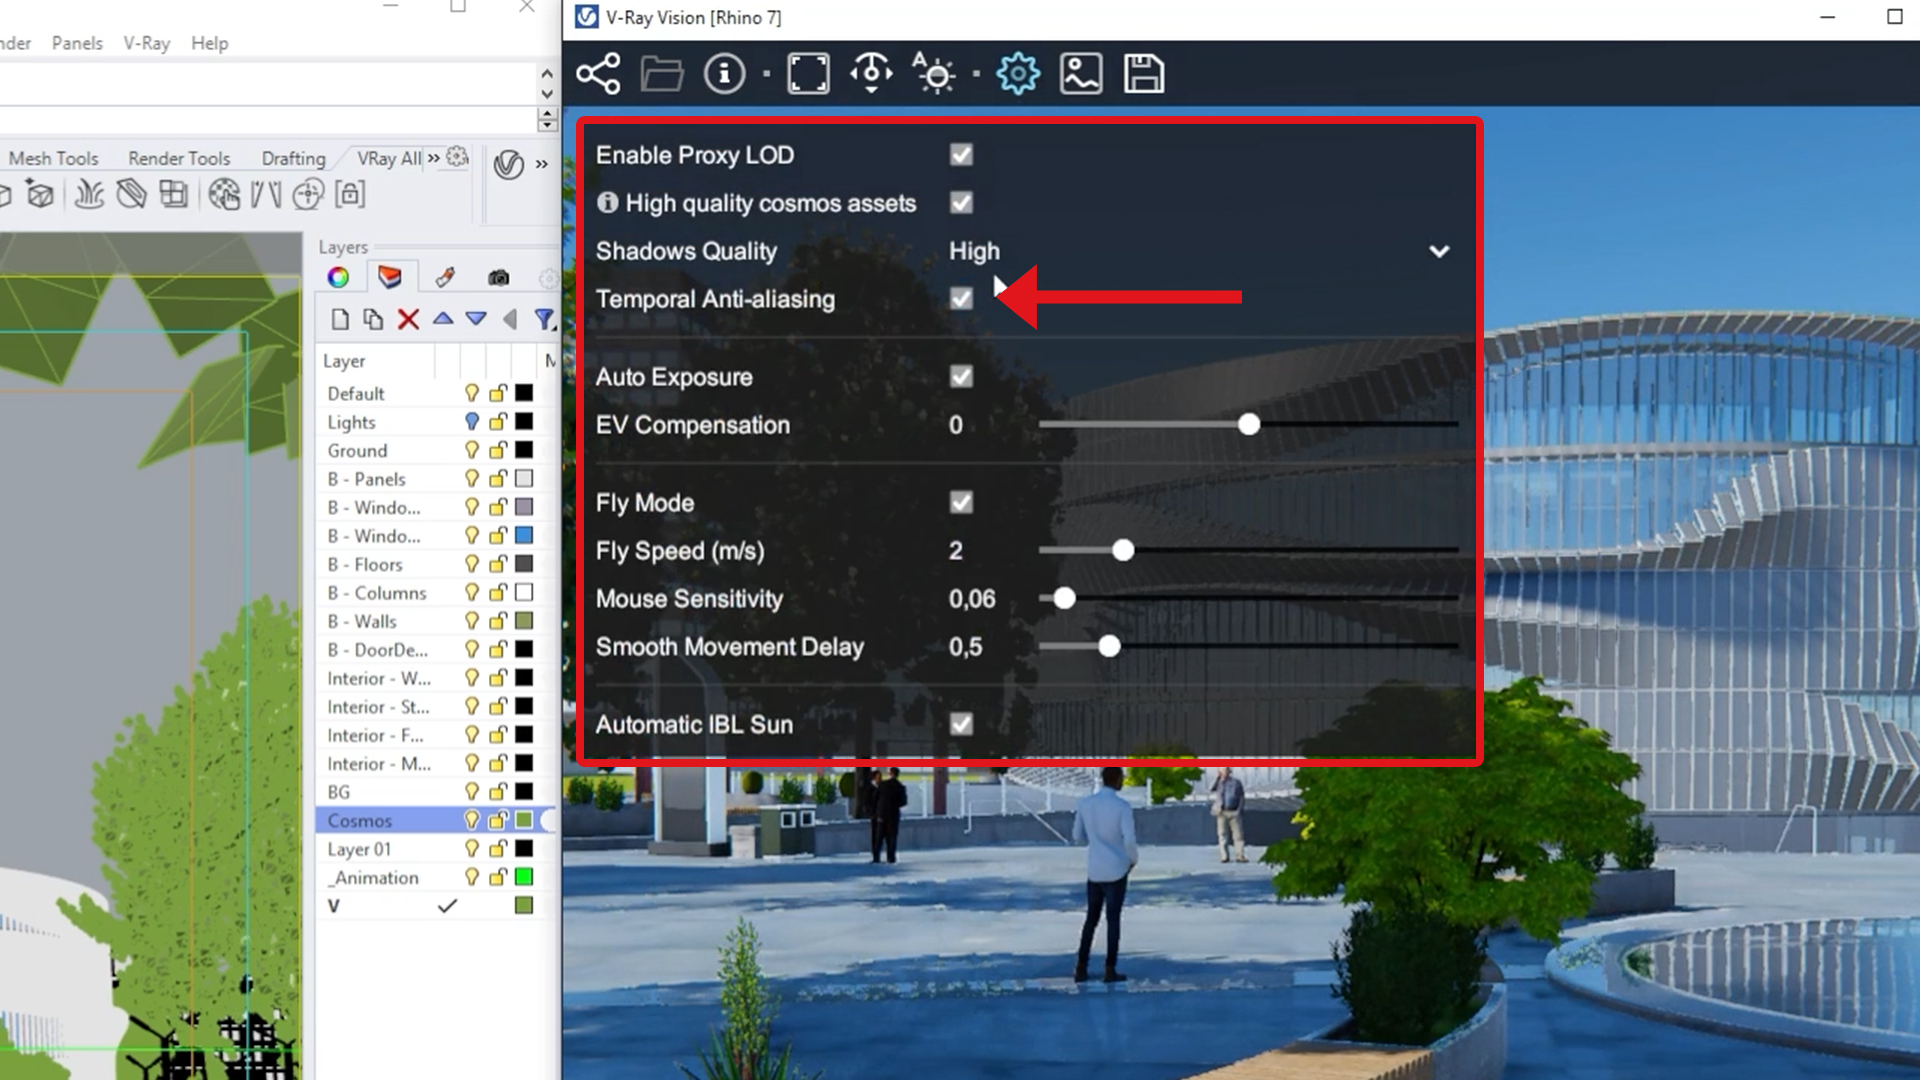
Ensuring smooth visual feedback
To avoid jagged edges on objects in your V-Ray Vision window, enabling "Temporal anti-aliasing" will result in a smoother image that clears any pixelization. Try the feature out by playing a preview of your scene and you’ll see the difference.
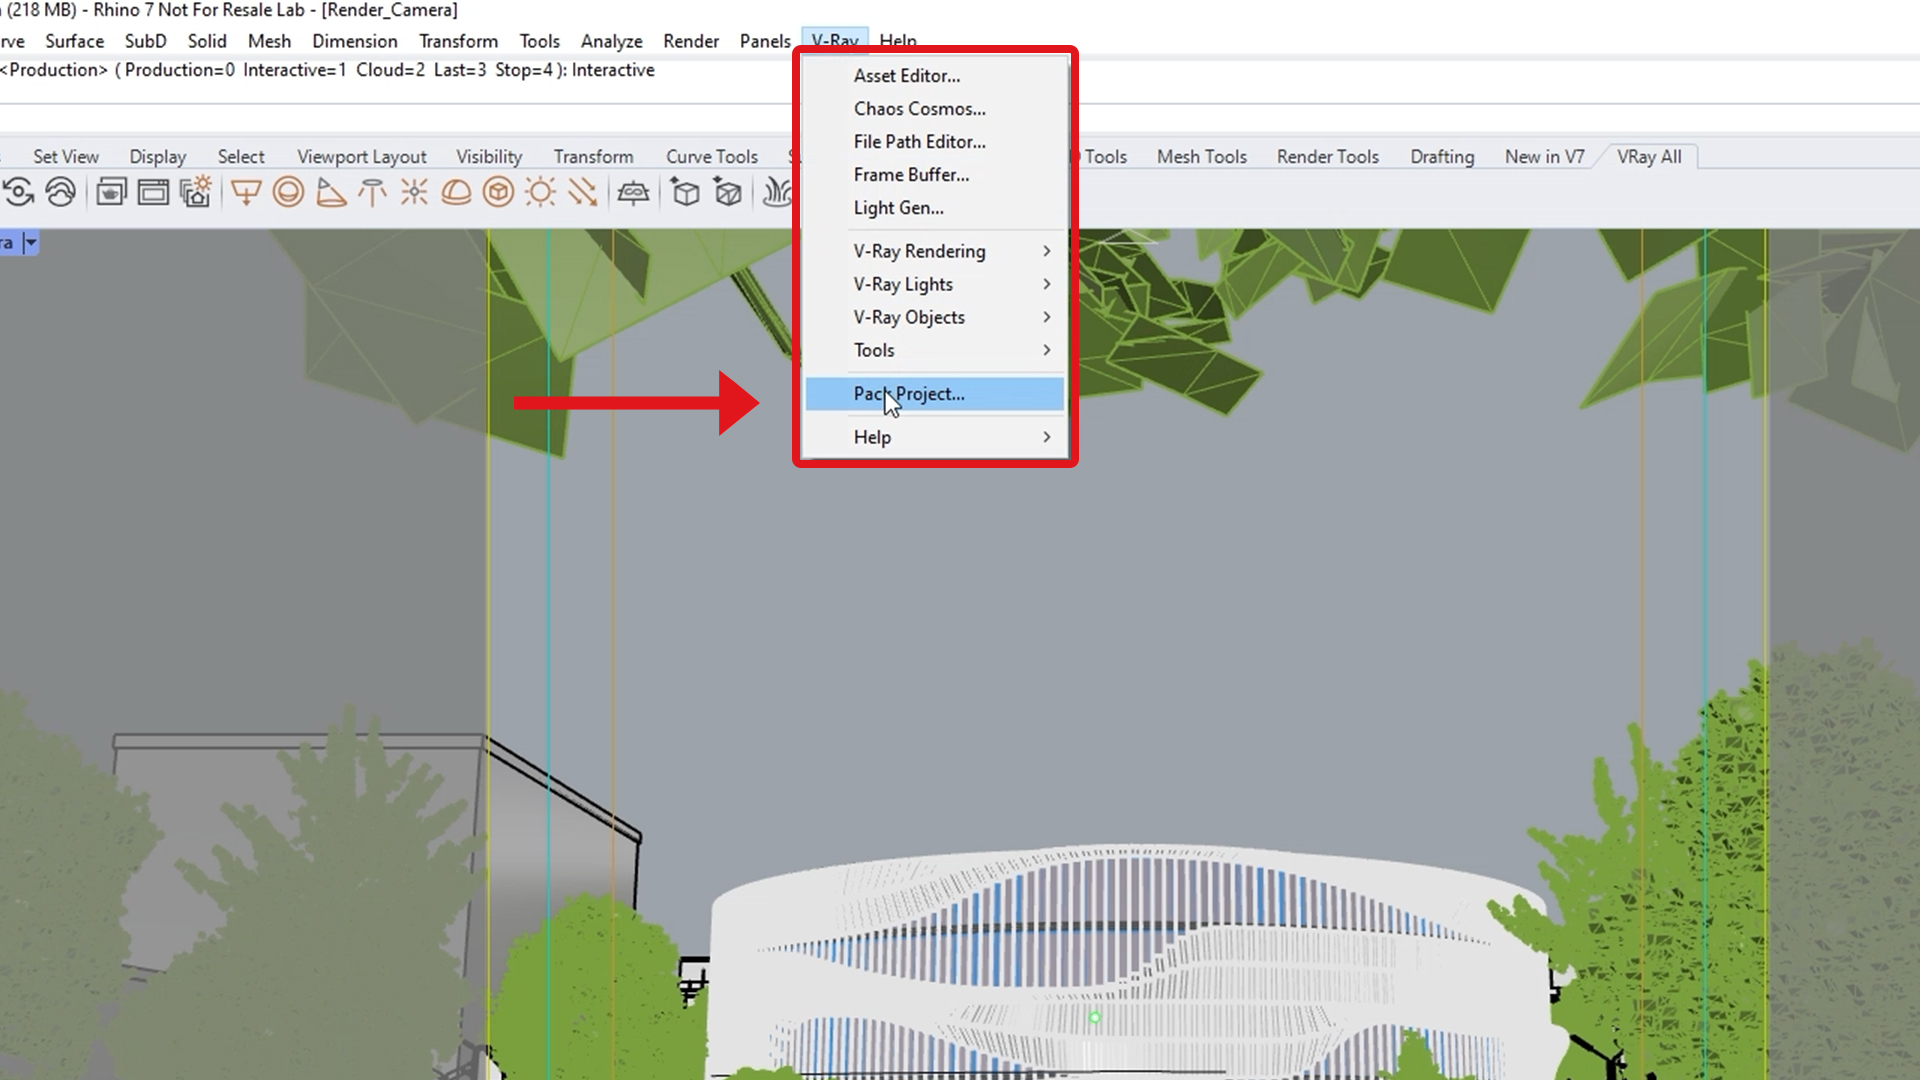
Easily share a project and download missing assets
Before a project is shared with clients or colleagues, or sent to be rendered to a render farm, Chaos Cosmos assets need to be packed. From the V-Ray dropdown menu, choose "Pack project." Next, choose to save your project on your machine or server. After that, you need to decide whether to pack the Cosmos assets into the archive for offline viewing, or if your scene will be rendered on a network farm. If you plan on sharing it with a colleague, select "No." Note that this step is omitted when rendering with Chaos Cloud.
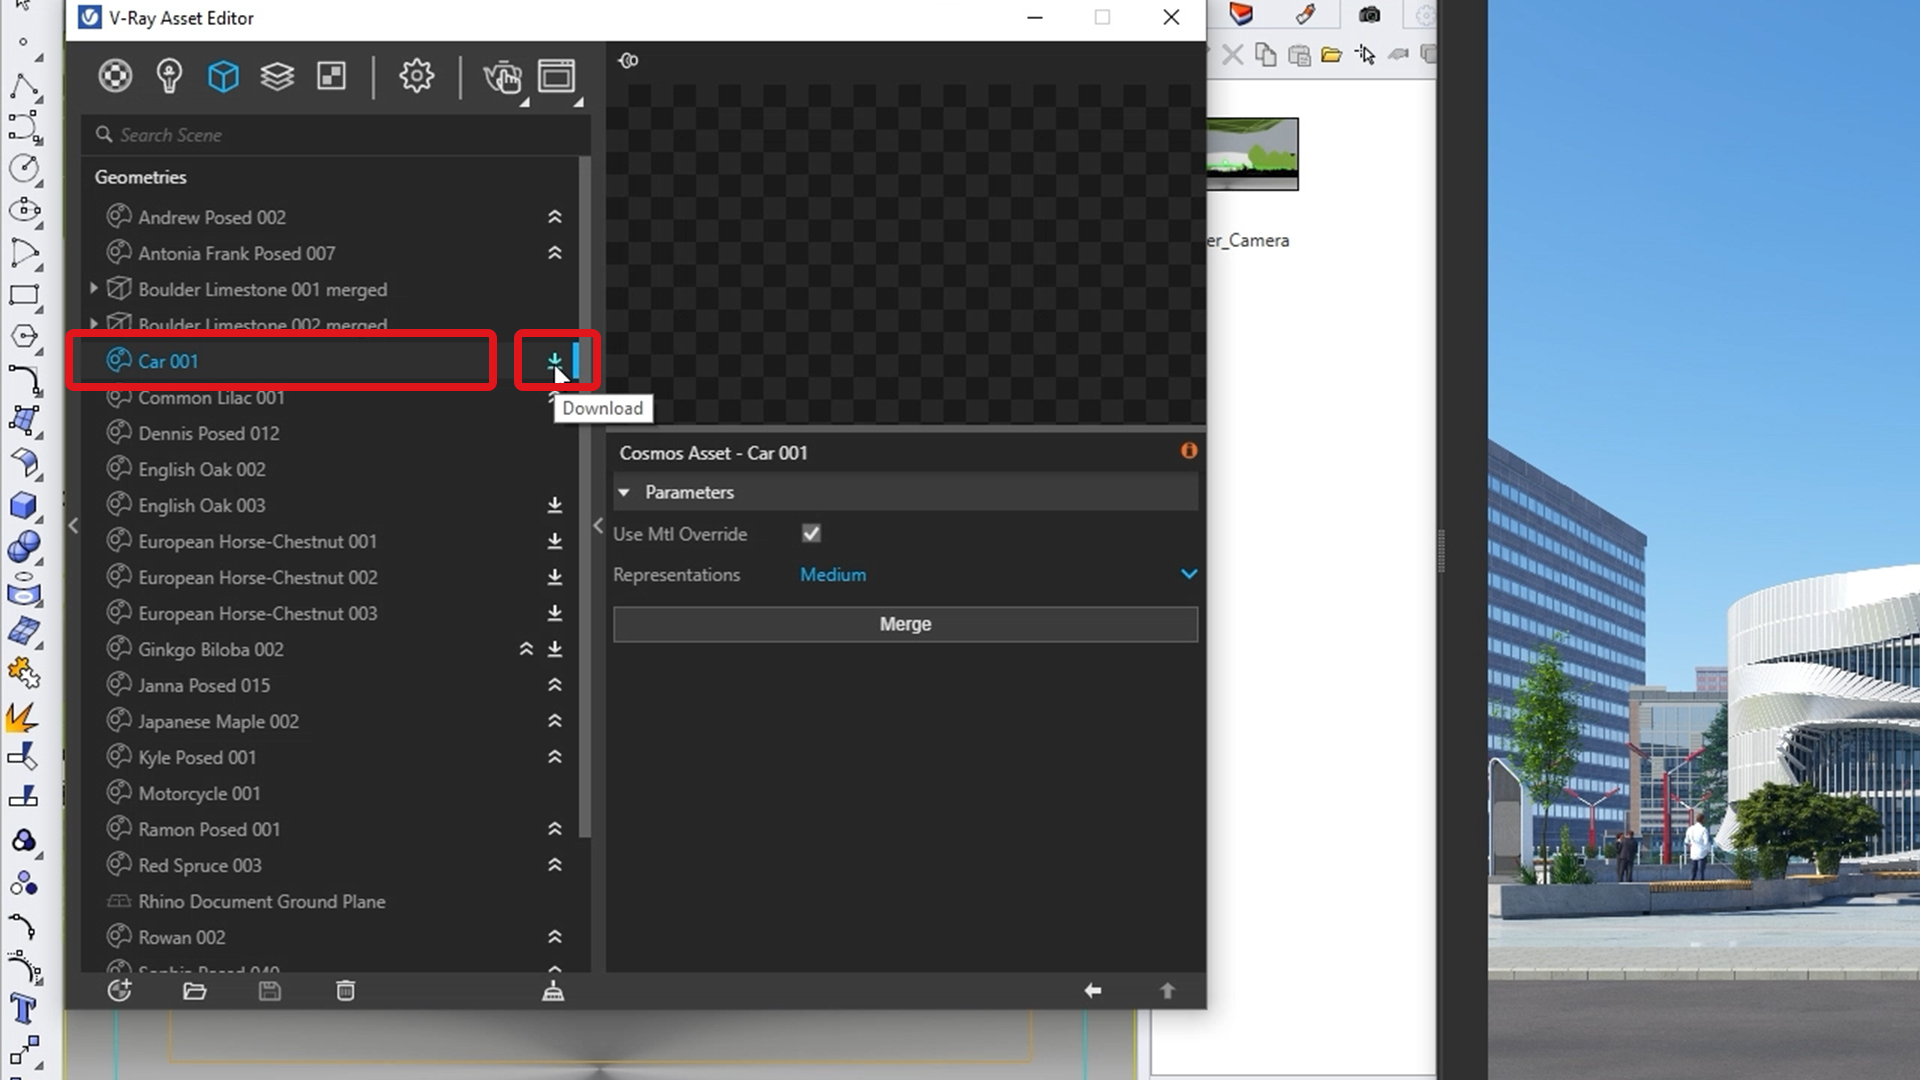
Initially, Chaos Cosmos assets are stored on our local machine. By heading over to the Geometry tab in V-Ray’s asset editor, we can click on "Download" to the right of each missing asset, or select them all, right click, and select "Download" to download all of them. Doing this will allow you to open the archived file on different machines with all assets visible.
Create multiple lighting scenarios with V-Ray 5's Light Gen
V-Ray 5 for Rhino's Light Gen frees you from having to move the sun around or rotating the HDRI, and instead handles all of the hard work for you. Click on the Light Gen icon in V-Ray’s toolbar, and select the space you want to light up: Exterior or Interior, as well as the lighting method: Sun and Sky or an HDRI.

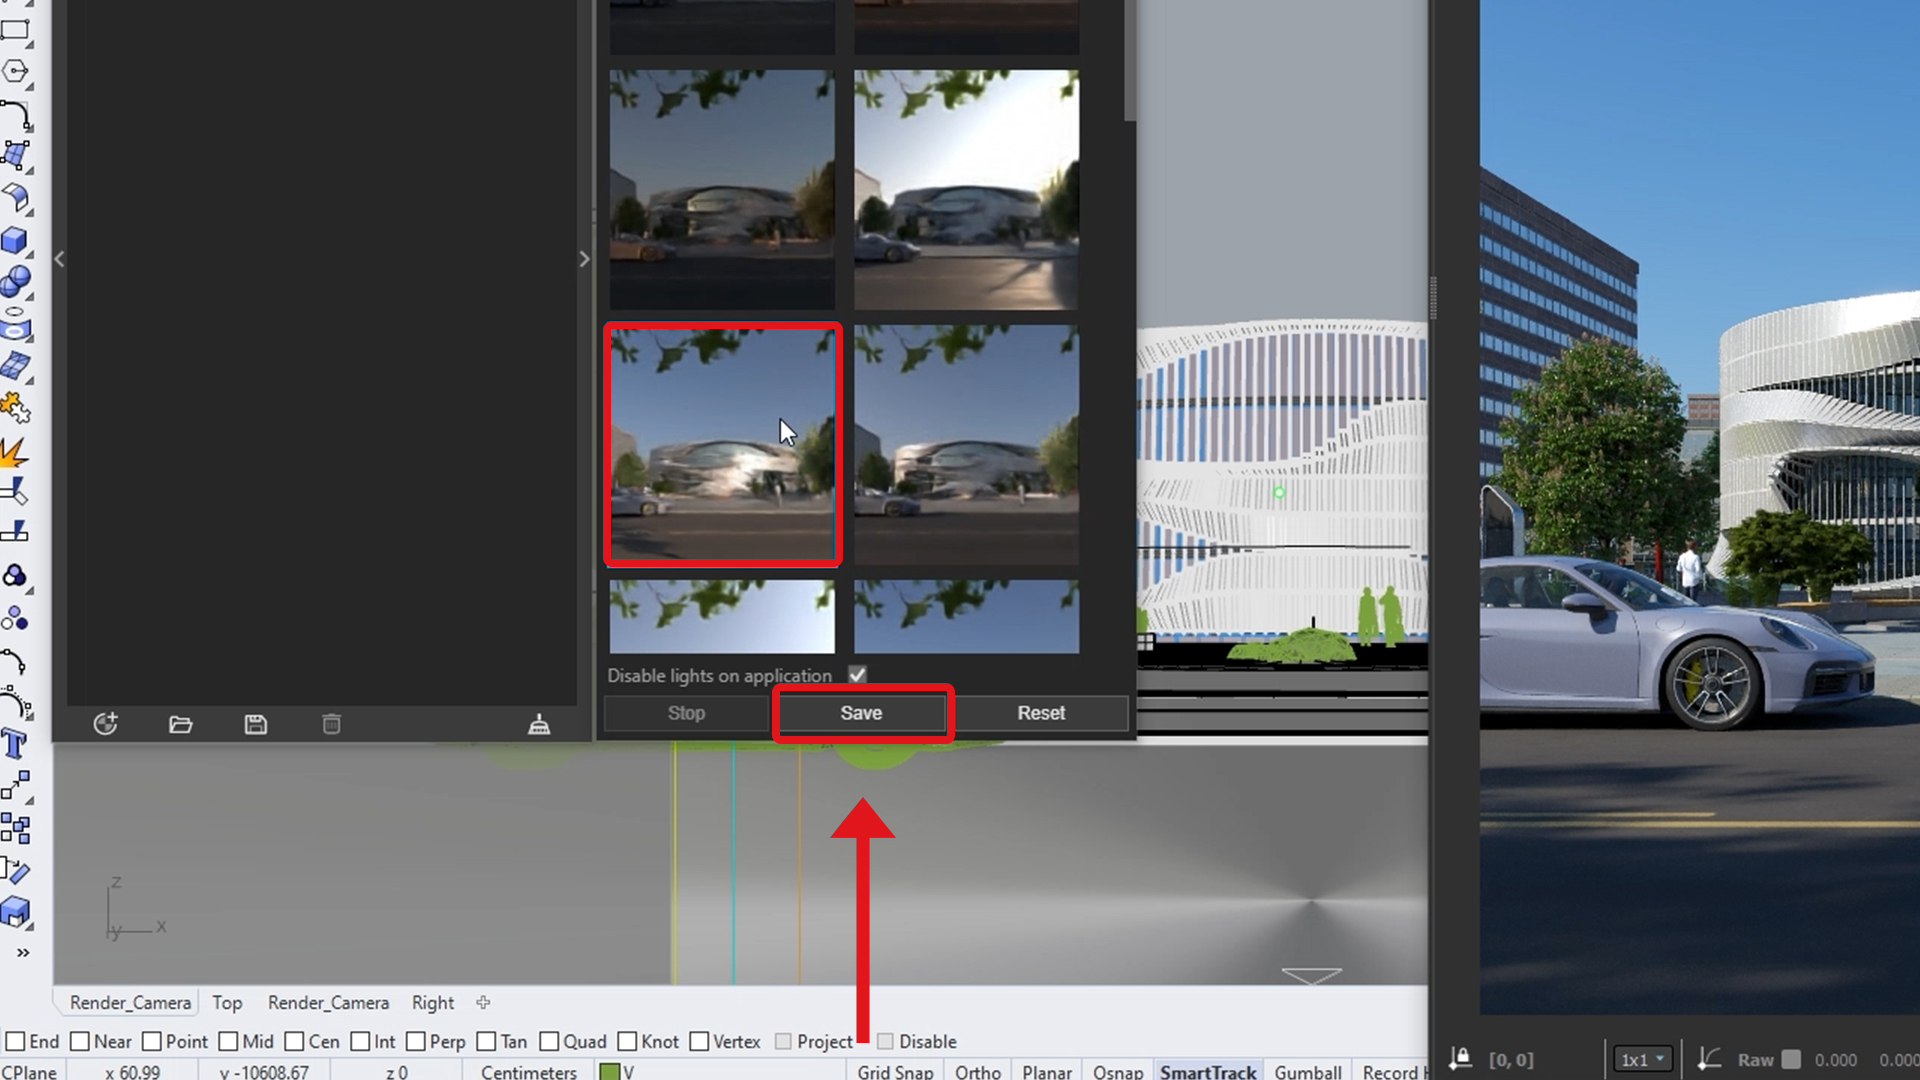
If you decide on V-Ray Sun and Sky, you will need to then select the number of vertical and horizontal variations of the sun's position V-Ray will create. Click "generate." You will then be able to choose the lighting scenario you like best from a list of thumbnails, and click it to apply it to your scene. Save your generated scenarios for future use by clicking "Save" and choosing a name for the set and a folder to store them in.
To switch the light source, simply click on "Reset" and select HDRI. When the HDRI source is selected instead, light will be calculated based on the HDR image in the scene. Select the number of HDRI variants you'd like as well as their rotation. If you've saved a light set before, click on "Load" to apply it to your scene.
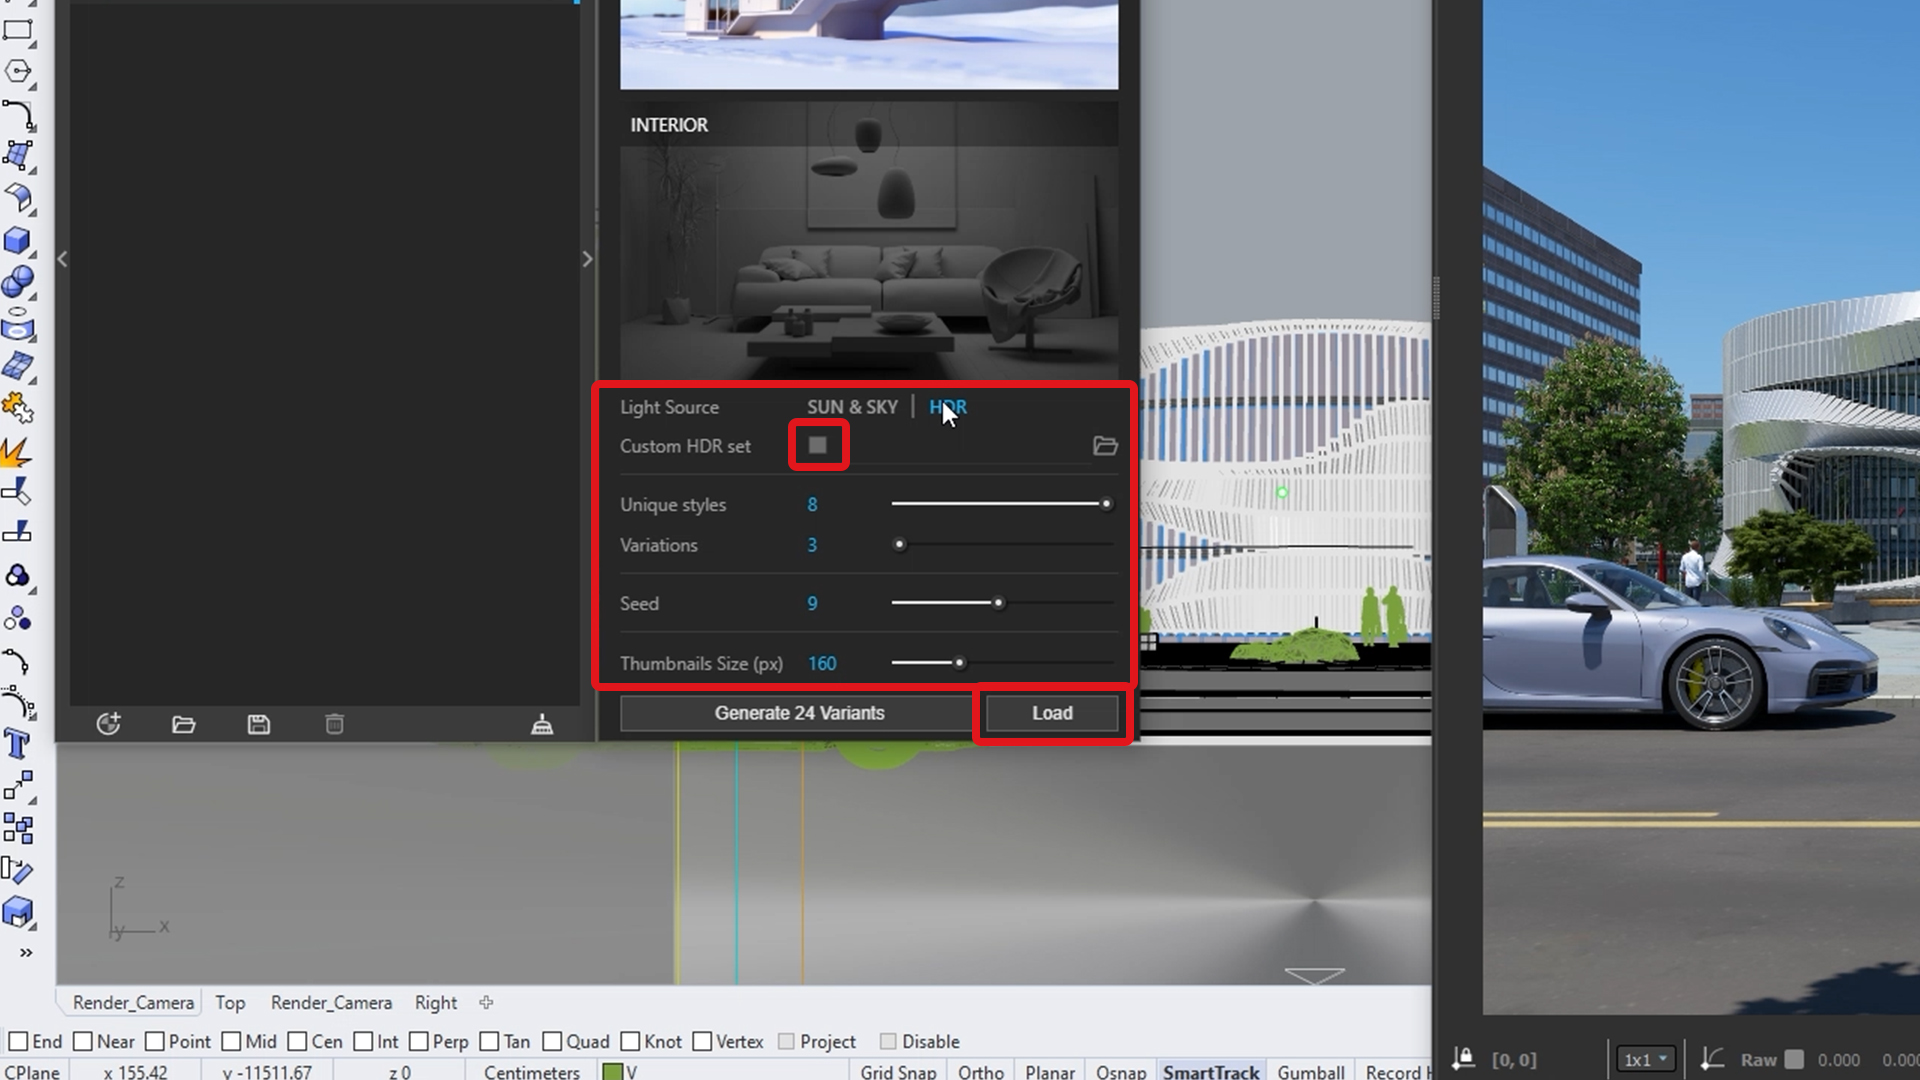
If you have a library of HDRIs you'd like to generate light scenarios with, click on "Custom HDR set." Click on the folder icon, and select your folder with the HDRIs. You can now adjust the number of variations and click "generate." Finally, play around with the lighting scenarios by choosing different styles and applying them to your scene until you get the one you're most happy with.
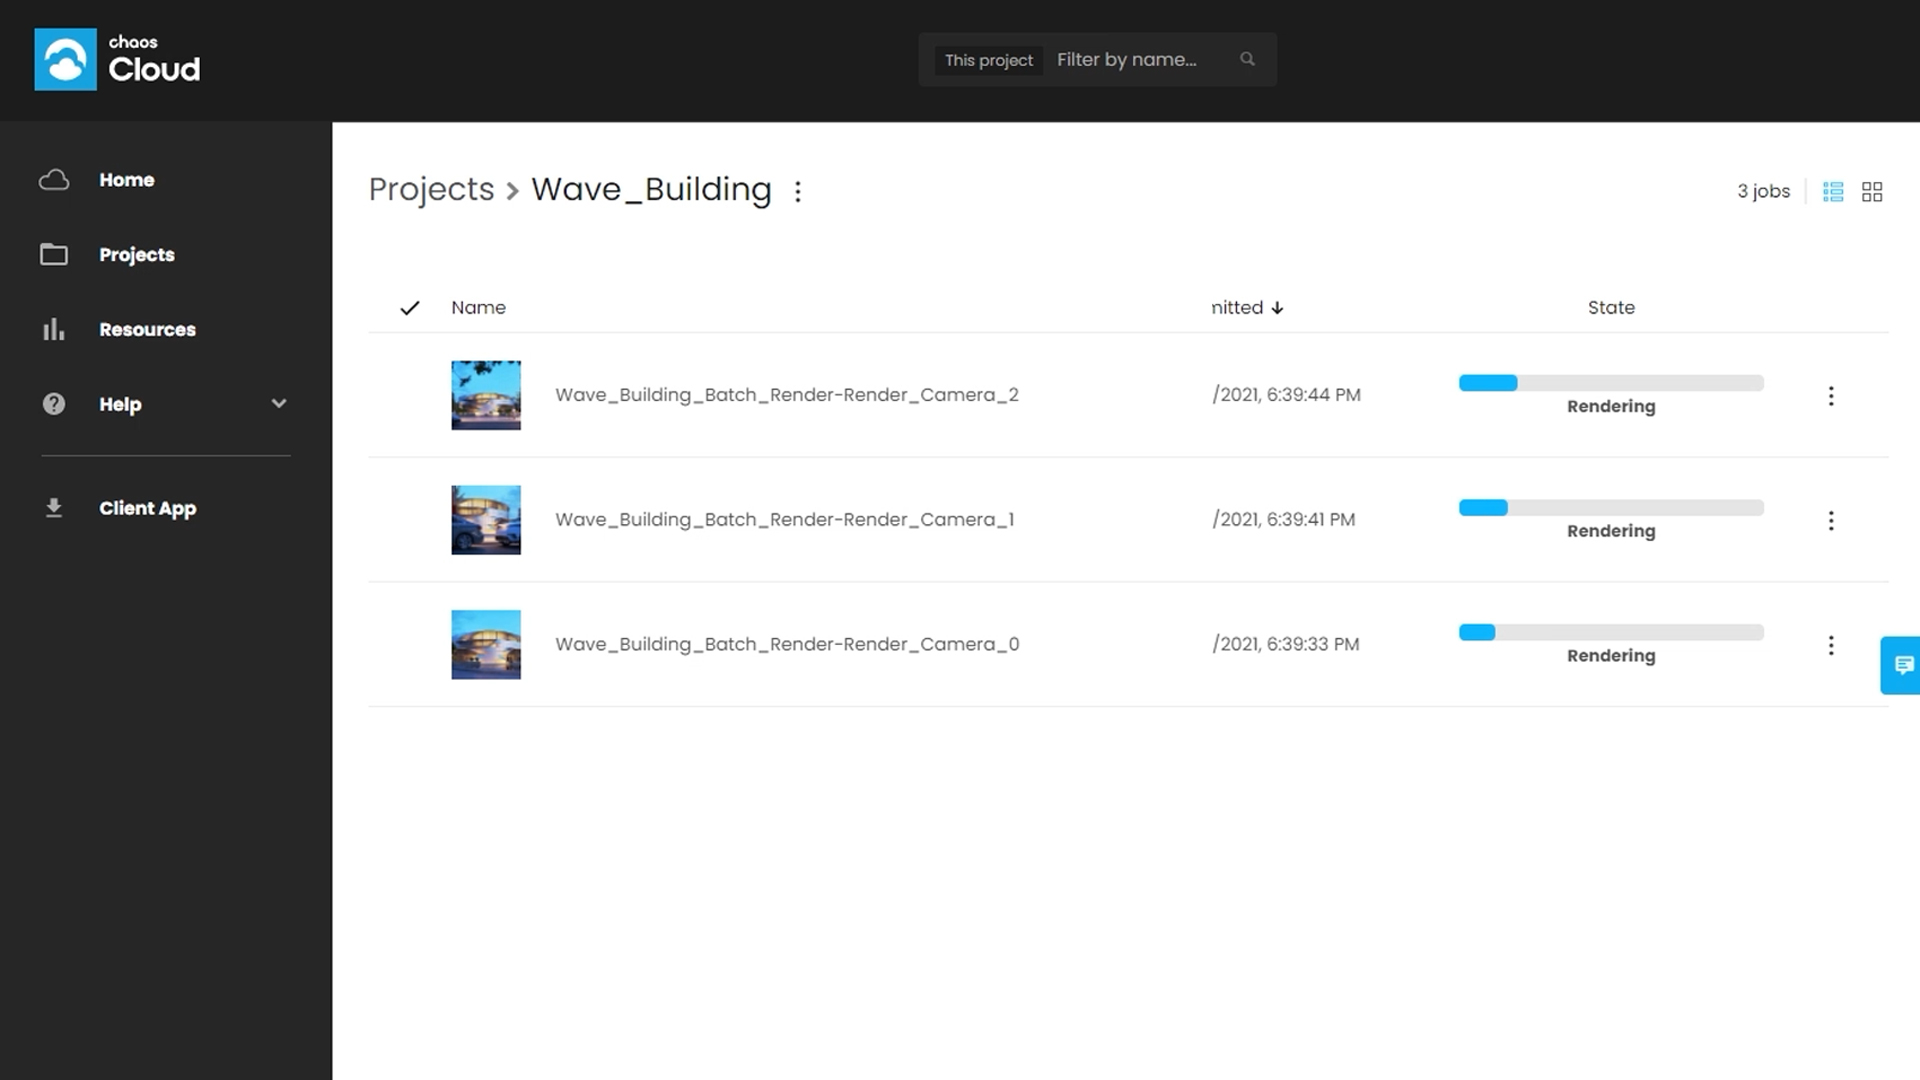
Render multiple views on Chaos Cloud
When you've got several views to render, Chaos Cloud comes in to render them simultaneously in a few simple steps. First, make sure you are not in "Interactive mode" and adjust the other settings to your project's needs. Next, open the "Batch rendering" menu and load the project or projects you want to render. Select the views you would like to be rendered on the cloud and click on the cloud button. You will be prompted to save the project, and Chaos Cloud will open in your web browser.
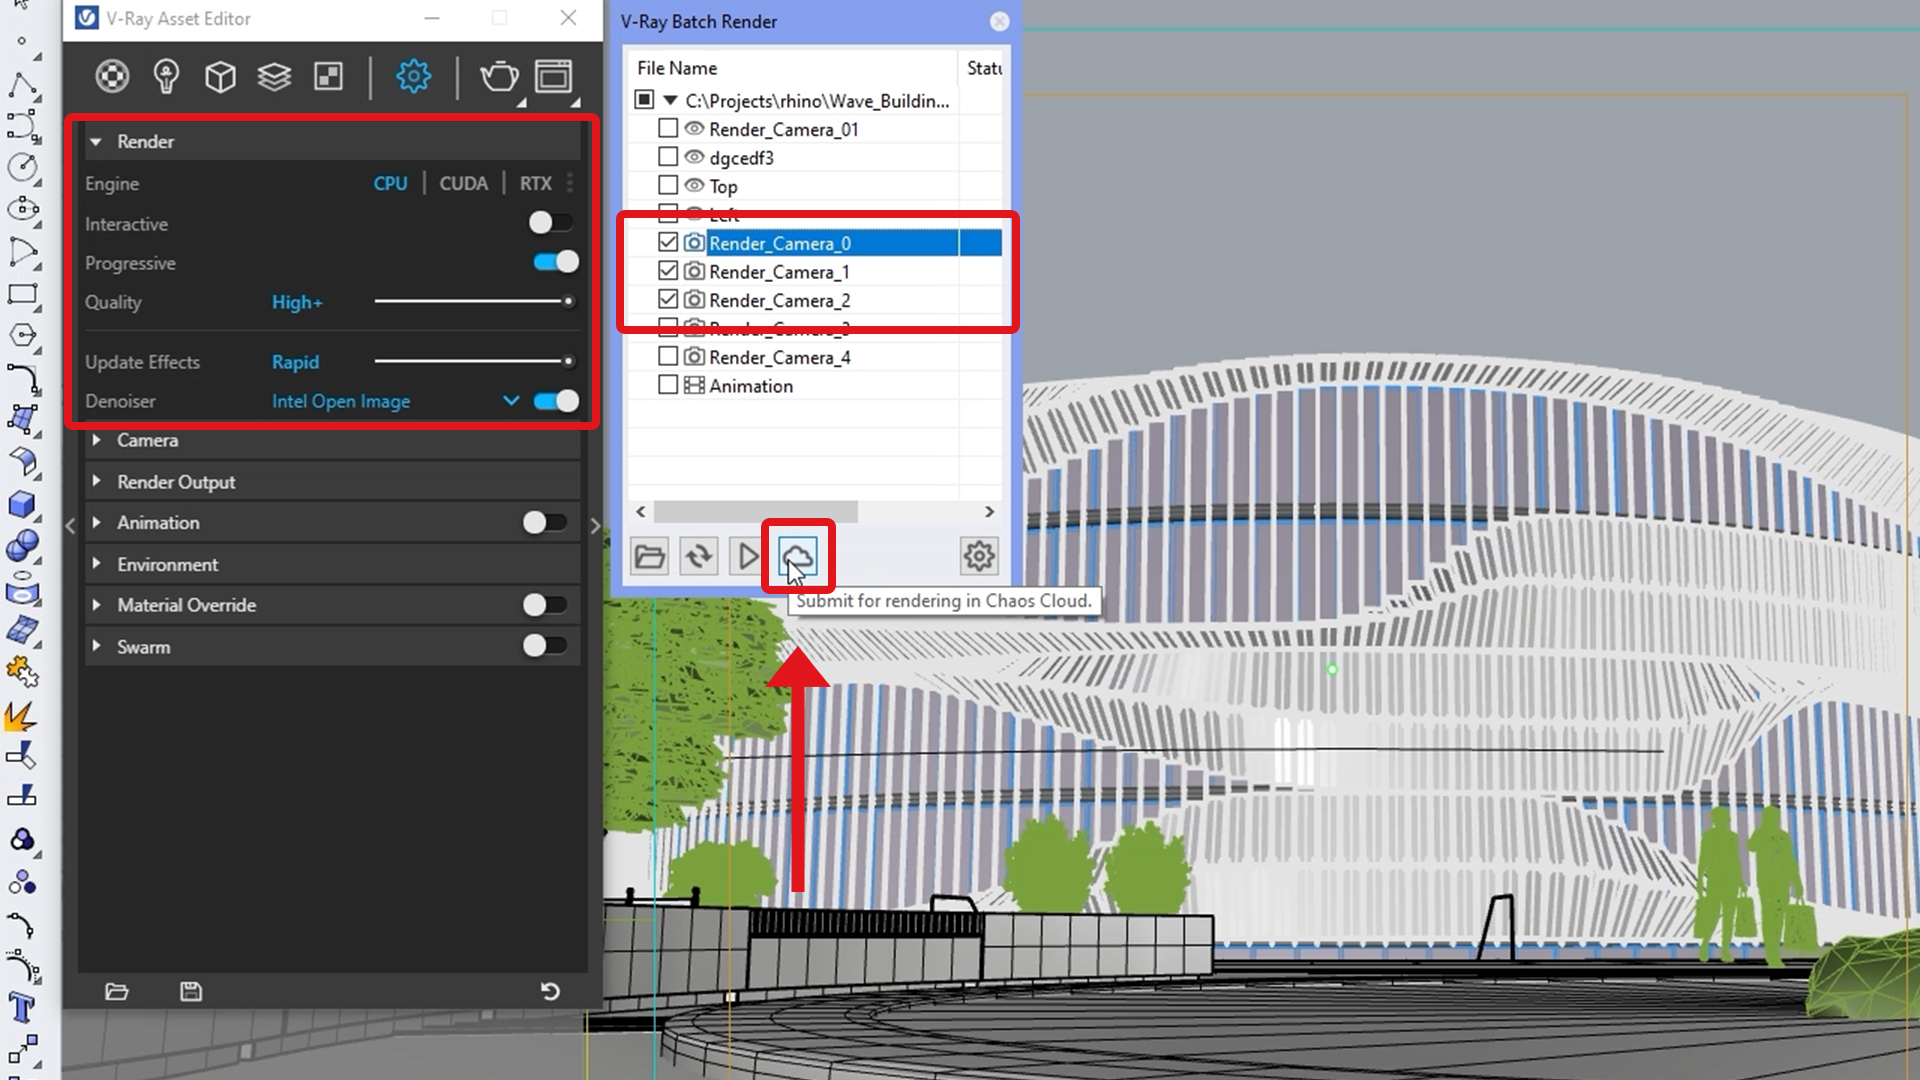
If you're using progressive rendering, you can now make more adjustments and set a credit limit for each job. Click "Submit" and Chaos Cloud will do the rest. You can keep an eye on the render's progress from your computer or phone if you're on the go. Once the renders reach the credit limit, each one will be paused. This allows you to increase efficiency by rendering several images at once while you work.
Live Link in Grasshopper
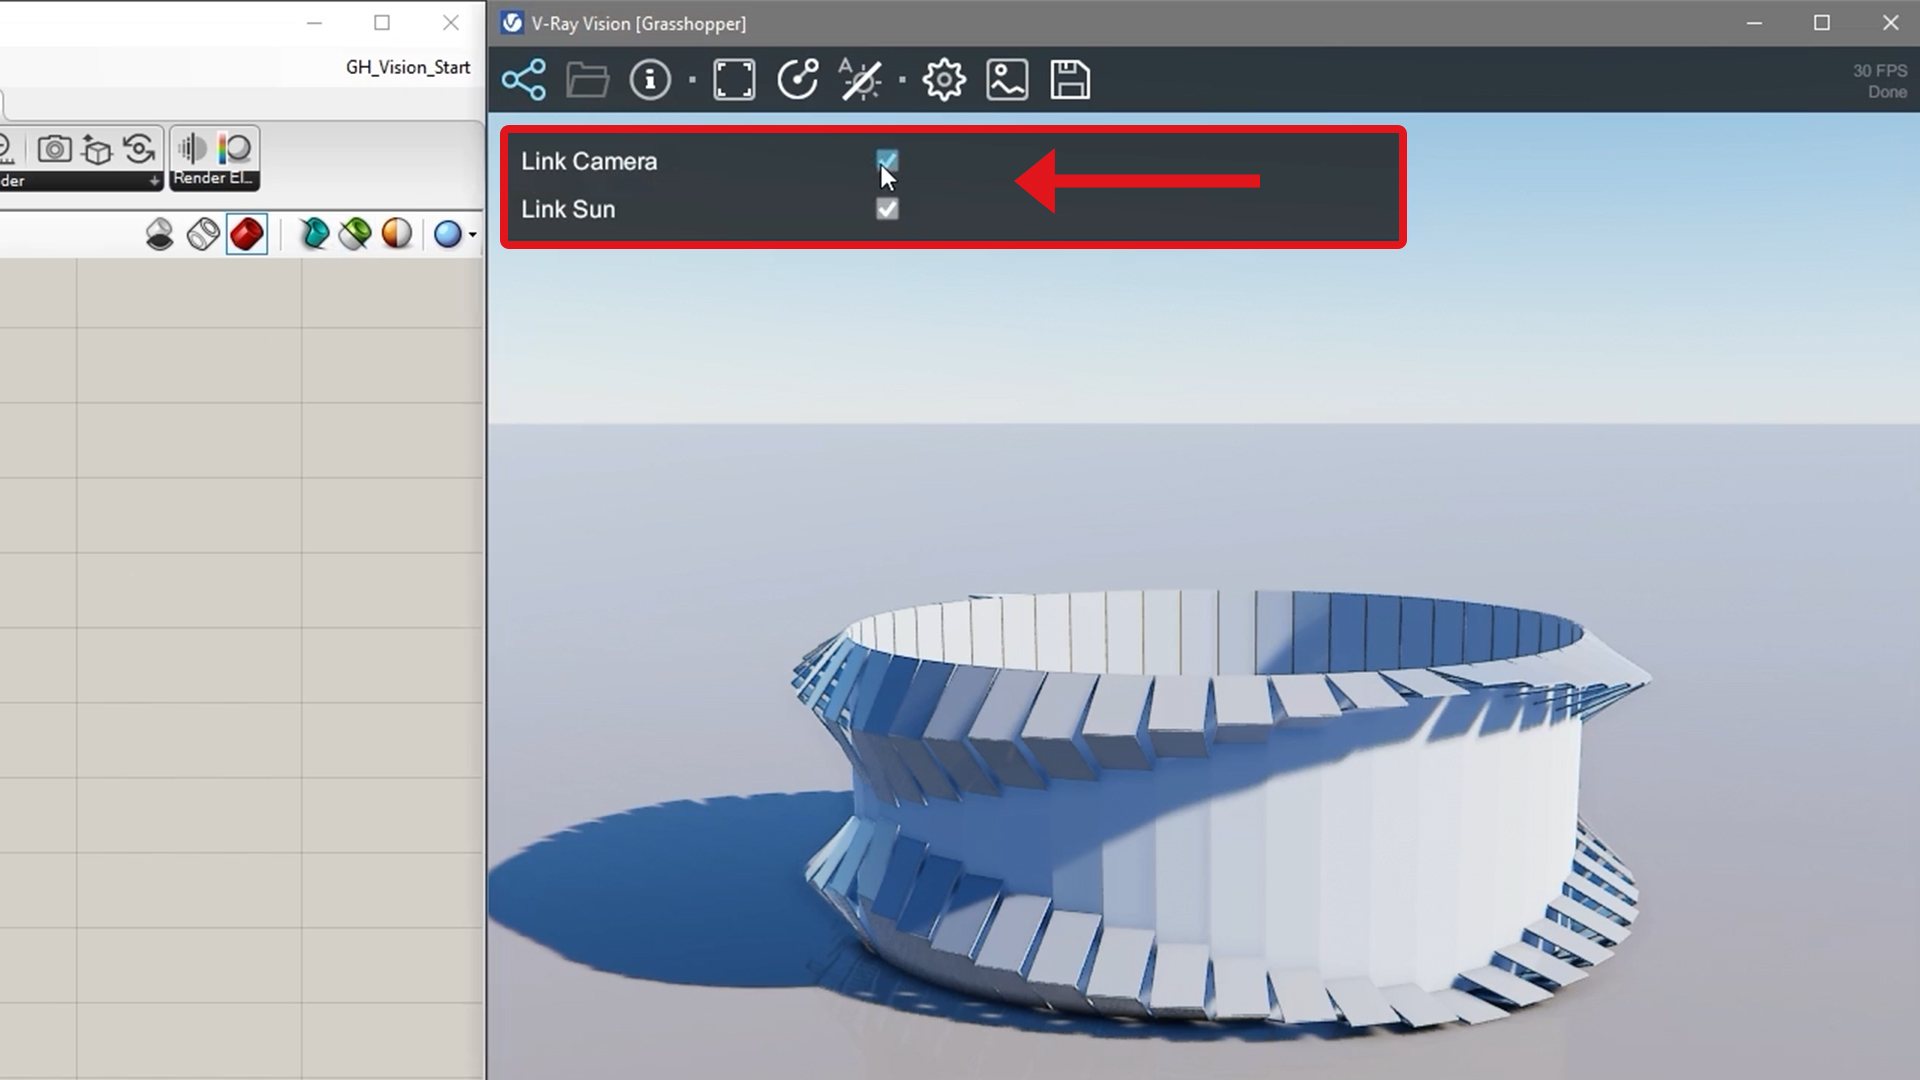
V-Ray Vision is supported in Grasshopper as well as Rhino. To take advantage of the real-time capabilities of V-Ray Vision, we need to use the same nodes that we use to initiate any type of rendering. First, create the Live Link node from the V-Ray tab and connect it to the Renderer one. Next, start it from the context menu.
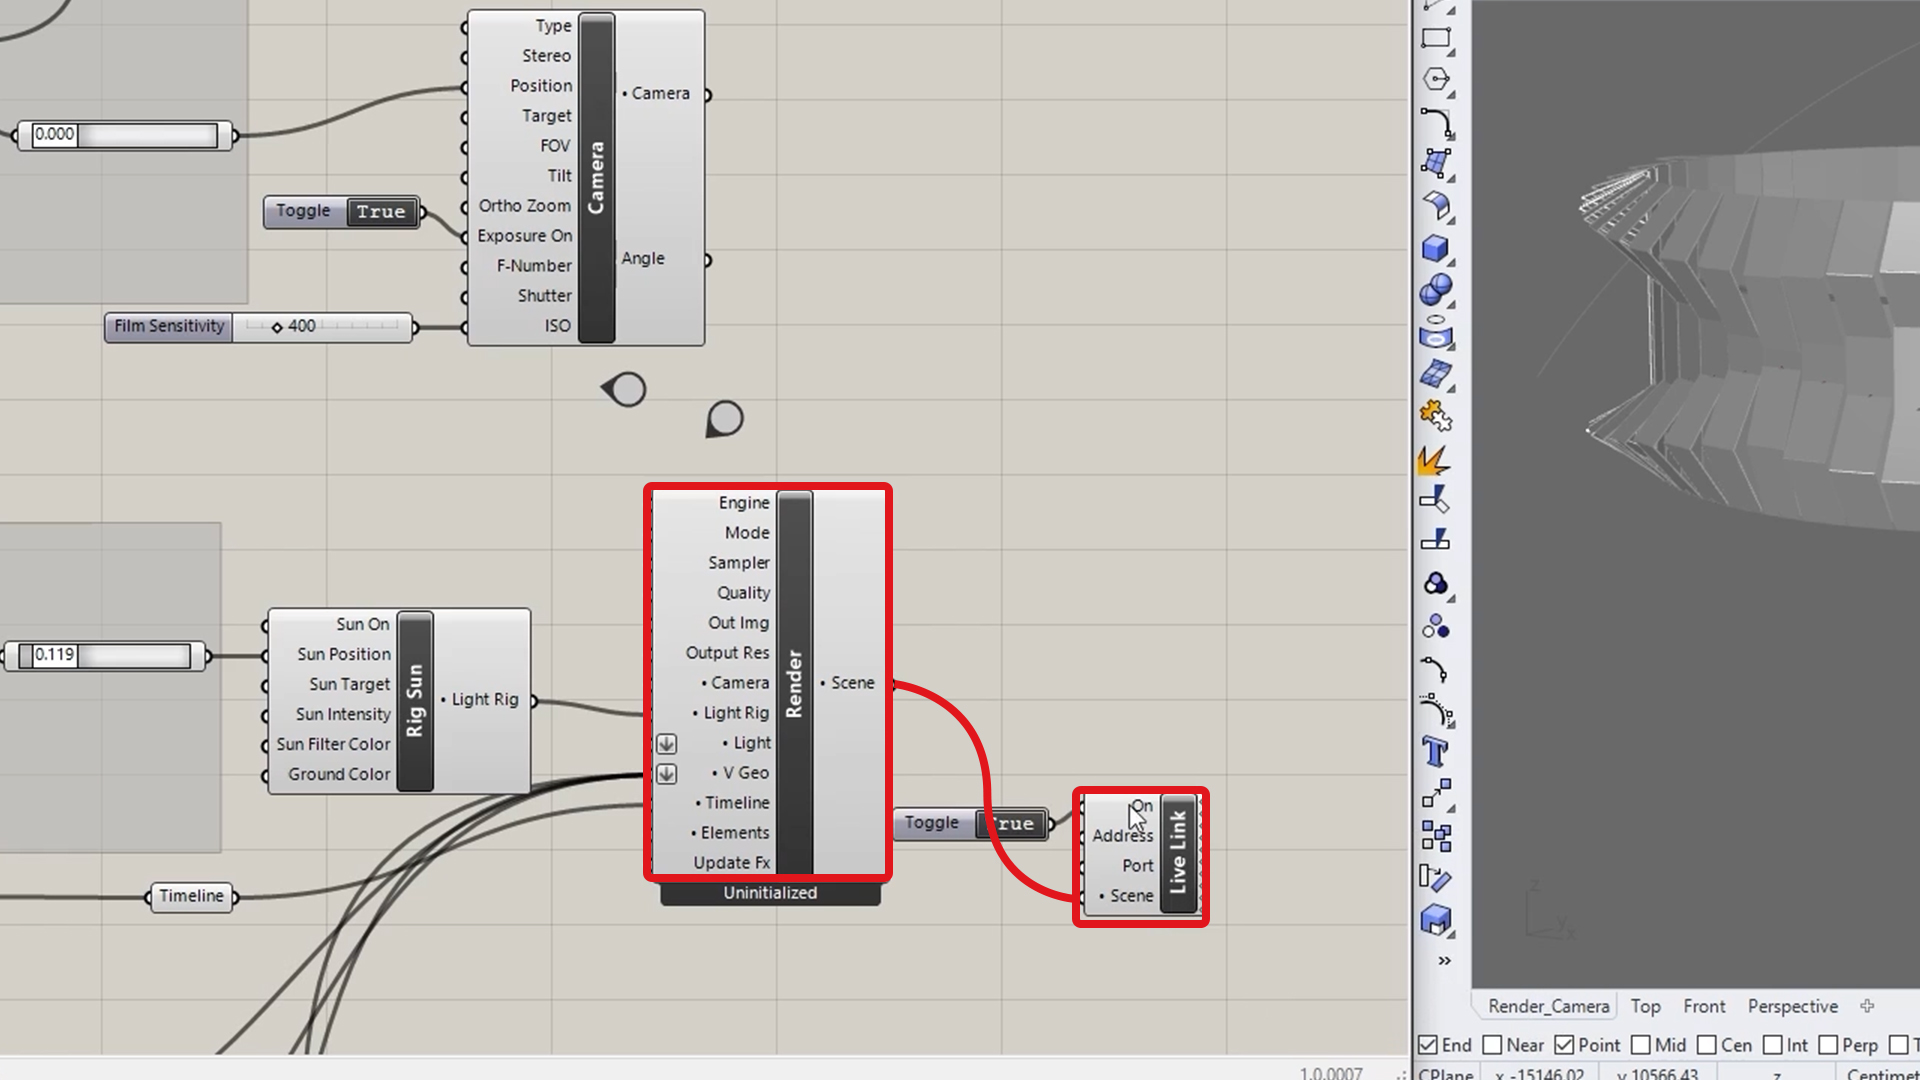
Now we have a live link to our Grasshopper definition. You can easily navigate from the Vision window or use and link the Camera node for further adjustments and possibilities such as Exposure Value. You can even add a Timeline node to create a predefined Camera Path. To control live link updates in V-Ray Vision we can use two options from the Live link button - sync Camera or Sun separately. If we want to stop the Live link, just turn off or disable the node.
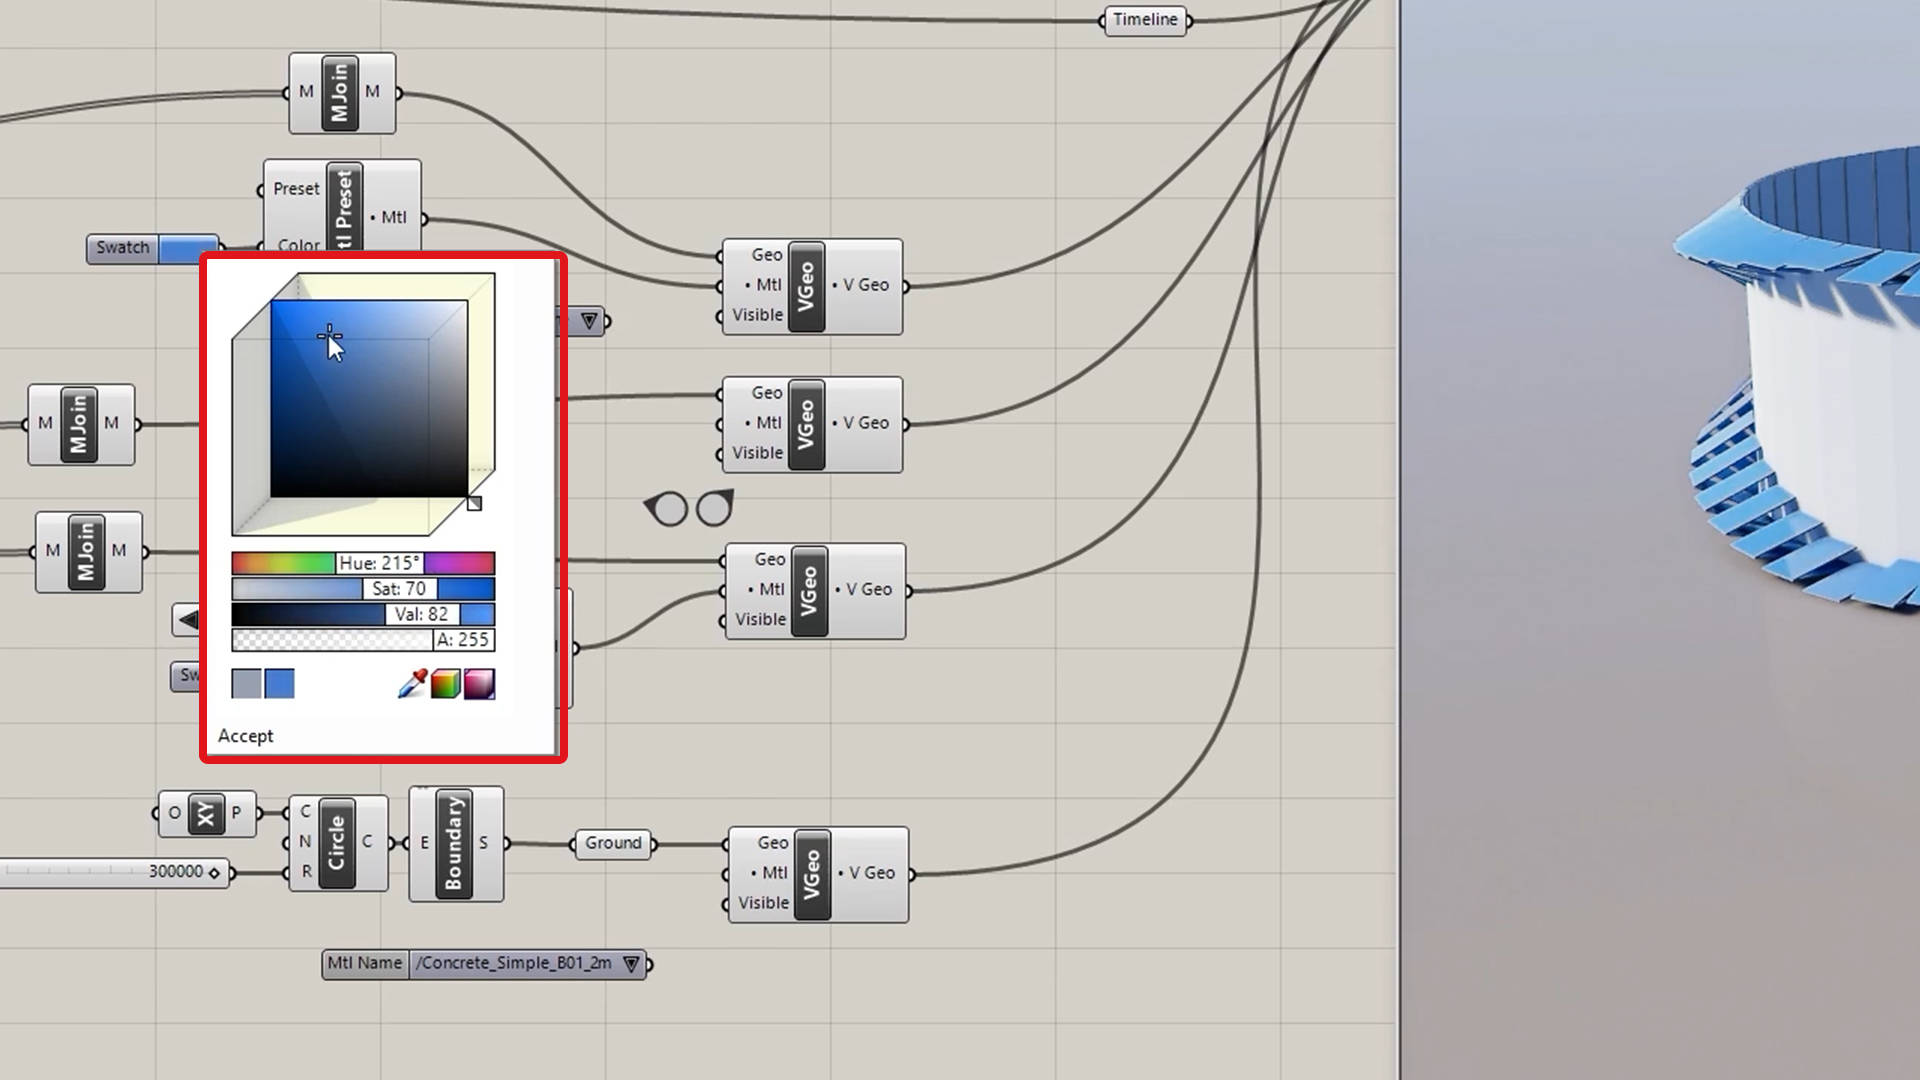
Materials and Geometry in Grasshopper
V-Ray for Grasshopper allows you to manage every material node from the V-Ray tab. You can easily change colors or use any V-Ray material from your Rhino project. If you want to use the preset node, you can select the appropriate preset for the geometry. A useful tip to avoid texture repetition in a material is to use a “stochastic tiling map.”
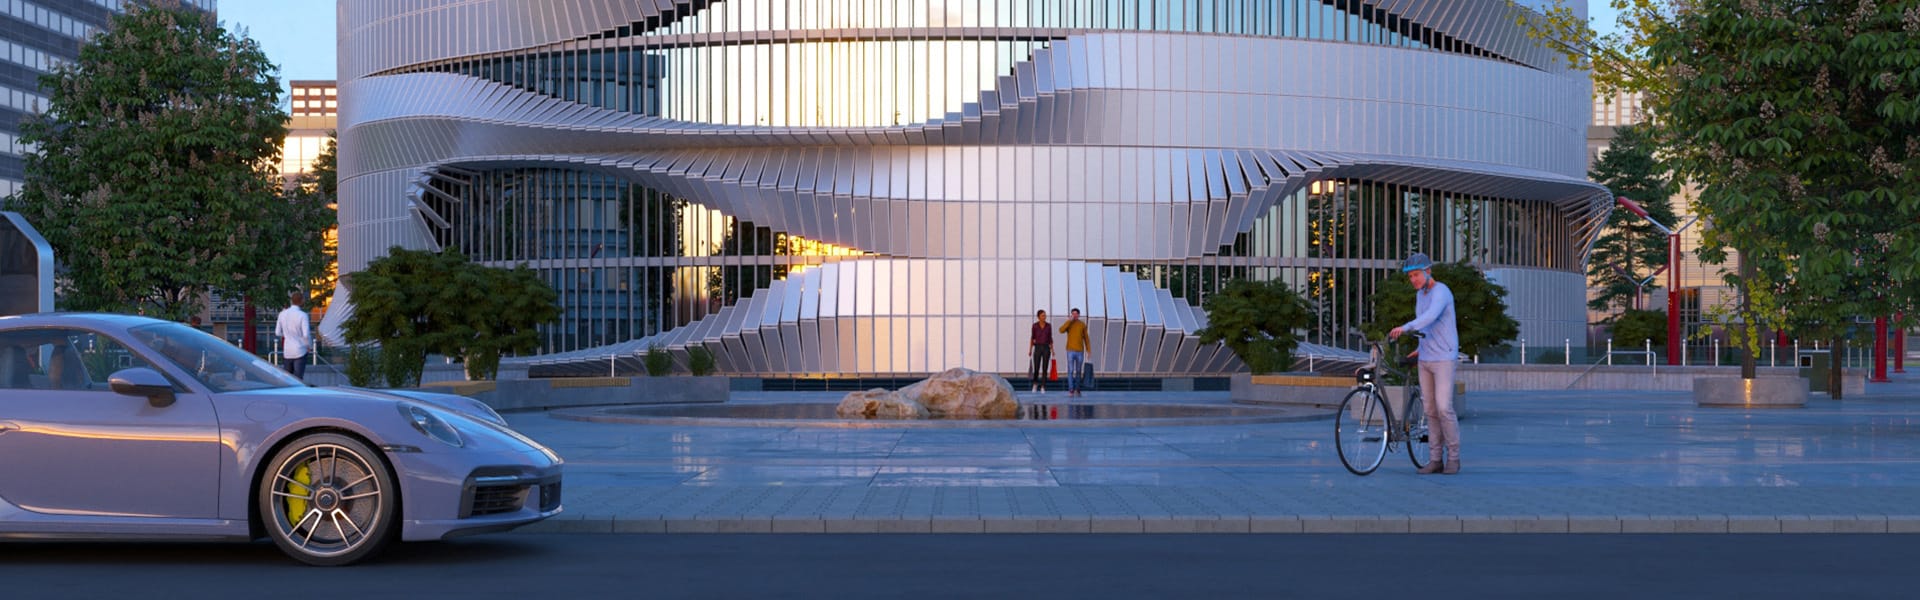
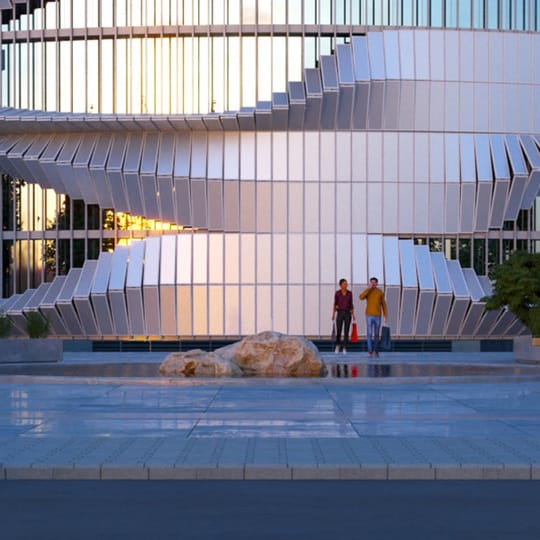
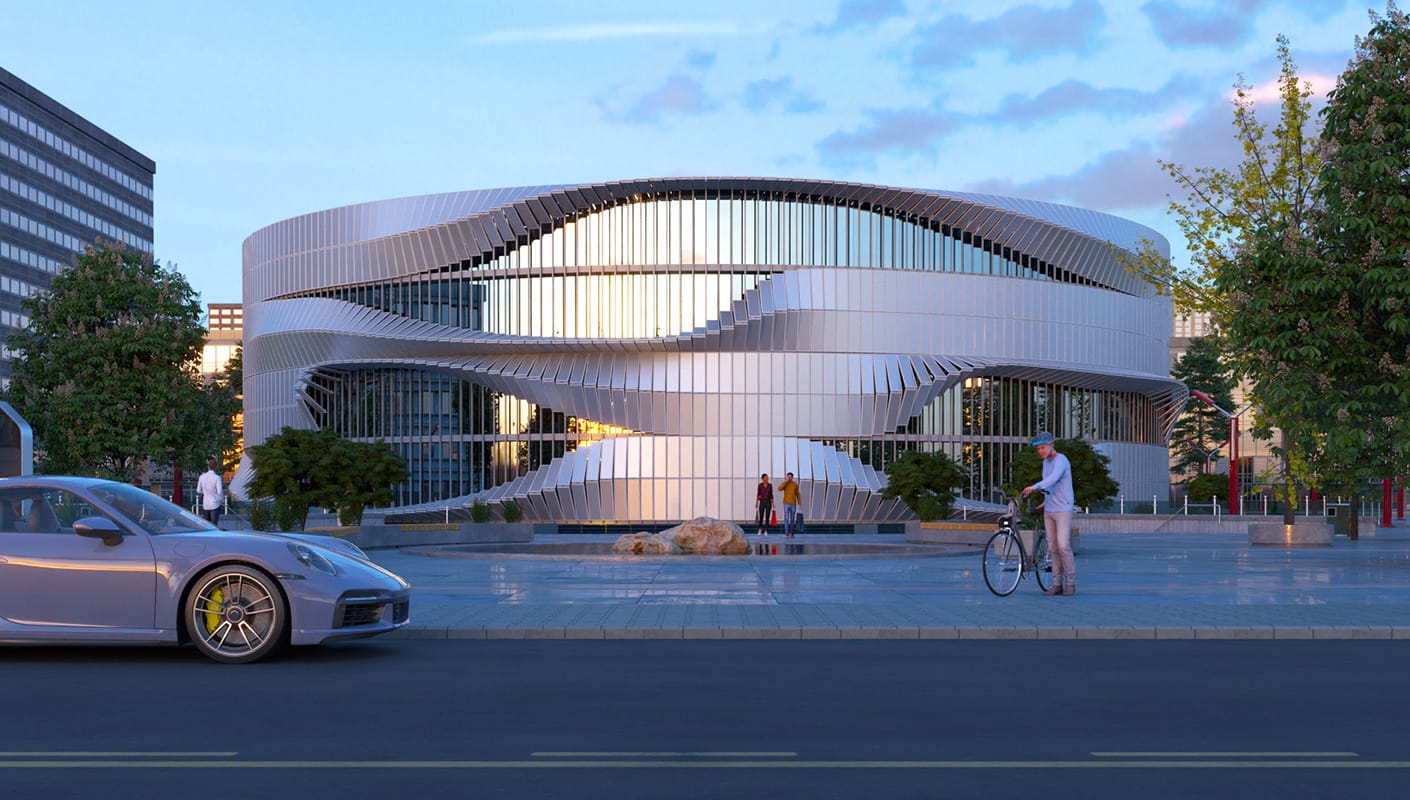
The Graph Mapper is used to determine the falloff and transition between the open and close panels state. You can alter the curves to tweak it to your preference, as well as change the panel count and height.

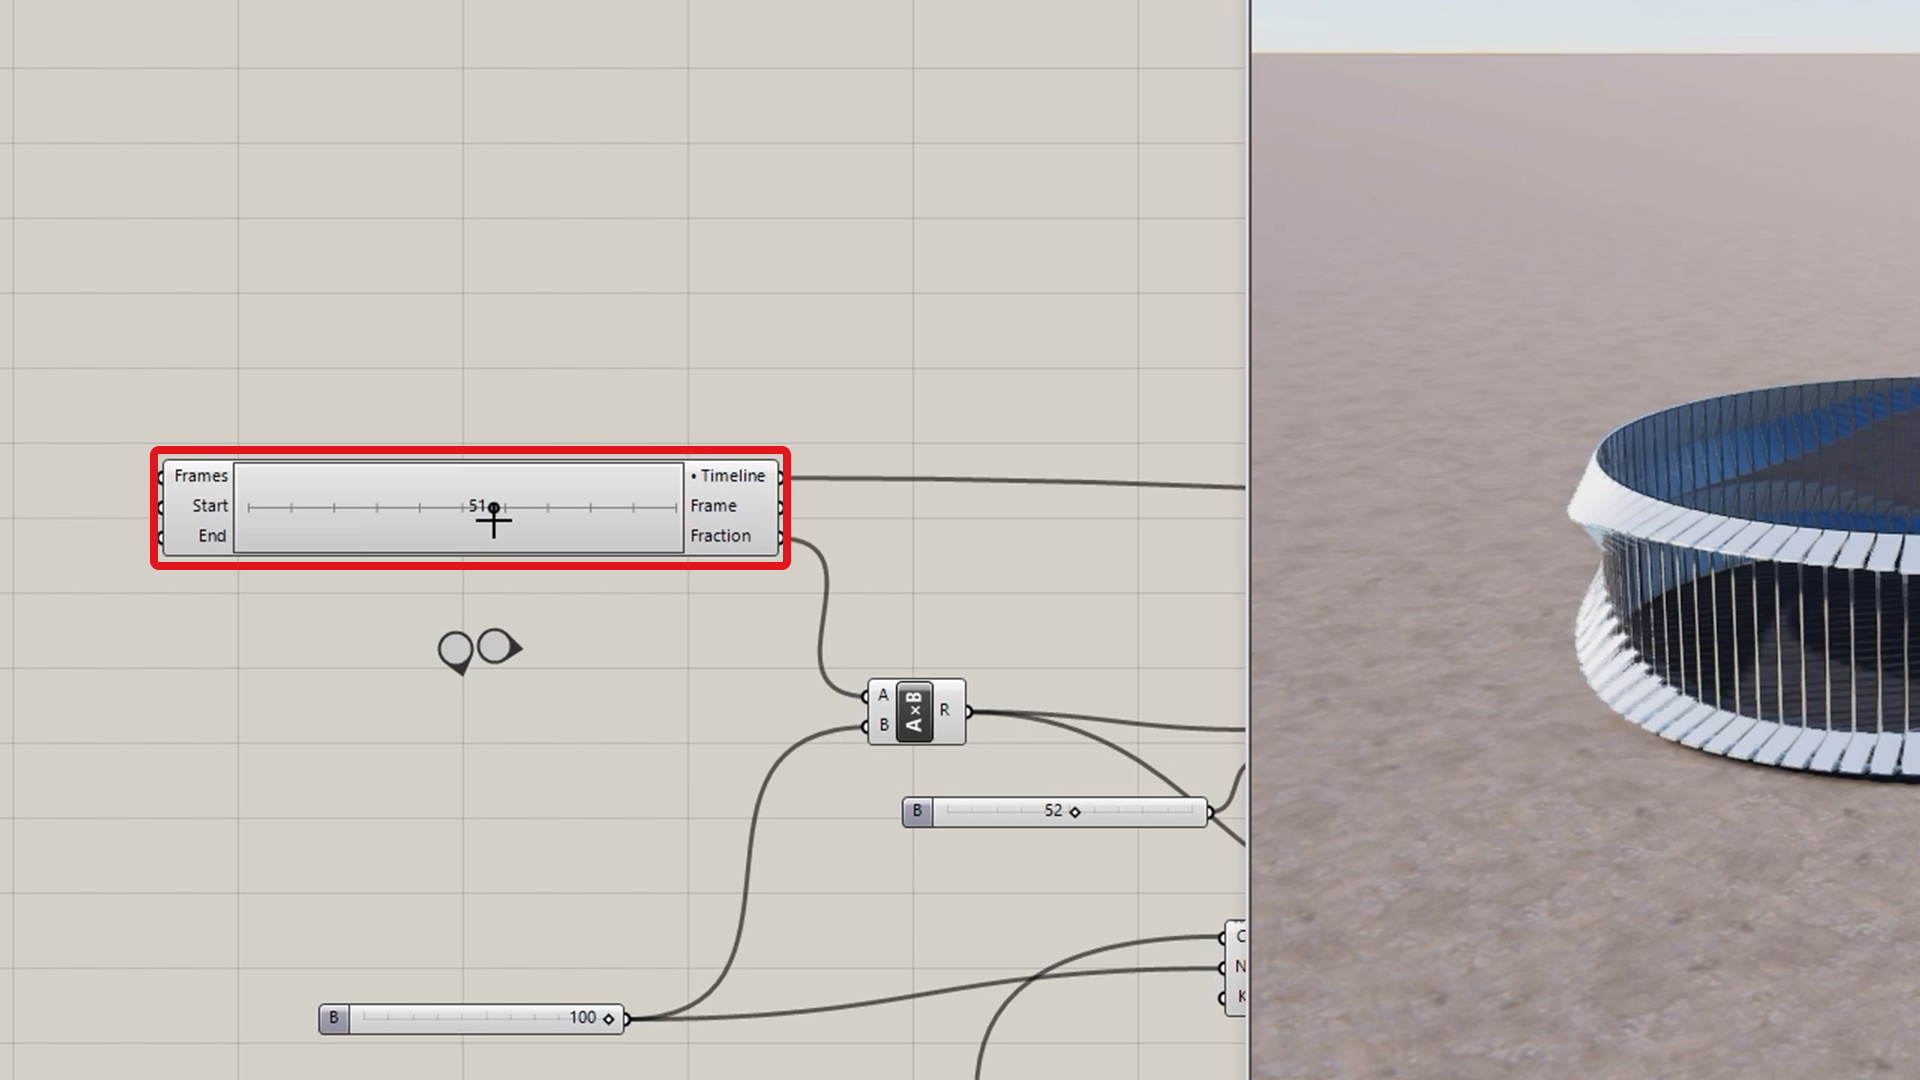
V-Ray Timeline in Grasshopper
The V-Ray Timeline is used for a simple animation setup. The position of the opening is rotated around a central axis. Camera and Sun animations are both fully supported. You can preview the animation however, as well as export it as a rendered sequence or a video using V-Ray Vision.
Export animations in Grasshopper
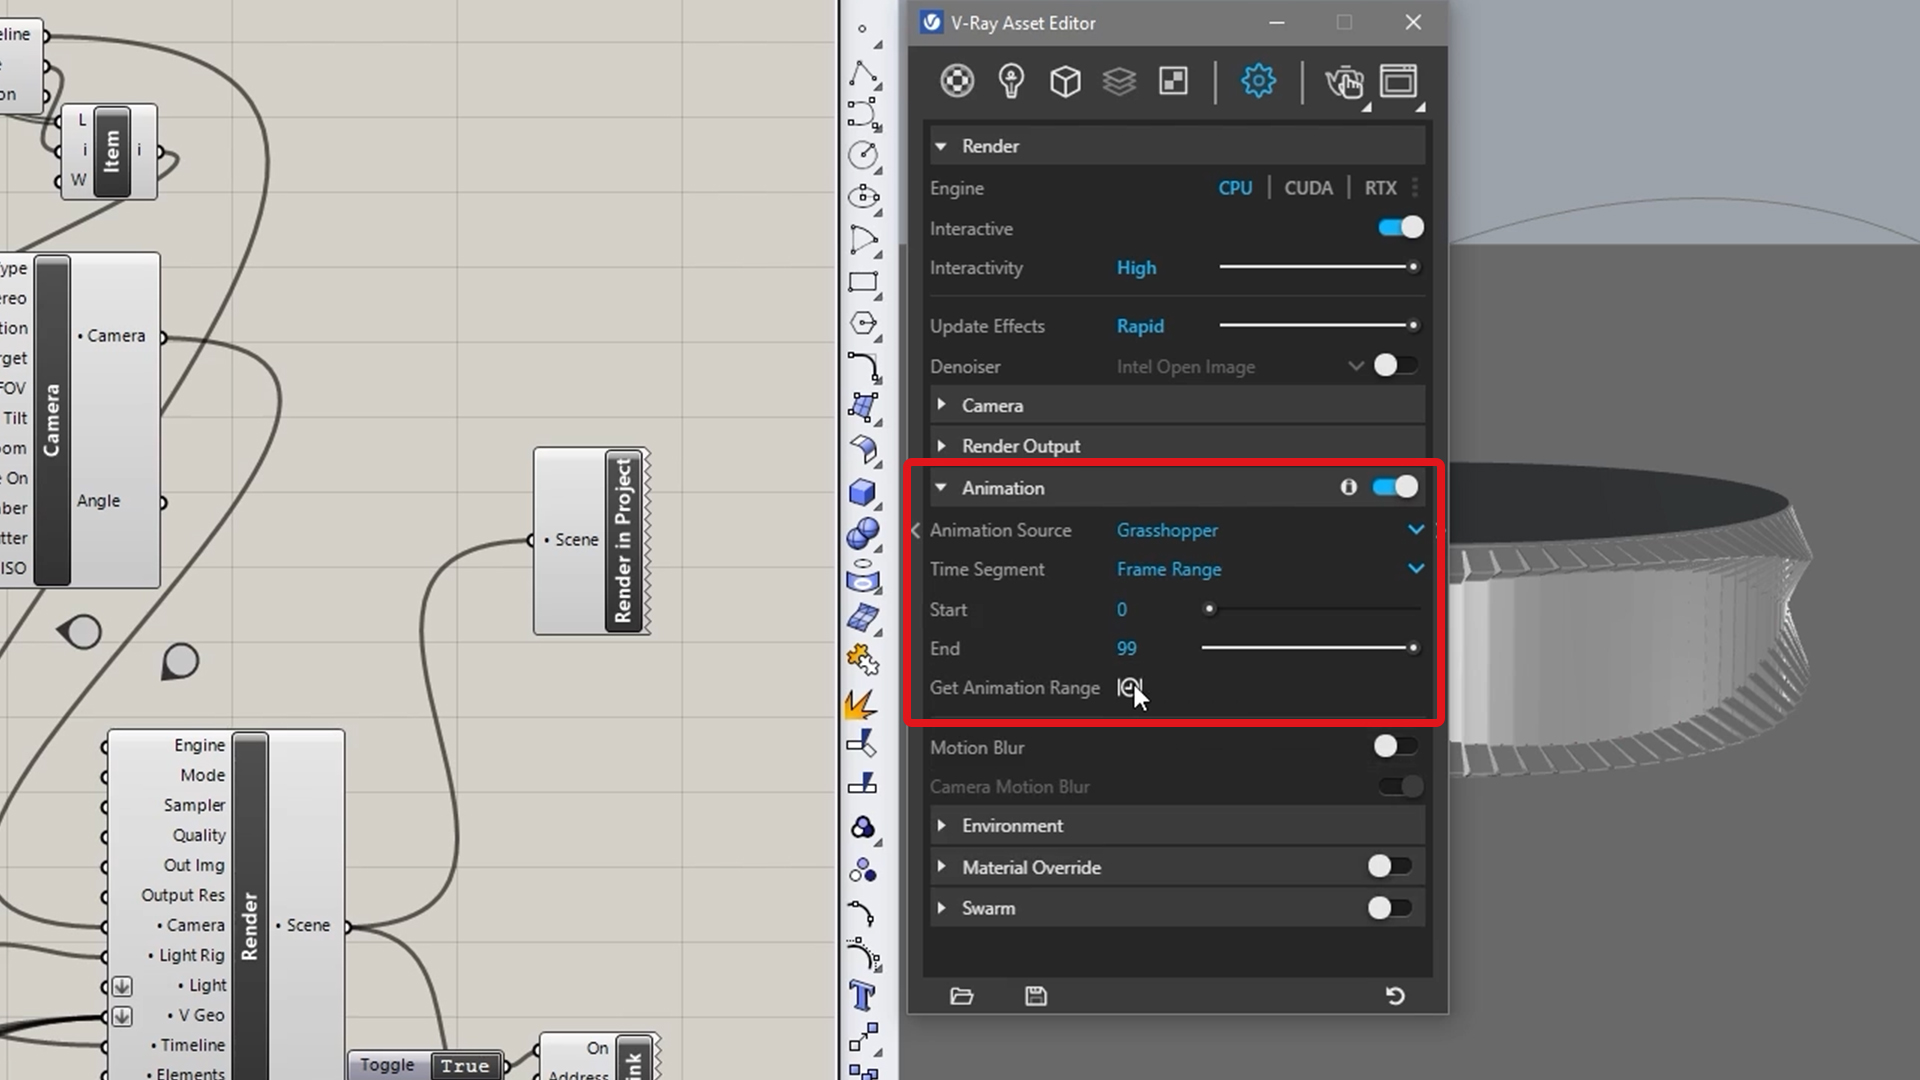
To use a Camera Path in an animation, all you need to do is to link the Timeline to the Renderer node so V-Ray will know which timeline is used for the animation. First, send the animation into your Rhino project in order to set the animation source. Create a Render in the Project node and link it to the Renderer one. Then, from the context menu, you have the option to export Camera or Sun animation. After that, you need to stop V-Ray Vision and open the V-Ray Asset Editor.
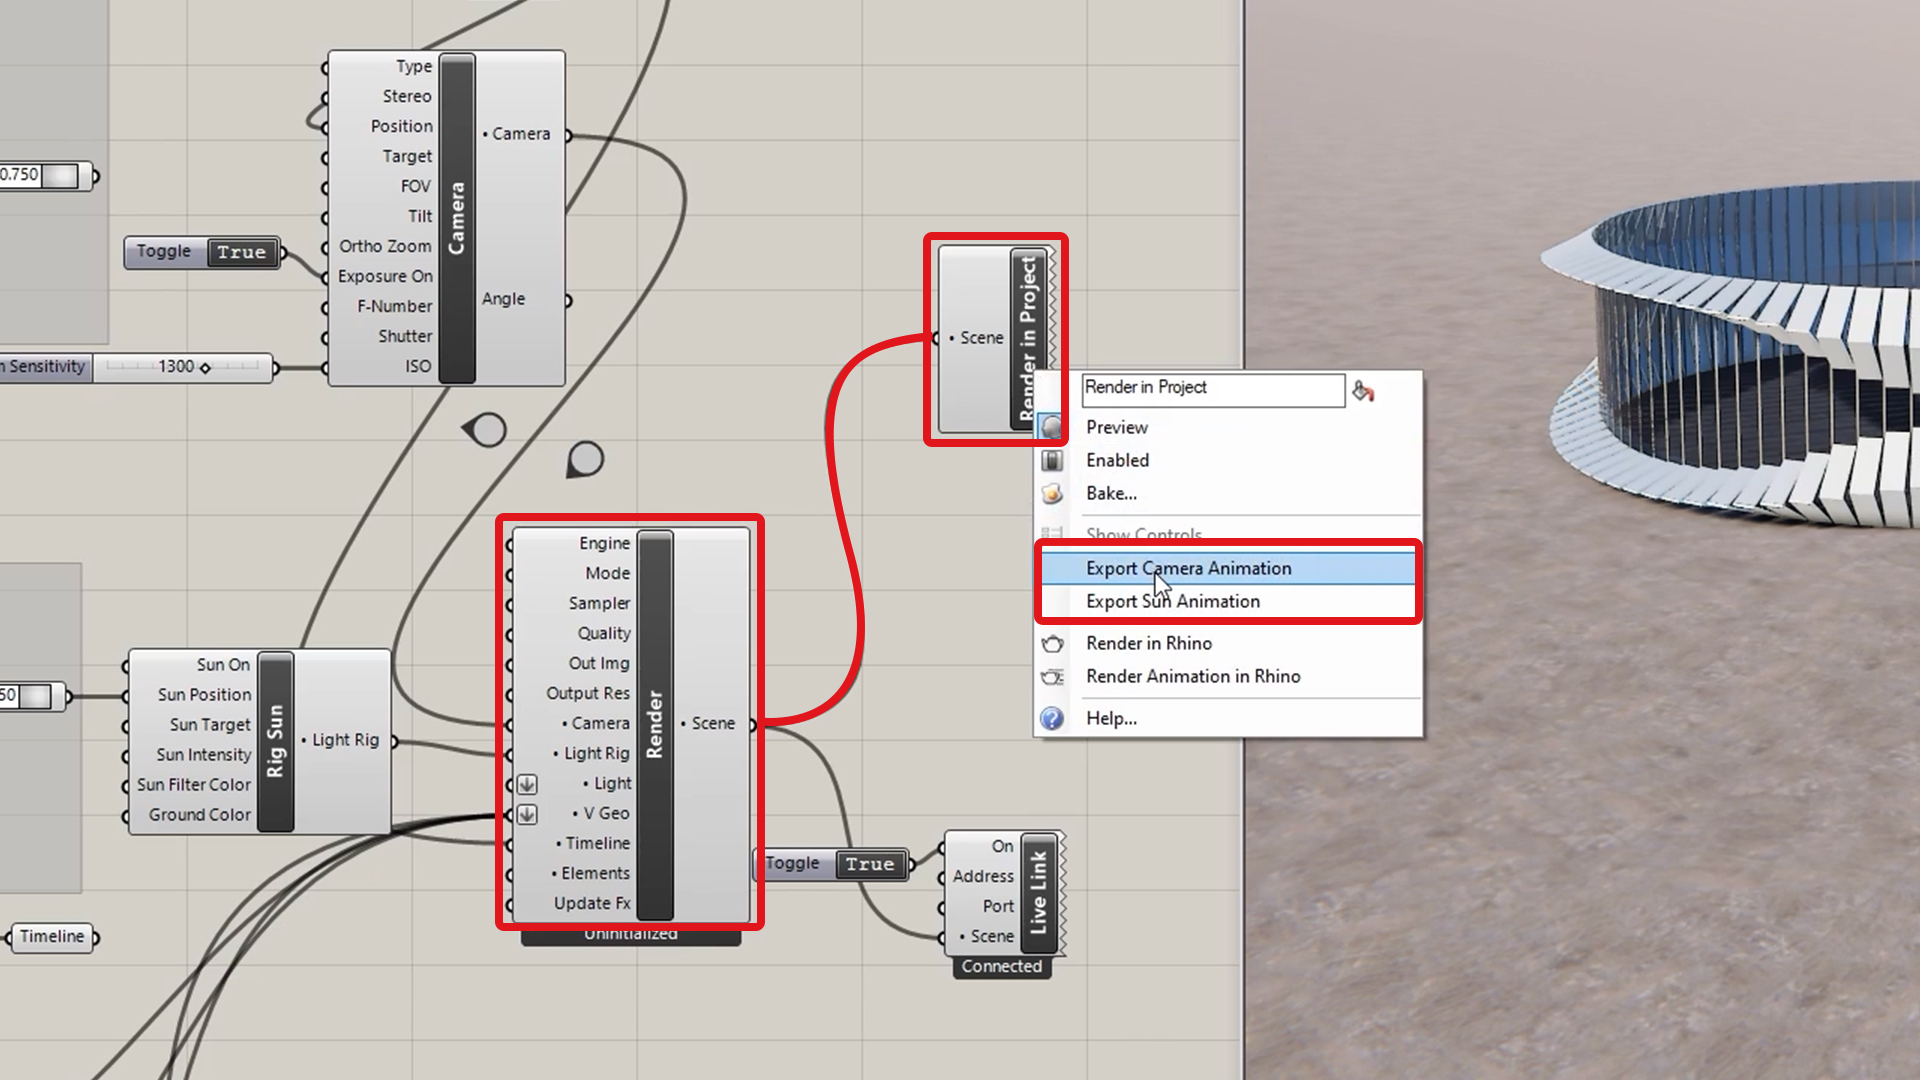
From the Settings tab, enable Animation functionality and change the source to Grasshopper. Finally, restart V-Ray Vision. Your animation is now ready to play or export.